Send Data to Altair IoT Studio
Data must be sent via HTTP or MQTT to Altair IoT Studio. For this project we are using MQTT connection.
MQTT Is the standard for IoT messaging. It allows for messaging between device to cloud and cloud to device. More information on MQTT can be found here.
Client connections are always handled by a MQTT broker, which is responsible for receiving and filtering the messages, determining who is subscribed to each message and sending them. To configure the MQTT broker connection, the Host, Username and Password are the required parameters.
Follow the steps below to connect your device via MQTT.
- If you haven't already, download the ESP8266 Training Guide folder.
- In your computer go to the folder created by Visual Studio Code for the project and substitute the default src folder for the one in the training guide link.
-
In Visual Studio Code, add the following:
-
credentials.h: Add your Network ID, Network
password, MQTT username and password.
Note: You can obtain the MQTT username and password in . First, click on Create Credentials in the MQTT section and then turn on Autogenerate for the username and password and click Save.
Figure 1. 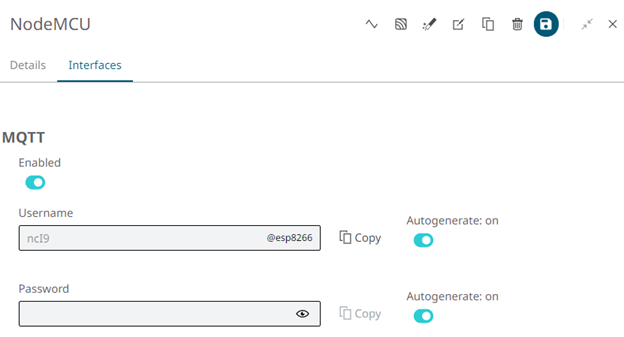
-
credentials.h: Add your Network ID, Network
password, MQTT username and password.
- Compile the code and upload it to your ESP8266 device.
-
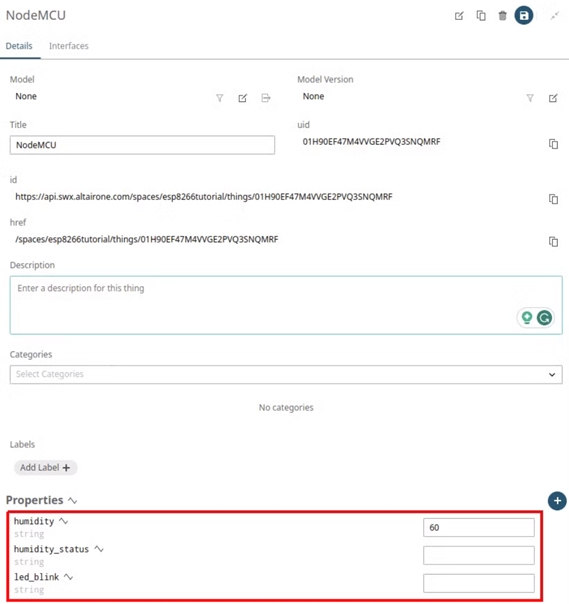
Check that the data was received in the device Properties:
Figure 2.