
Connect to an MQTT Broker using Twin Activate
Tutorial Level: Intermediate Publish and subscribe from a client to an IoT platform (external broker) using MQTT (Message Queuing Telemetry Transport) protocol.
Prerequesites for This Tutorial
The following software and accounts are required for this tutorial:
- Altair Twin Activate
- Free account on Altair IoT Studio platform: https://studio.swx.altairone.com/
Files for This Tutorial
MQTT Pub IoT Studio.scm, MQTT Sub IoT Studio.scm
Overview
One of Twin Activate's communication protocol options is MQTT, a well-known communication protocol used in IoT (Internet of Things). It is possible to both publish and subscribe to any MQTT broker, local or external, very quickly and lightly.
When publishing messages to a topic, Twin Activate sends data from the software to the broker. When subscribed to a topic, Twin Activate receives data from the broker to the software.
In this tutorial, the external MQTT broker is on Altair IoT Studio. That is the end-to-end Altair IoT platform that covers all necessary technology for Smart and connected products development. In IoT Studio, it is possible to create Things, which represent the entities in your world. They store information about real-world objects like assets, rooms, or buildings, as well as information about concepts like Tasks or processes. These Things receive data if Twin Activate is publishing, and sends data if Twin Activate is subscribed to the MQTT topic. With the data on the IoT platform, you can create dashboards using that data: https://help.altair.com/altair-iot-studio/topics/mqtt_dashboard.htm?hl=mqtt.
General Setup on IoT Studio-IoT Platform
-
In IoT Studio, .
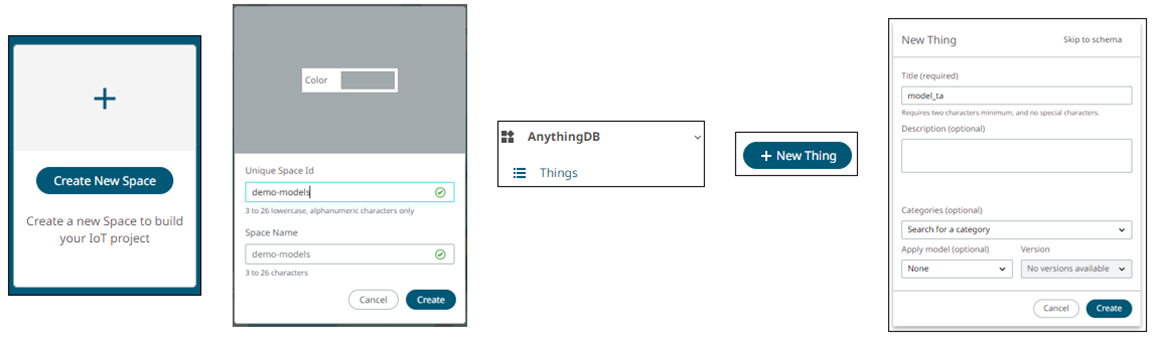
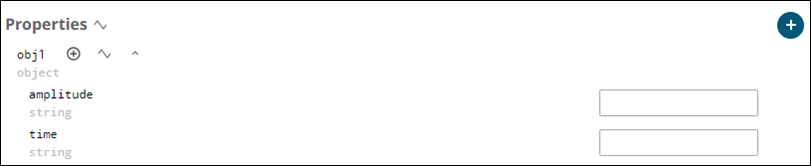
After the Thing is created, a property is created to receive data from Twin Activate and be stored on IoT Studio.
-
Select .


-
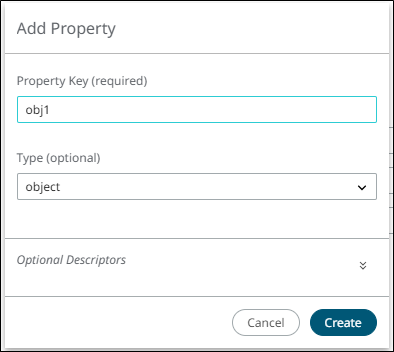
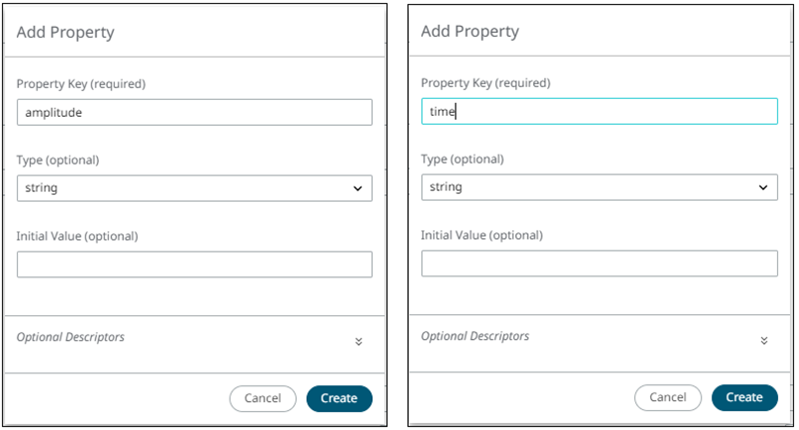
Create Properties to be attributed to this object:
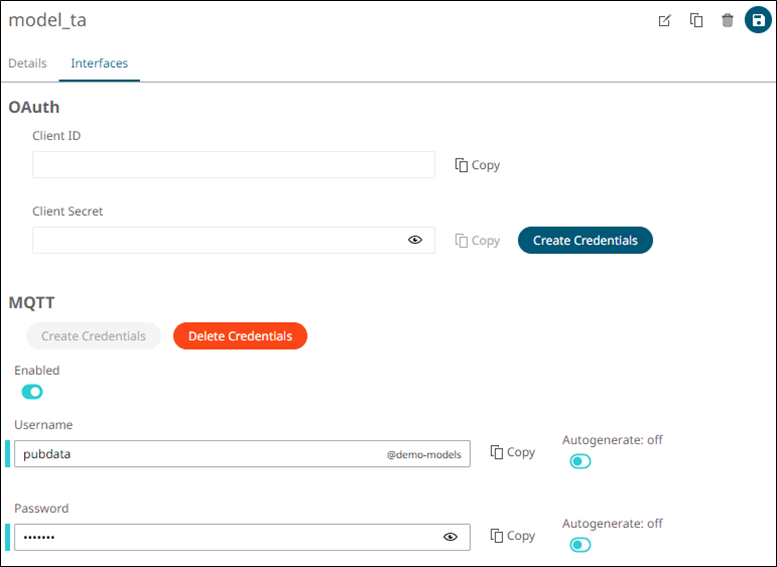
-
To set the MQTT credentials on IoT Studio, select .
Publishing to an MQTT Topic on IoT Studio
- In Twin Activate environment, select .
-
In the block Connection tab set the Hostname,
Credentials, and the Topic end
point with the Space name, Thing ID, and, in this case, properties (not
mandatory), following the structure:
'spaces/<space-name>/things/<thing-id>/properties'Note: You can find the main topic structure in the URL
href.
-
Ensure the block Parameters tab has the Number of
Inputs, in this case two (amplitude and time), and the
Message. It is required to use JavaScript Object
Notation (JSON) format to send data to IoT Studio:
{
	"obj1":{
		"amplitude": "%%1",
		"time": "%%2"
	}
}
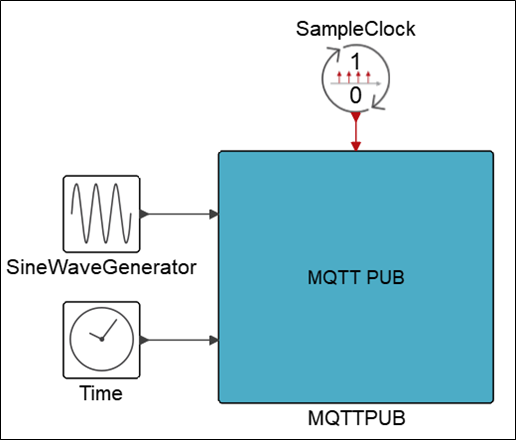
-
After doing the setup for the MQTT PUB block, connect some of the Signal
Generators blocks to the inputs and a SampleClock to activate the block:
-
Select . The simulation sends data in real time to IoT Studio.

-
Click Run Simulation.
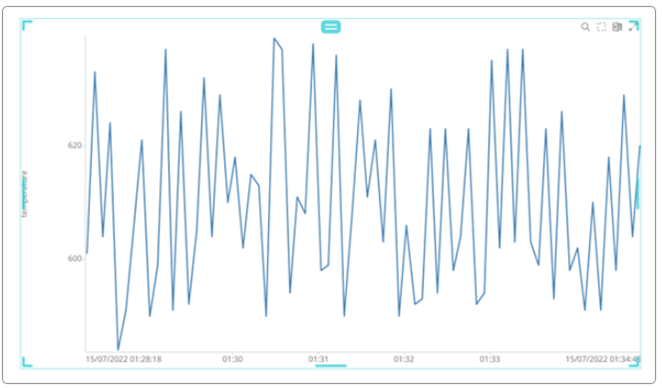
It is possible to see that the data sent from Twin Activate is being received on IoT Studio using the MQTT protocol.

Subscribing to an MQTT Topic on IoT Studio
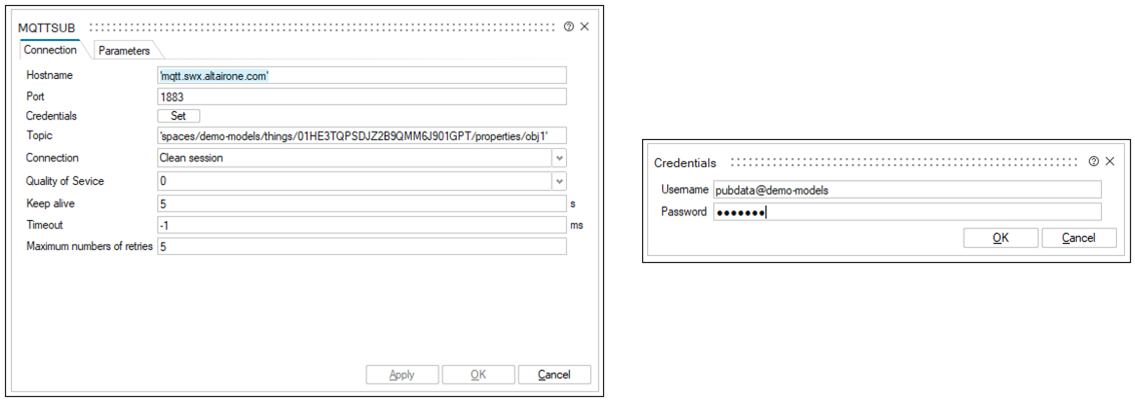
- In Twin Activate environment, select .
-
In the block Connection tab set the Hostname,
Credentials, and the Topic end
point with the Space name, Thing ID, and, in this case, properties (not
mandatory), following the structure:
'spaces/<space-name>/things/<thing-id>/properties/<property-name>'
-
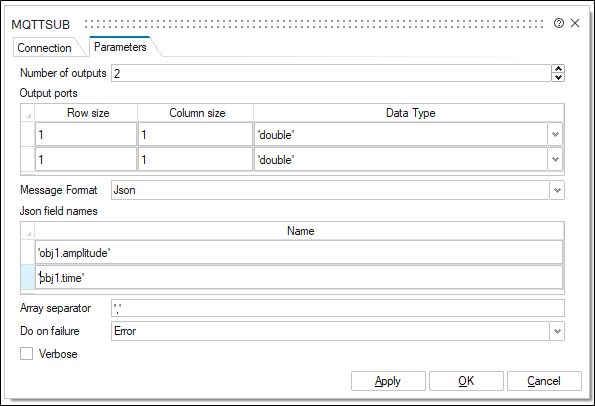
Ensure the block Parameters tab has the Number of
Outputs, in this case two (amplitude and time), and the
Message. As it is being received from IoT Studio, select JSON format, and as the message will be
received from one object, the format below must be respected to receive each of
the attributes.
-
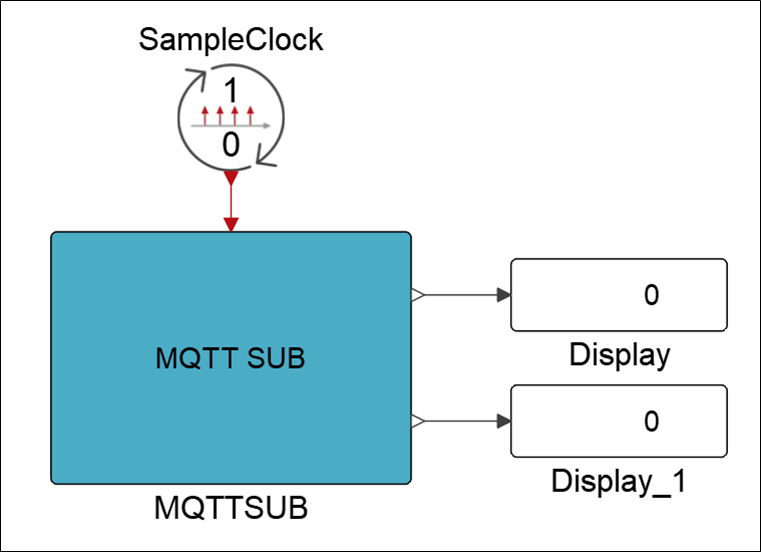
After doing the setup for the MQTT SUB block, connect some of the Signal
Viewers blocks to the outputs and a SampleClock to activate the block:
-
Select . The simulation sends data in real time to IoT Studio.

-
Click Run Simulation.
After being subscribed to an MQTT topic, any message sent to the topic is received in Twin Activate. Say that some device is sending message to IoT Studio on the created object, on its attributes. Considering that Twin Activate is connected to IoT Studio, those messages appear in the software:
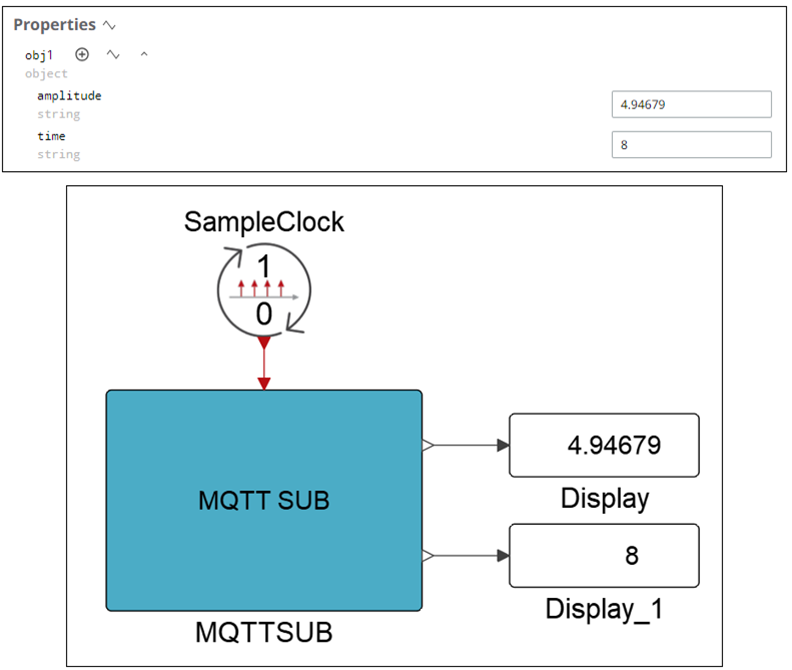
It is possible to see that the data sent from IoT Studio is being received on Twin Activate using the MQTT protocol.