Create a GUI with UI Designer
Create a graphical user interface with predefined objects from the UI Designer toolkit.
-
From the ribbon, select .
 The UI Designer opens in a new window.
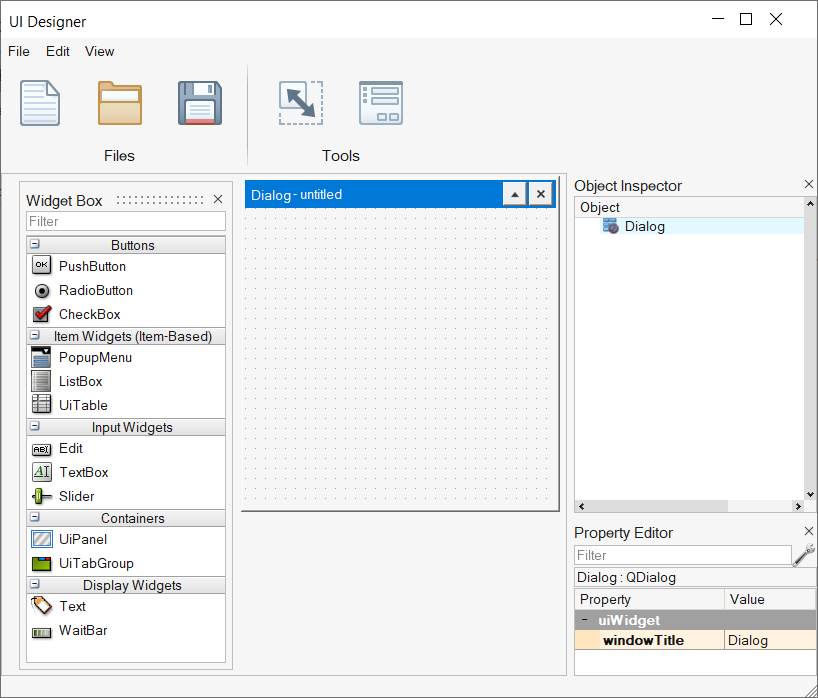
-
Drag objects from the Widget box into the Dialog to create your GUI
design.
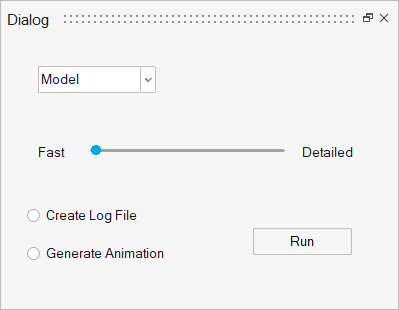
The following example shows a simple GUI with a list box, slider, radio buttons, push button and labels.
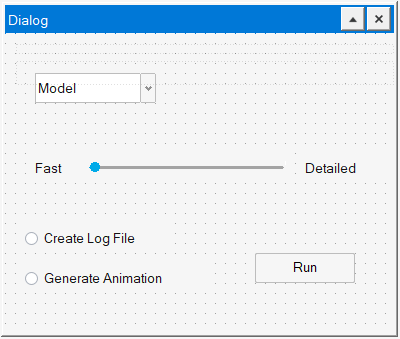
-
Modify the location, name, and properties of each object as required for your
design.
- To adjust location, select the object and move it with your mouse or arrow keys.
- To modify properties, select an object, then modify the desired
properties in the Property Editor.
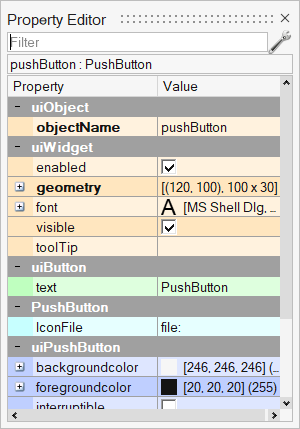
You can also right-click an object and define a number of properties through the context menu.
-
From the UI Designer ribbon, select the
Preview button.
 A preview of your graphical user interface design is displayed. Review your design, then close the Preview window.
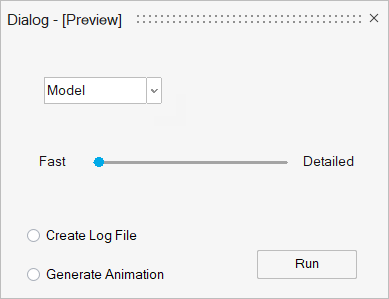
-
Save your design and specify your preferred file format:
Save As Descrption *.ui Saves your design as a UI Designer file. Use this file format when you want to continue working on your design through UI Designer. *.oml Use this format to generate a code skeleton. Note: Once you save your design as code, you cannot load it back into the UI Designer. If you want to keep a working verision of your design that you can open through the UI Designer, save a version in .ui format before saving as code.When the design example from above is saved as an .oml file, the following code is produced:% Auto-generated code by UI Designer %----------------------------------- % Callback functions: %----------------------------------- function slider_callback(handle, callstate) % Add callback implementation: [slider] end function radioButton_callback(handle, callstate) % Add callback implementation: [radioButton] end function radioButton_2_callback(handle, callstate) % Add callback implementation: [radioButton_2] end function pushButton_callback(handle, callstate) % Add callback implementation: [pushButton] end function popupMenu_callback(handle, callstate) % Add callback implementation: [popupMenu] end %----------------------------------- % GUI elements: %----------------------------------- Dialog = figure('units', 'pixels', 'position', [0 0 410 310] ... , 'numbertitle','off', 'name','Dialog'); undock(Dialog); slider = uicontrol('parent', Dialog, 'style','slider' ... , 'callback','slider_callback', 'interruptible','off' ... , 'units','normalized', 'position',[0.25 0.50 0.21 0.07] ... , 'enable','on', 'max', 99 , 'min', 0 , 'orient','horizontal' ... , 'value', 0 , 'sliderstep', [1 10] ... , 'callbackdelay',0.000000, 'tag','slider', 'userdata',[], 'tooltipstring','', 'visible','on'); text = uicontrol('parent', Dialog, 'style','text' ... , 'units','normalized', 'position',[0.07 0.47 0.15 0.10] ... , 'fontname','MS Shell Dlg', 'fontangle','regular', 'fontweight','normal', 'fontsize',7.80 ... , 'enable','on', 'string','Fast' ... , 'horizontalalignment','left' ... , 'verticalalignment','middle', 'foregroundcolor', [20 20 20], 'backgroundcolor', [246 246 246] ... , 'tag','text', 'userdata',[], 'tooltipstring','', 'visible','on'); text_2 = uicontrol('parent', Dialog, 'style','text' ... , 'units','normalized', 'position',[0.47 0.47 0.15 0.10] ... , 'fontname','MS Shell Dlg', 'fontangle','regular', 'fontweight','normal', 'fontsize',7.80 ... , 'enable','on', 'string','Detailed' ... , 'horizontalalignment','left' ... , 'verticalalignment','middle', 'foregroundcolor', [20 20 20], 'backgroundcolor', [246 246 246] ... , 'tag','text_2', 'userdata',[], 'tooltipstring','', 'visible','on'); radioButton = uicontrol('parent', Dialog, 'style','radiobutton' ... , 'callback','radioButton_callback', 'interruptible','off' ... , 'units','normalized', 'position',[0.05 0.67 0.25 0.10] ... , 'fontname','MS Shell Dlg', 'fontangle','regular', 'fontweight','normal', 'fontsize',7.80 ... , 'enable','on', 'string','Create Log File', 'value', 0 , 'foregroundcolor', [20 20 20] ... , 'tag','radioButton', 'userdata',[], 'tooltipstring','', 'visible','on'); radioButton_2 = uicontrol('parent', Dialog, 'style','radiobutton' ... , 'callback','radioButton_2_callback', 'interruptible','off' ... , 'units','normalized', 'position',[0.05 0.77 0.38 0.10] ... , 'fontname','MS Shell Dlg', 'fontangle','regular', 'fontweight','normal', 'fontsize',7.80 ... , 'enable','on', 'string','Generate Animation', 'value', 0 , 'foregroundcolor', [20 20 20] ... , 'tag','radioButton_2', 'userdata',[], 'tooltipstring','', 'visible','on'); pushButton = uicontrol('parent', Dialog, 'style','pushbutton' ... , 'callback','pushButton_callback', 'interruptible','off' ... , 'units','normalized', 'position',[0.53 0.77 0.25 0.10] ... , 'fontname','MS Shell Dlg', 'fontangle','regular', 'fontweight','normal', 'fontsize',7.80 ... , 'enable','on', 'string','Run', 'value', 0 ... , 'foregroundcolor', [0 0 0] ... , 'backgroundimage','' ... , 'backgroundcolor',[246,246,246], 'tag','pushButton', 'userdata',[], 'tooltipstring','', 'visible','on'); popupMenu = uicontrol('parent', Dialog, 'style','popupmenu' ... , 'callback','popupMenu_callback', 'interruptible','off' ... , 'units','normalized', 'position',[0.03 0.17 0.25 0.10] ... , 'fontname','MS Shell Dlg', 'fontangle','regular', 'fontweight','normal', 'fontsize',7.80 ... , 'enable','on', 'value', 1 , 'string', {'Model' } ... , 'foregroundcolor', [20 20 20], 'backgroundcolor', [255 255 255] ... , 'tag','popupMenu', 'userdata',[], 'tooltipstring','', 'visible','on'); - Return to the Twin Activate window and load the .oml file with your design.
-
Run the file.
The software produces a GUI based on the code file you saved through the UI Designer.
