Nonwoven
Use the Nonwoven tool to create a nonwoven backing cloth to yield a smoother surface on the finished model. You can select surfaces on the model, or project the nonwoven backing cloth onto the model.
Location: Foaming ribbon, Tooling subribbon, Nonwoven icon
Create Nonwoven Backing Cloth
Select one or more surfaces in your model geometry to create a nonwoven backing cloth on the selected surfaces, or project a shape onto the model to create a nonwoven backing cloth in a customized configuration.
-
Click the Tooling icon.

-
In the Tooling sub-ribbon, click the Nonwoven icon

OR
click the Project satellite icon.

-
If using the Nonwoven tool, click one or more surfaces,
or click and drag to select several surfaces at once, to create a nonwoven
backing cloth.
If using the Project tool:
-
In the microdialog, choose the X, Y, or Z axis for the projection
direction.

Click the green arrow to reverse the projection. -
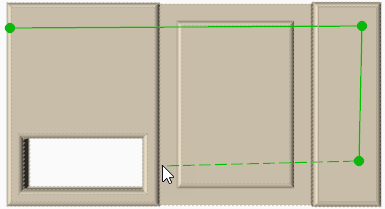
Click the surface of the model to begin creating the shape of the
projection. Each left-click places a corner of the projection.

- Right-click to complete the projection.
-
In the microdialog, choose the X, Y, or Z axis for the projection
direction.
-
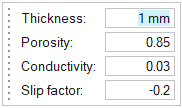
Use the microdialog to define the Thickness, Porosity, Conductivity, and Slip
Factor of the backing cloth.

Thickness defines the average thickness of the backing cloth. In most cases, the default value of 1 mm will be correct.Porosity defines the ability of the backing cloth to allow gases to pass through it. Enter a value between 0 and 1, where 0 means no gases can escape and 1 means gases can fully escape. In most cases, the default value will be correct.
Conductivity defines the thermal conductivity of the backing cloth. In most cases, the default value will be correct.
Slip Factor defines how easily the material flows across the backing cloth. In most cases, the default value of 0 will be correct, however if the backing cloth has many curved surfaces, a value of 0.2 may yield better results. Values less than -1 or greater than 1 are not valid.
- Right-click and mouse through the check mark to exit, or double-right-click.