In this tutorial, you will learn how to use PollEx Golden Sample.
You can generate the guide documents automatically with defining Golden Sample
specification in PCB manufacturing process by PollEx Golden Sample.
Open PollEx PCB.
Launch Golden Sample.
From the menu bar, click File > Open.
Open the
PollEx_PCB_Additive_Sample_r<revision
number>.pdbb file found here:
C:\ProgramData\altair\PollEx\<version>\Examples\Modeler\Additive.
From the menu bar, click Tools > Golden Sample.
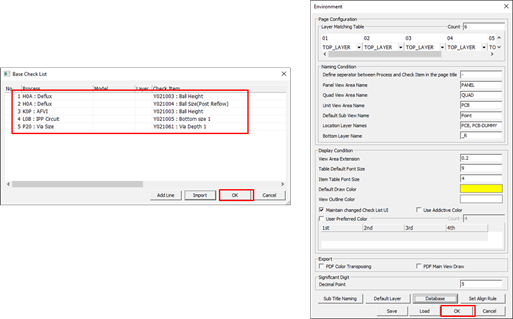
Set the Environment.
Sets the environment to use to create each page of Golden Sample.
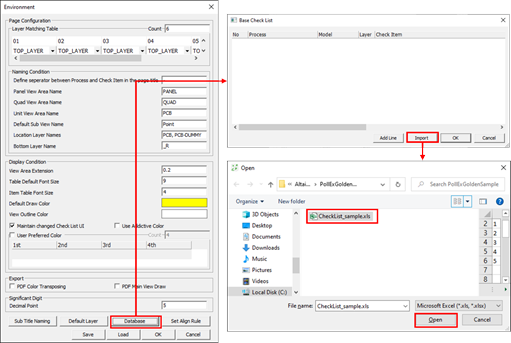
From the menu bar, click Setting > Environment.
Click Database.
The Base Check List dialog
opens.
In the Base Check List dialog, click
Import.
Select the file and click Open.
Figure 1.
In the Base Check List dialog, click
OK.
Click OK.
Figure 2.
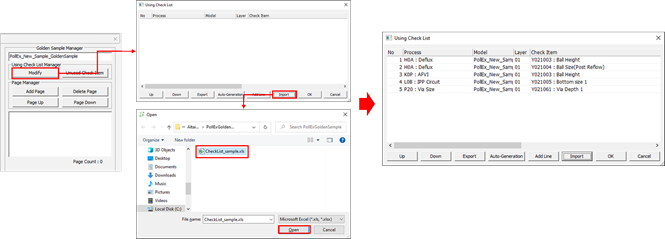
Generate Golden Sample File.
In the Golden Sample Manager section, click
Modify.
The Using Check List dialog opens.
In the Using Check List dialog, click
Import.
Import the
C:\ProgramData\altair\PollEx\<version>\Examples\Modeler\Additive\GoldenSample_Checklist.xls
file.
Figure 3.
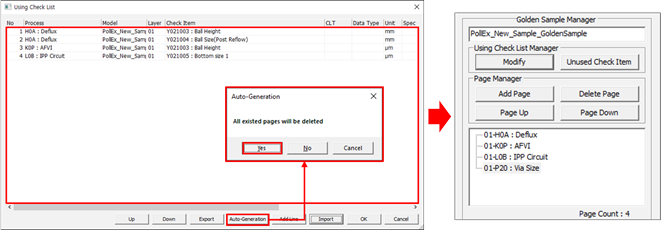
In the Using Check List dialog, click
Auto-Generation.
The Auto-Generation dialog
opens.
In the Auto-Generation dialog, click
Yes.
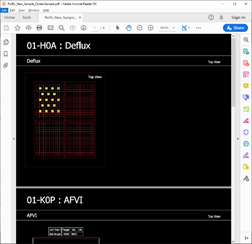
The Golden Sample page is automatically generated for each set
of Check items (based on Layer+Process). Figure 4.
Click OK.
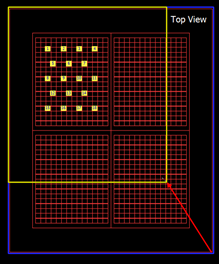
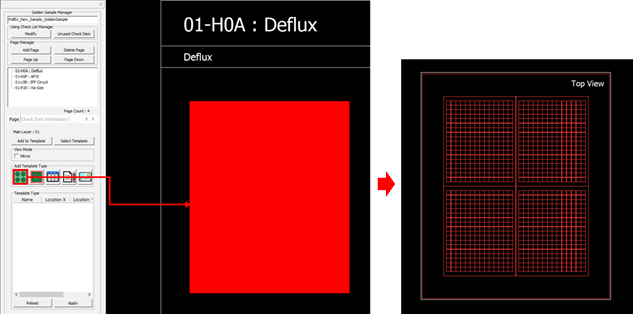
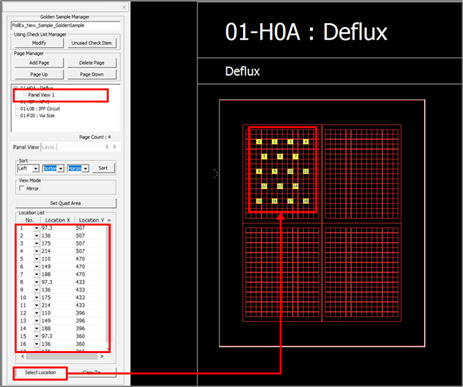
Generate Panel View Area.
From the page lists, click 01-H0A :
Deflux.
Click and drag the mouse to the right screen to
create an area for making new Golden Sample.
Figure 5.
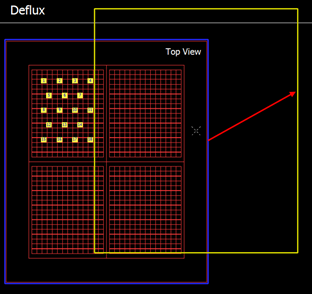
The Panel View is created in the list.
Select the Panel View, click Select
Location on the bottom left.
Using the mouse, select and display the location of the unit to be
inspected on the Panel.
Figure 6.
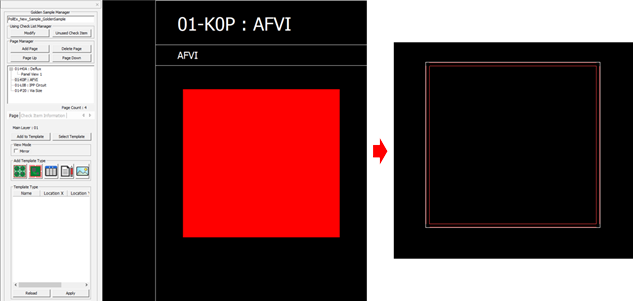
Generate unit View.
From the page lists, click 01-K0P : AFVI.
Click from the Add Template Type section and drag
the mouse to the right screen to create the Golden Sample area.
Figure 7.
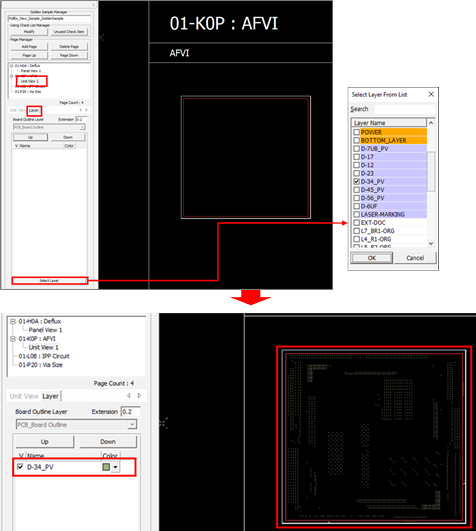
The Unit View is created in the Page list.
Select the Unit View from the list and select
layer(s) to display in the Layer tab.
Figure 8.
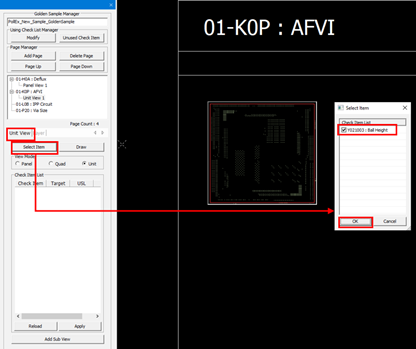
Select the layer to be inspected, and click Select
Item in the Unit View tab.
The Select Item dialog opens.
In the Select Item dialog, enable the
item checkbox, and click
OK.
Figure 9.
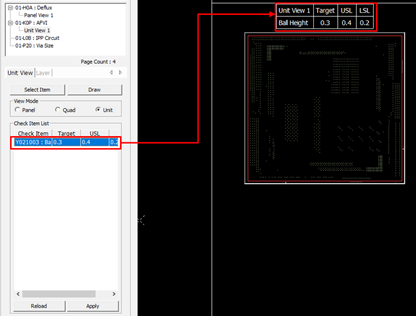
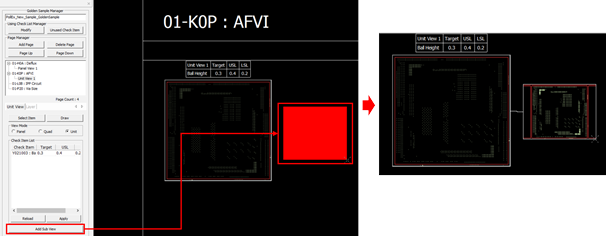
The spec table of the check item is displayed at the top of the
view.
Enter 0.3 for Target.
Enter 0.4 for USL (Upper Specification
Limit).
Enter 0.2 for LSL (Lower Specification
Limit).
Click Apply.
Figure 10.
Select the Add Sub View menu and drag the mouse
to the right screen to create the Sub View area.
Figure 11.
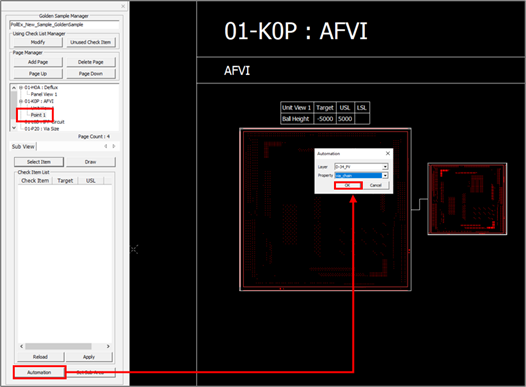
Create a sub view area.
Select a point from the list and click
Automation on the bottom left to select the
minimum value to be set as a check item among property items for each
layer.
Figure 12.
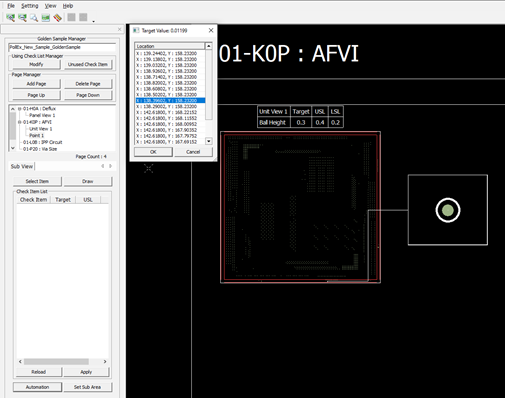
Select the position to display in the sub view from the selected
minimum value list.
Figure 13.
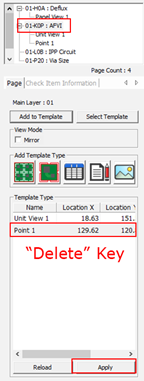
Delete Created Lists.
Click a page from the page lists and select a list from the Template
Type lists.
Press Delete.
Click Apply to delete the selected type.
Figure 14.
Resize the Area.
Select the page to change and click each area in the right screen to
adjust the size of the area.
The selected area is indicated by a blue line. The size change is
increased after selecting the corner part of the rectangular area with
the mouse. In the changeable state, the line of each area is displayed
in yellow. You can press Esc to cancel the operation. Figure 15.
Move the Area Position.
Select the page to change and click each area in the right screen with
the mouse to move the area.
The area selected is indicated by a blue line.
To move an area, select the area, right-click, and press
Enter or select Move
in the pop-up menu, and left-click at the desired location.
In the moveable state, the line of each area is displayed in yellow.
You can press Esc to
cancel the operation. Figure 16.
Save Golden Sample File.
When saving, the file name is saved as the sample file name, and it is saved
in the location where the sample file is located.
Export Golden Sample File.
You can export the Golden Sample file to PDF or DXF format. Figure 17.
 and drag the mouse to the right screen to
create an area for making new Golden Sample.
and drag the mouse to the right screen to
create an area for making new Golden Sample.
 from the Add Template Type section and drag
the mouse to the right screen to create the Golden Sample area.
from the Add Template Type section and drag
the mouse to the right screen to create the Golden Sample area.