PollEx BOM is software that can import formatted text BOM or
MS/Excel BOM and to use for searching components or check conjunction with PCB design
file.
Launch PollEx BOM.
Import MS/Excel Format BOM.
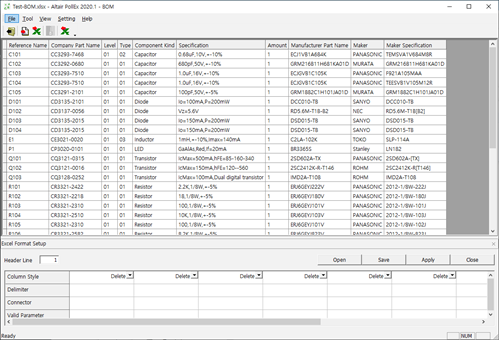
Click File > Import BOM > MS/Excel BOM from the menu.
Select the PollEx_BOM_Sample_Excel_r1.0.xlsx file
from
C:\ProgramData\altair\PollEx\<version>\Examples\Modeler\BOM.
Figure 1.
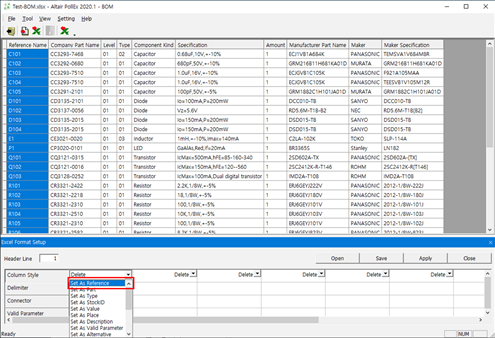
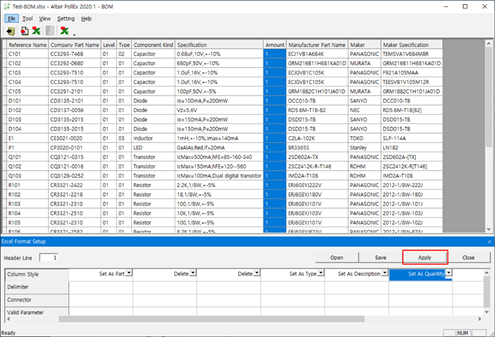
Enter 1 in the Header Line under Excel Format
Setup.
Figure 2.
Click the first column of Column Style and select Set As
Reference from the menu.
Figure 3.
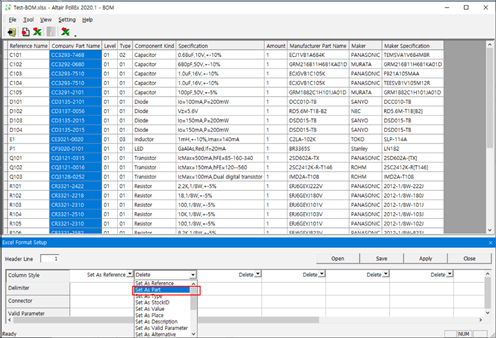
When the first column in the Excel Format Setup is clicked, the
matched column is highlighted.
Click the second column of Column Style and select Set As
Part.
Figure 4.
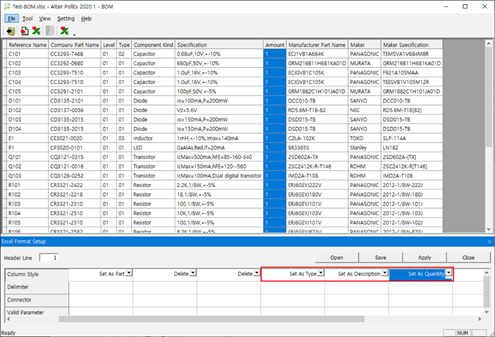
Leave the third and fourth columns to
Delete.
Set the fifth column to Set As Type.
Set the sixth column to Set As
Description.
Set the seventh column to Set AS Quantity.
Figure 5.
Click Apply.
Figure 6.
Save Column Style Setup.
Enter Test for File name and click
Apply to save the Excel setup.
Click Save.
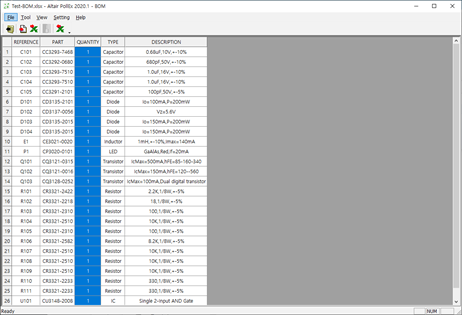
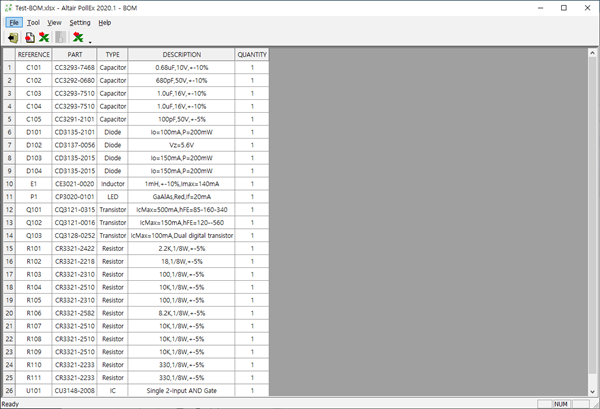
After saving the .ebi file, BOM list is displayed
as shown in Figure 7. Figure 7.
Change Column Order.
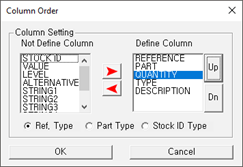
From the menu bar, click Tool > Define Column Order.
The Column Order dialog opens.
In the Column Order dialog, select
Quantity from the Define Column and click
Up twice.
Figure 8.
The Quantity column is moved to the middle. Figure 9.
Save BOM with binary file (*.bdbb).
From the menu bar, select File > Save.
Enter Test in the File name field and click
Save.
Import ASCII Formatted BOM.
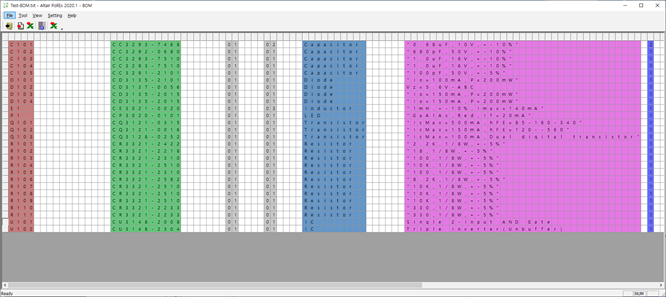
From the menu bar, select File > Import BOM > ASCII BOM.
Select the PollEx_BOM_ASCII_r1.0.txt file from
C:\ProgramData\altair\PollEx\<version>Examples\Modeler\BOM.
Figure 10.
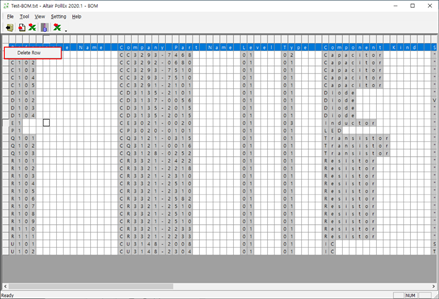
Delete Header Line.
Right-click the second row from the top and select Delete
Row.
Figure 11.
Column Style Setup.
Click the columns to define types, such as reference, part, and so on.
Set the first area to Set As Reference.
Set the second area to Set As Part.
Set the fifth area to Set As Type.
Set the sixth area to Set As Description.
Set the seventh area to Set As Quantity.
Figure 12.
Generate BOM.
From the menu bar, select Tool > Get Final Report.
Figure 13.
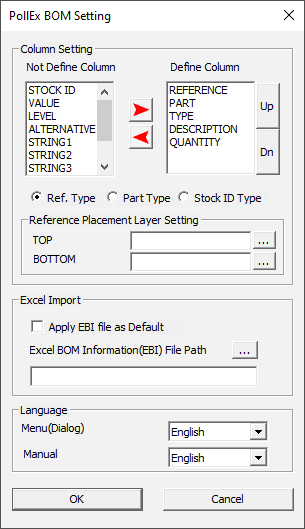
Column Setting.
If the columns are not displayed properly, you must define the column
setting.
Click Setting > Environment.
Using the arrow keys, move the items below to the right and click
OK.