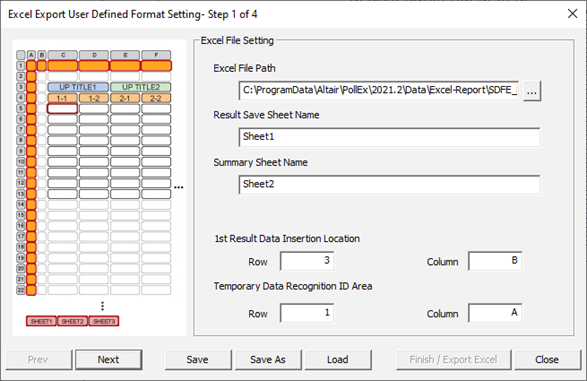
Excel File Path: This section defines the path of the company standard
report file to be used for saving the result. If you do not have
standard report file, you must create blank excel file beforehand.
If you want to use tutorial excel format, please click
Load and open the
training.SDFEE file from
C:\ProgramData\altair\PollEx\<version>\Examples\Verification\LDFE\SDFEE.
Result Save Sheet Name: Select the sheet to save result.
Summary Sheet Name: Select the sheet to save test summary.
1st Result Data Insertion Location: Select the cell where the result
data from the first category is to be saved.
Temporary Data Recording ID Area: As mentioned before, the history of
the tests is provided in the user defined format, so you should select a
cell for the program to use for this feature. Generally, you should
select 1-A.
Next: go to next step.
Save: Save current setup environment (*.SDFEE
file).
Save As: Save current setup environment with different name.
Load: Load pre-saved setup environment file.
Figure 2.
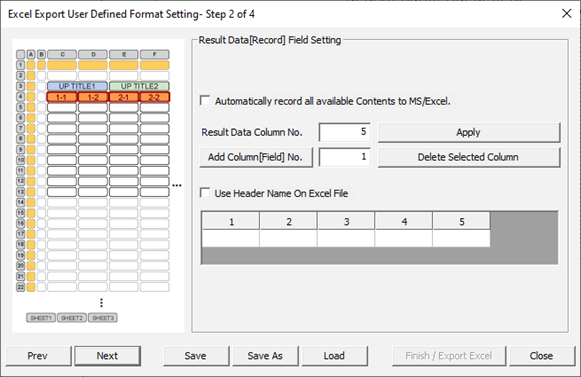
Result Data Column No: This section creates the number of columns
corresponding to the test result. Remember the contents of the report he
wants to record and predict the type and number of results. (Example: If
you need 10 columns, enter 10 and click
Apply.)
Add Column [Field] No: This section creates the number of columns with
predefined number. Enter the number of columns you want after that click
Apply. If you want to delete a column, select
the column, and use the Delete button.
Figure 3.
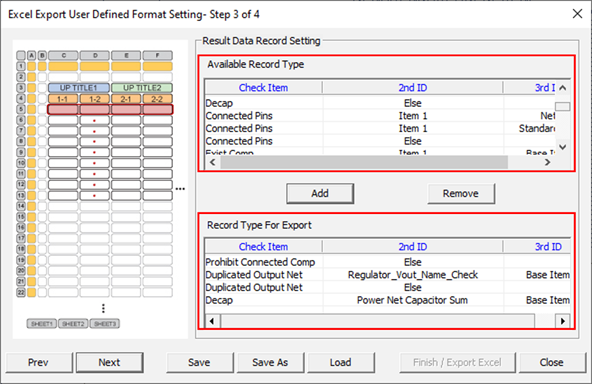
Available Record Type: This section shows the list all test items and
sub items available. You can selectively choose the needed categories
and move them to Record Type For Export section using Add.
Record Type For Export: This section shows the test items to be
recorded.
Figure 4.
Record Type for Export: This section shows the selected categories of
Step3.
Check Item:
Show the test item name list.
2nd ID:
Shows the test sub-item name list.
Selected Cell Type: Select whether to manually or automatically select
the result item to be entered into each cell.
User
Defined String: User can configure each columns and rows by
manually.
Predefined
Item: Upon selecting this option, user can use predefined item
for each column of report.
Column setup section: This section shows all columns and rows user
defined. User can modify them by double clicking each item.
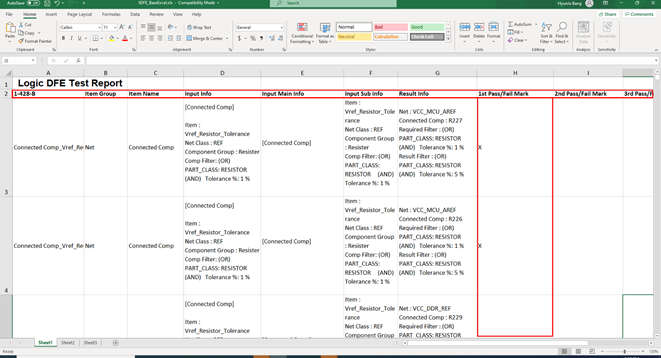
After completing Steps 1 to 4, click Finish/Excel Export to create a report as
shown below.
Figure 5.
As
mentioned in step2, a column is provided for each test subject. Each column
is provided with the contents that the user has defined in step3.
1st Pass/Fail
Mark column shows the test result status. (Pass/Fail)
The test history of up to 10 tests can be saved in same excel report file.