
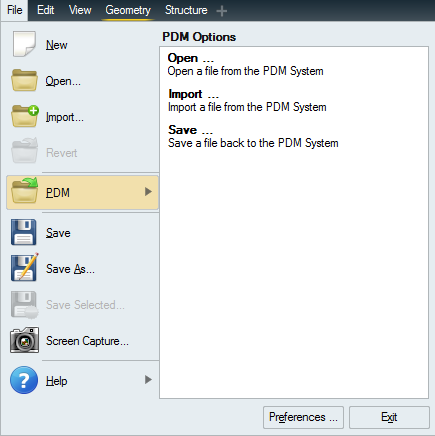
Product Data Management (PDM)
Open, import, and save files to PTC Windchill™ or Siemens Teamcenter™.
You need to integrate Inspire with your PDM system and add a repository before you can open or save files.
Teamcenter Setup
Integrate Inspire with Siemens Teamcenter™.
Typically, there are no server-side requirements to integrate Inspire with Teamcenter, but the FCC client needs to be installed on each user's computer or workstation in order to upload data. For any other action, the FCC client is not required.
Teamcenter version 14.0 or better is required.
- A valid Teamcenter username and password
- The full URLs for the host server and the file server, which can be provided
by your Teamcenter administrator.
Example: Host = http://adm10sa1dev2:8080/tc, where "tc" is the Teamcenter site ID (your site ID may be different)
Example: File server = http://adm10sa1dev2:45444
- Obtain the FCC client-only installation files from your Teamcenter administrator and install them. (During the installation, you will be prompted for the host and port values.)
-
Add the following environment variables:
- FMS_HOME = C:\Program Files (x86)\Siemens\FCC
- FMS_PATH = %FMS_HOME%; %FMS_HOME%\bin; %FMS_HOME%\lib
-
Update the PATH environment variable:
- PATH = %PATH%; %FMS_PATH%
Windchill Setup
Integrate Inspire with PTC Windchill™.
To integrate Inspire with PTC Windchill™, webjects must be installed on the Windchill server as part of the setup process. Windchill versions up to 11.1 are currently supported.
- A valid Windchill username and password
- The full URL for the host server, which can be provided by your Windchill
administrator
Example: Host = http://trwindchill10.altair.com
-
Install webjects on the Windchill server:
- Copy the webject files, which are located in the Inspire installation folder under the following
subfolder:
C:\Program Files\Altair\2026.0\Inspire2026.0\javaapps\win64\pdmconnector_server\webjects\
- Paste the webject files to the Windchill installation folder under the
following subfolder:
\tasks\ext
- Copy the webject files, which are located in the Inspire installation folder under the following
subfolder:
- Log in to Windchill as an Administrator.
-
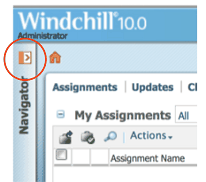
From the Windchill home page, expand the Navigator.
-
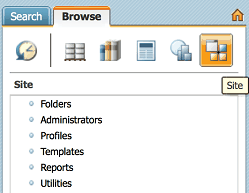
Go to .
-
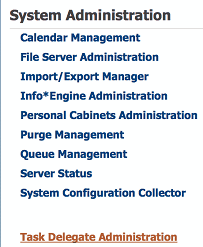
Select .
-
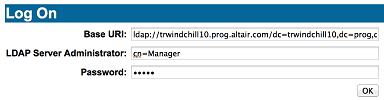
Log on.
- Go to Create Delegate.
-
Create the following six delegates:
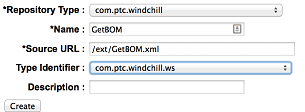
Delegate Repository Type Name Source URL Type Identifier Description 1 com.ptc.windchill HWCheckConnection /ext/HWCheckConnection.xml com.ptc.windchill.ws 2 com.ptc.windchill HWExpandBOM /ext/HWExpandBOM.xml com.ptc.windchill.ws 3 com.ptc.windchill HWGetBOMOccurrence /ext/HWGetBOMOccurrence.xml com.ptc.windchill.ws 4 com.ptc.windchill HWGetRelatedCadDoc /ext/HWGetRelatedCadDoc.xml com.ptc.windchill.ws 5 com.ptc.windchill HWGetWTPartCad /ext/HWGetWTPartCad.xml com.ptc.windchill.ws 6 com.ptc.windchill HWQuery /ext/HWQuery.xml com.ptc.windchill.ws
Add a Repository
Add a repository to manage files on your PDM system.
First, you'll need to:
- Integrate Inspire with your PDM system.
- Obtain the Name, Host, and File Server for the repository, which can be provided by your network administrator
-
Select .
-
Add a repository.
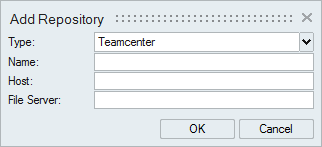
If you haven't added a repository before, the Add
Repository dialog opens automatically. Alternatively, you
can click Add a New PDM Repository
 :
:
-
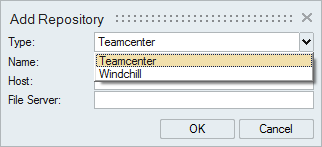
For Type, select the correct repository type.
-
Enter the Name, Host, and
File Server.
- If Teamcenter 14.3 (SSO enabled) is selected, you'll also need your TC Login Service and SSO App Identifier.
- If Windchill (SSO enabled) is selected, you'll also need your SSO Identity Provider.
- If OpenPDM is selected, you'll also need the username and password for your OpenPDM and PDM accounts.
- Click OK.
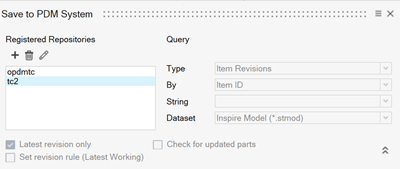
Delete a Repository
Delete a repository when you no longer need it.
-
Select .
- Select a repository in the Registered Repositories list.
-
Click Delete
 .
.

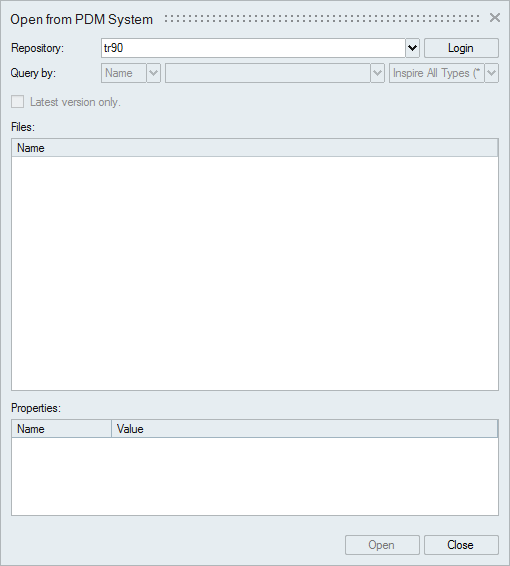
Open a File from Your PDM system
Open a model from your PDM system, or import a saved model from the PDM system and merge it with the current model.
- Integrate Inspire with your PDM system.
- Add a repository.
- Log in to your PDM system.
-
Choose from the following options:
Option Description Open a model Select . The current file is cleared from memory.
Import and merge a saved model with the current model Select .
-
Select a repository.
- Click Login and enter your credentials to log in to your PDM system. If you're unsure what your credentials are, check with your network administrator.
-
Perform a query to locate the file you want to open or import.
- Teamcenter: From the Type dropdown, select
Name or ID and press
Enter. You can also filter the results by file
type. Select Latest version only to display only the
latest version of a file in the list of results.
- Windchill: Enter a Part or document, file Name or ID, and press Enter. You can also filter the results by file type.
- Teamcenter: From the Type dropdown, select
Name or ID and press
Enter. You can also filter the results by file
type. Select Latest version only to display only the
latest version of a file in the list of results.
- The results of the search query are displayed under Files. Click the + on an assembly node to expand it. Properties are defined in your PDM system and are for display only.
- Double-click a file to open it, or select it and click Open (or Import). Select a node to open an entire assembly, or a single file to open a part.
- Select Check for updated parts on the Open from PDM System window to automatically refresh the query results. Out-of-date parts are shown in red in the list of files. You can adjust how often to check for updates using the Timer setting under .
- You can select a part, name, or ID you have previously searched for from the drop-down list.
- In Teamcenter, revisions of a file are shown as children under the parent node. In Windchill, the parent node is a container. The actual file and all of its revisions are listed under the container node.
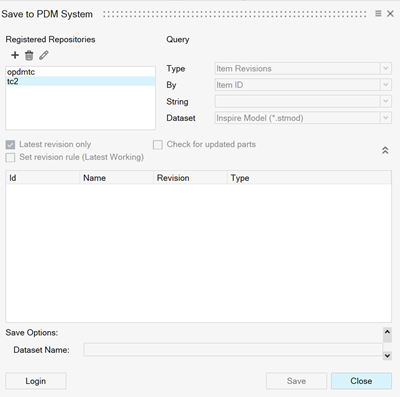
Save a File to Your PDM System
Save a file to your PDM system.
- Integrate Inspire with your PDM system.
- Add a repository.
- Log in to your PDM system.
-
Select .
-
Select a repository.
- If you are not already logged in, click Login and enter your credentials to log in to your PDM system. If you're unsure what your credentials are, check with your network administrator.
-
Perform a query to locate where you want to save the file.
- Teamcenter: From the Type dropdown, select
Name or ID and press
Enter. You can also filter the results by file
type. Select Latest version only to display only the
latest version of a file in the list of results.
- Windchill: Enter a Part or document, file Name or ID, and press Enter. You can also filter the results by file type.
- Teamcenter: From the Type dropdown, select
Name or ID and press
Enter. You can also filter the results by file
type. Select Latest version only to display only the
latest version of a file in the list of results.
- The results of the search query are displayed under Files. Click the + on an assembly node to expand it. Properties are defined in your PDM system and are for display only.
-
Select where to save the file.
- To save over an existing file, select the file. If the selected file name already exists in the PDM system, the version in the PDM system will be overwritten.
- To save a file with a new name, select the parent node where you want to save the file. The saved file will appear as a child under the parent.
- Under Save Options, enter a Name and Description for the file. The File Name defaults to the name of the file in Inspire.
- Select a File Type. Dataset, Reference, and Tool are filled in automatically based on the file type. (Teamcenter only; Windchill does not have the Dataset options.) You may need to change these values depending on the requirements of your PDM system.
- Click Save.