Run Options: Local vs. Remote
Choose whether to run jobs locally or on a remote job server.
Click the Run group label to define how jobs are run.
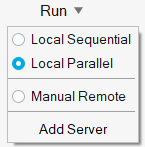
The Add Server option is available for structures and the SLM process in print3D, but not for motion, binder-sinter, porosity, or thinning analyses. The Manual Remote option is only available for structures analysis.
- Local Sequential
- Queue run requests on your local computer and run one after the other.
- Local Parallel
- Immediately execute all runs simultaneously on your local computer.
- Manual Remote
- Manually run a job on a remote server. Select this option if using a remote server that is not an Altair PBS server.
- Custom Server
- If you have added a remote server, the name of the server will appear in the menu. Select it to run jobs remotely on that server.
- Add Server
- Add and configure a remote job server.
Add a Remote Job Server
Add and configure an Altair PBS server to run jobs remotely.
This option is only available for Structures and Print3D analysis, not Motion analysis.
-
Click the Run group label to display run options.

- Select the Add Server option from the menu.
-
Enter the Name, Host, and
Port.
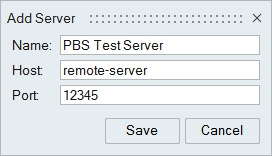
-
Click Save.
A cloud icon appears next to the Run menu when the connection to the server has been established.

- Click the Run group label and verify that the server has been added.
- Set up and run an analysis using the Run Analysis window.
If Inspire is integrated with Altair PBS Works, you can connect to an:
- HPC Cluster running PBS Professional Workload Manager
- HPC Cluster running LSF Workload Manager
Run an Analysis Job Manually
Manually copy a prepared model file and queue it on a remote jobs server.
-
Click the Run group label to display run options.

-
Select the Manual Remote option.
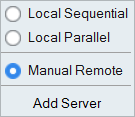
-
Select the File menu and click the
Preferences button to open the Preferences.
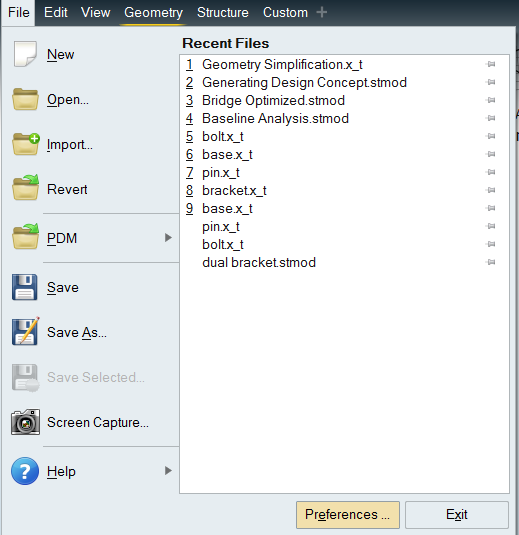
- Under Category, select Inspire: Run Options and enable Run in model directory, then click OK.
-
Set up and run an analysis.
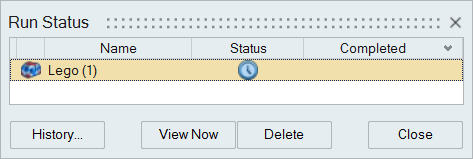
The status icon in the Run Status window indicates that Inspire is waiting for the run file to be manually copied to the remote server.
-
Right-click on the run name and select Open Run
Folder.
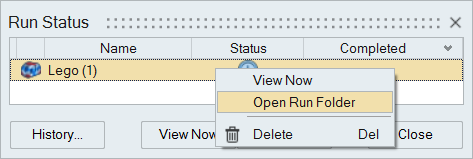
- Copy the run file and manually submit it to your remote job server queue.
- When the job has finished running on the remote server, copy the set of result files back to the Inspire run history folder on your local computer.
-
Click the
 satellite on the Analyze icon to open the
Run Status window.
-
Right-click on the name of the run and select View
Results.
After copying the run files, the status will change to a green check mark indicating that results are ready to view.
- You can start a manual remote run and close your local version of Inspire. After copying the results back, you can load your results from the Run History.
- For more information about how to install and configure a remote job server, refer to the Inspire Remote Job Submission Guide, available on the Altair Help Center.
Windows
This references the batch file hwfdmfeprocessor.bat found in <installation_directory>\Inspire2026\hwx\bin\win64.
hwfdmfeprocessor.bat stmodelfileWithPath currentRunDir scratchDir
                        exportFileName baseDir – mesh 1
where exportFileName is optiAnalysis.fem for analysis or topoOpt.fem for
optimization.
C:\Program Files\Altair\2026\Inspire2026\hwx\bin\win64>hwfdmfeprocessor.bat c:\Temp\Model.stmod c:\Temp c:\Temp optiAnalysis.fem c:\Temp -mesh 1 -ncpu 4 -ram 20000Linux
This references the shell file hwfdmfeprocessor.sh found in $INSTALLDIR/altair/scripts .
hwfdmfeprocessor.sh stmodelfileWithPath currentRunDir scratchDir exportFileName
                        baseDir – mesh 1
where exportFileName is optiAnalysis.fem for analysis or topoOpt.fem for
optimization.
altair@altair-support:~$ ~altair/Inspire2026/hwfdmfeprocessor Files/Model.stmod ~altair-support/temp/ ~altair-support/temp/ topoOpt.fem ~/basedir -mesh 1 -ncpu 4 -ram 80000