Save results
How to save the results?
- Once a test is completed, the corresponding results can be saved by using the
Save test results button (1).
Table 1. Save test results 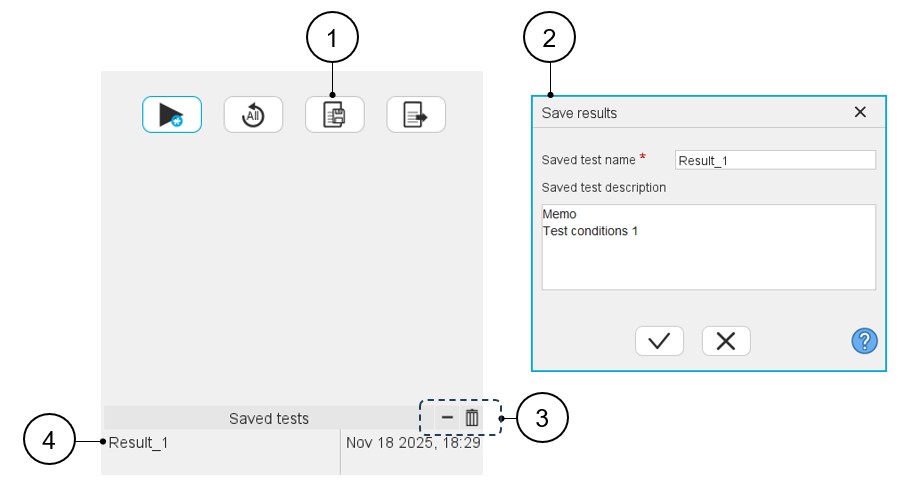
1 Button to save the test result. 2 Dialog box to save test results. Give a name and write a description. 3 By clicking on the Remove selected test (-) button, the selected saved test result is removed.By clicking on the Remove all tests (bin) button all the saved test results are removed. 4 List of the saved tests. The list of saved test results is limited to five elements. The saved results can be displayed in the test area for analysis. See below to know how to do that.
Table 2. Saved test 
1 Click on a saved test to select it. Once the test is selected, right-click on it to open a list box that allows displaying results with the command “Display”. A double-click on the saved test result name (for example, Result_1) gives the same result.
2 The test result is displayed in a new tab inside the test results zone. 3 Displaying edited results (saved and current results) is possible by clicking on the corresponding tabs. Several saved tests can be displayed. 4 Note: Other functions available in this list box are:The selected test result can be renamed (Rename), exported (Export results - see next section) and removed (Remove).
- Management of the saved test
Table 3. Management of the saved test 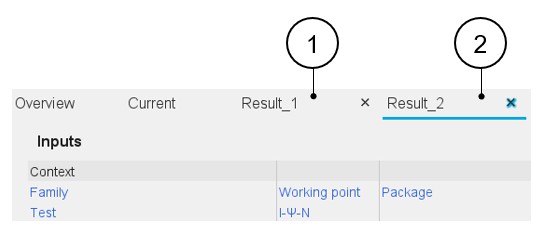
1 Several saved test results (maximum five) can be displayed inside the test area for comparison with each other. 2 X allows removing the selected test result from the test area. A test result removed from the test area can be re-displayed at any moment.