Choose part
How to choose part?
- Access to the Part Library
The “Part shape” button allows accessing the part libraries, from Motor Factory – Design area to change the part topology.
To illustrate the process to be applied for choosing a part, we are considering the example of a slot part since the workflow is the same whatever the considered part: Slot (inner or outer), Magnet (inner or outer), Saliency (inner), Bar (inner or outer), Pole (inner).
Figure 1. The “Part shape” button allows accessing the Part libraries - Case of the “Slot shape” (1) 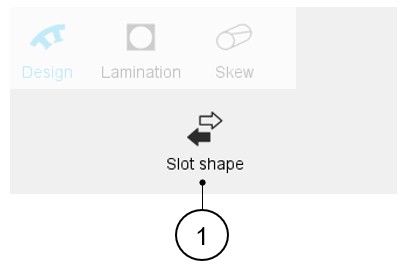
- Dialog box
- Main description
Clicking on the "Part shape" button opens a dialog box, allowing access to the corresponding Part Libraries.
It allows visualizing, comparing, choosing, and importing another part topology to modify the current stator design.
Table 1. Dialog box allowing to choose a part topology in Part Library 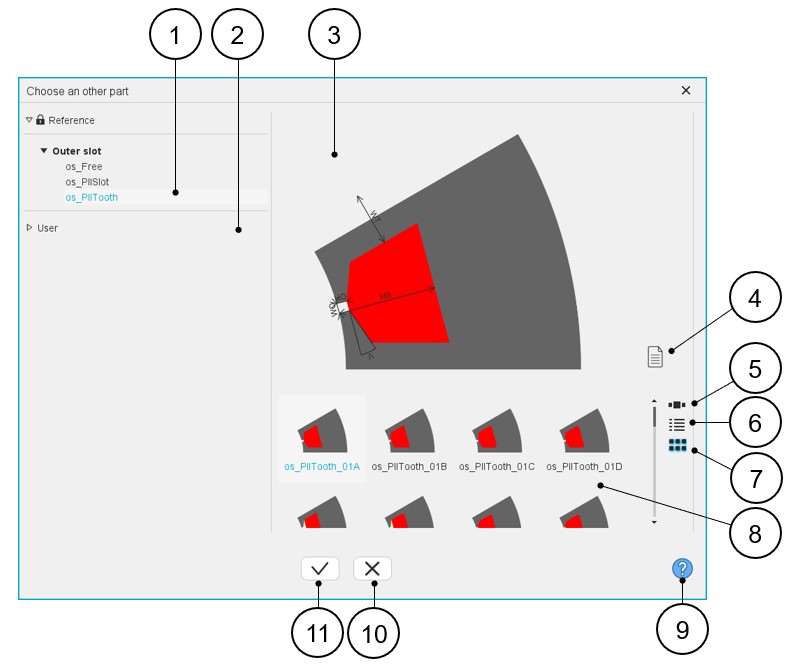
1 Visualization of the reference libraries, i.e., the libraries of topologies provided with FluxMotor. Select them to view their content and choose a part among them.
See the “Part Library” application for additional information.
2 Visualization of the user libraries. See the “Part Library” application for additional information. 3 Area where the selected part is displayed (static picture) – Topology + dimension labels. 4 Button to visualize the list of the attached documents. 5 Button to display the thumbnails as a slide show. 6 Button to display the thumbnails as a list. 7 Button to display the thumbnails as a matrix view of pictures. 8 Area to visualize all the topologies of slots from the selected library (ref. 1). 9 Access to the online user help guide dedicated to the usage of the dialog box. 10 Button to close the dialog box and to come back to Motor Factory – Design – Area dedicated to the considered part. 11 Button to choose and to import the selected part and to modify the current machine design. - Attached documentsIn Part Library, it is possible to attach files to the parts (or to the libraries as well). Hence, while choosing a part topology from the Motor Factory Design area via the dialog box described above, we can have access to these attached files if they have been stored previously.
Table 2. Visualization of attached documents 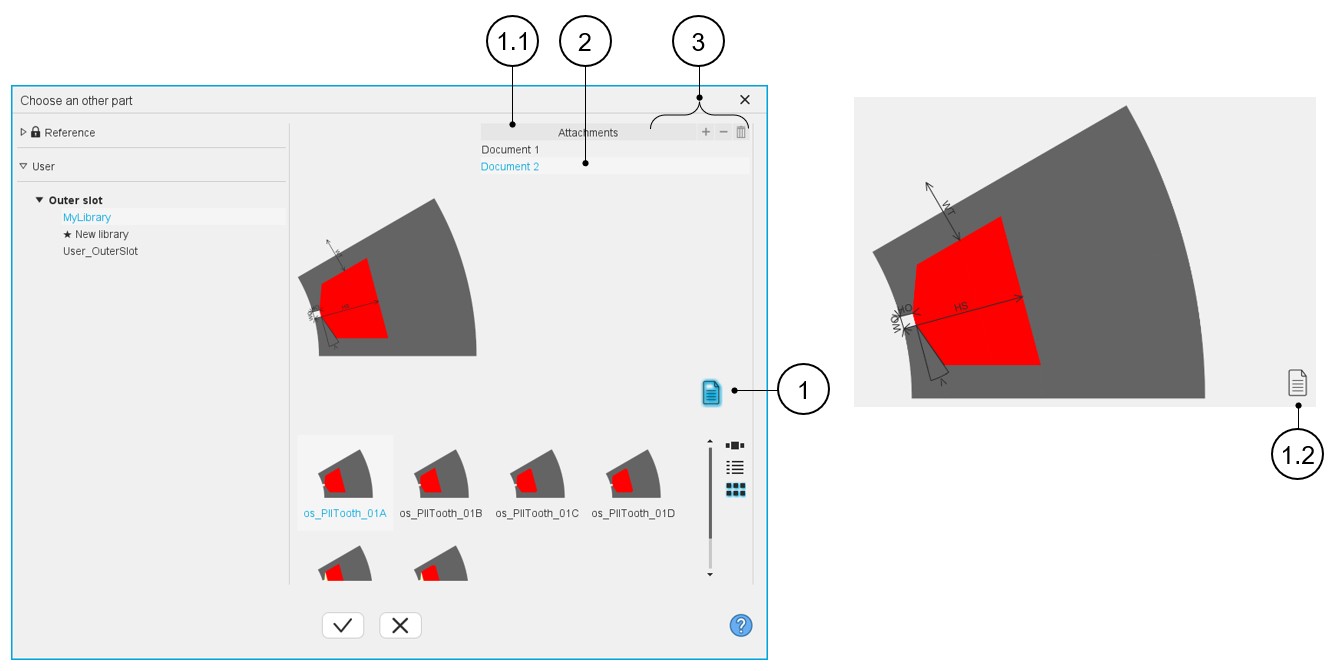
1 Button to show or hide the attached document list. Once clicked the button becomes blue and the attachments are displayed
1.1 Zone where the attachments are displayed after clicking on the button that manages attachments (1). 1.2 When the button that manages attachments is unclicked, it becomes black, and the attachments are hidden. 2 List of attached documents (if present). A double click on the selected document opens it. Documents can be added only from Part Library application. Refer to “Part Library” application for additional information.
3 Button (+) to add an attachment, Button (-) to remove one or several attachments and Button (Delete) for removing the selected attached file. Note: These buttons are greyed (not active) in the dialog box since attachments can only be managed in the Part Library.
- Main description