Define Material Properties for Objects in the Database
Material Concept
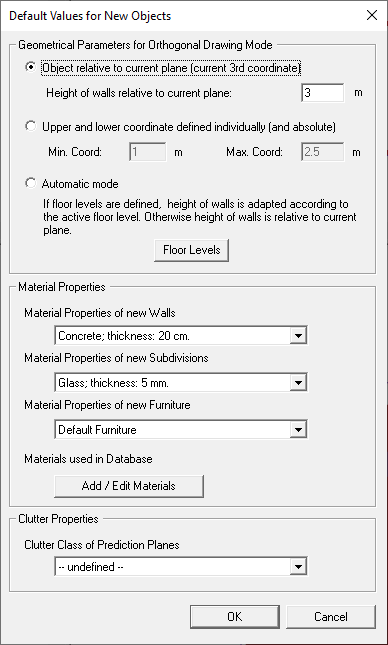
The consideration of the different material properties of the buildings/walls has a significant influence to the results of the wave propagation models. Therefore, for each object (building in urban databases and wall/subdivision in indoor databases), the corresponding material properties should be assigned.
The handling of the different materials in a so-called material catalogue will be explained in the following. The consideration of different materials is even more important for the indoor scenarios (as there is a large spectrum of wall properties concerning thickness and material) while for urban databases in most cases the same default material for all buildings is utilized (due to lack of information concerning the individual building materials).
Material Catalogue
In order to allow an easy handling of the different materials used within an indoor or
urban building database the materials are organised is a so called material catalogue,
which can be displayed by the menu item used in database or by clicking on the ![]() button, see Figure 1.
button, see Figure 1.
In the Material Catalogue dialog the different materials used in the loaded database are organised. This means for indoor environments the materials of the walls, floors, ceilings, and also of the subdivisions (doors, windows) must be entered, while for urban scenarios the materials of different building types and for vegetation can be handled.
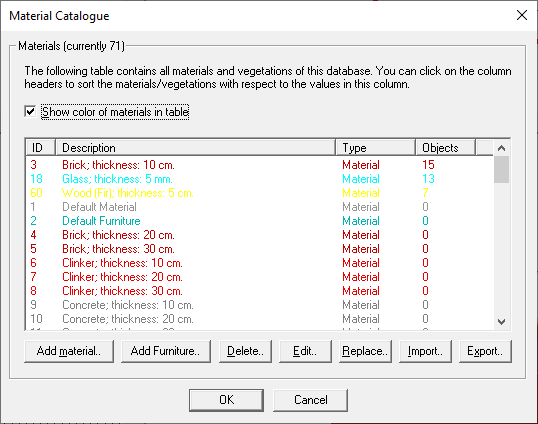
Material properties can be imported from other vector databases by using the button Import and can be exported to user-defined material catalogues with the button Export. Using the button Replace existing materials in the list can be replaced with material properties from another file.
When working with indoor databases it is possible to enable or disable propagation phenomena like diffraction, reflection, transmission and scattering for each material. Additionally the user can decide by using the corresponding check box if the current material can be calibrated or not.
Electrical Properties
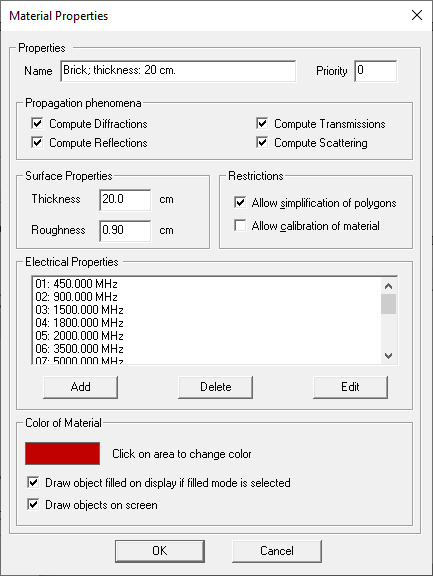
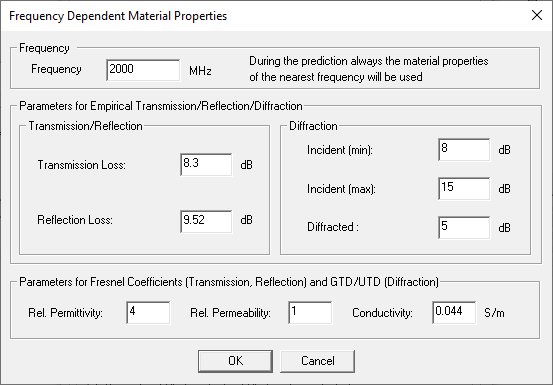
Because the electrical properties of the materials depend on the frequency, individual electrical properties for different frequency bands can be defined. For each material as many frequency bands as required are possible. The definition/modification of the electrical properties is done by clicking on Add/Edit in the Material Properties dialog, see Figure 2. Then the following window will appear representing the Frequency Depending Material Properties, see Figure 3. The individual parameters of the material properties for the defined frequency are entered here.
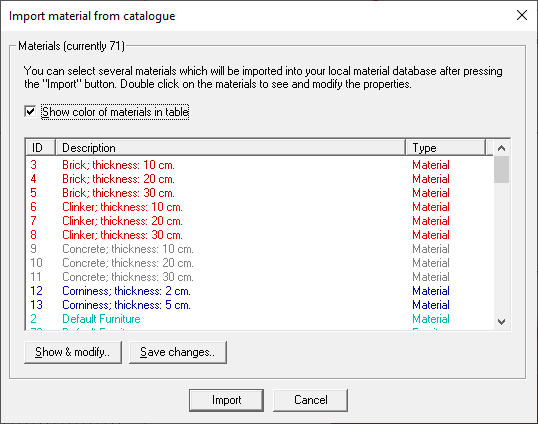
From the Global Material Catalogue the required material can be selected. The Global Material Catalogue includes materials commonly used with different thicknesses. For user convenience it is possible to extend and modify this Global Material Catalogue either by adding new materials or by changing already existing ones. The user can also replace an existing material in his local Material Catalogue by a material from the Global Material Catalogue.
After definition of the electrical properties of the selected material for a special frequency, this step can be repeated for other frequencies (if required). In this context it is important to mention that for the prediction within ProMan always the electrical properties of the nearest frequency band will be considered automatically according to the defined frequency within ProMan.