SS-T: 0000 EDEM, Transfer Chute Deflector Plate
Tutorial Level: Intermediate Learn how to export data from Altair EDEM for use in linear structural analysis in SimSolid.
- Purpose
- This tutorial is intended for users with experience using EDEM. In this tutorial, you will do the following:
- Export force data from EDEM.
- Prepare, solve, and post process the model in SimSolid.
- Model Description
- The following file is needed for this tutorial:
- Transfer Chute for SimSolid.dem
-
Figure 1. 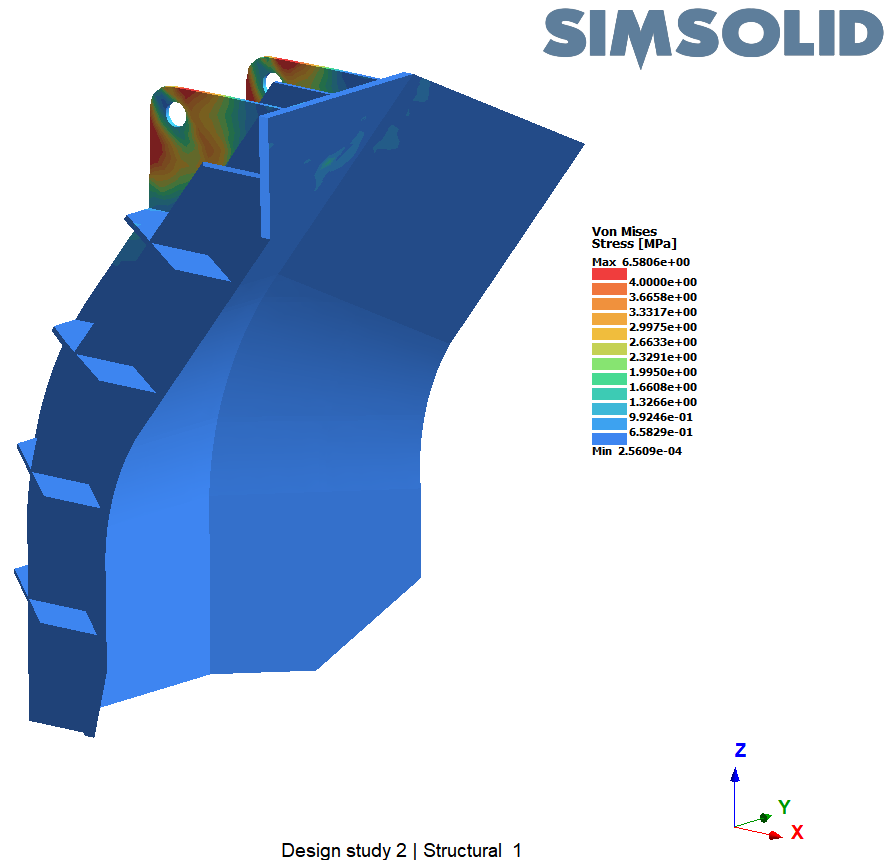
Export Force Data
- Launch EDEM.
- In the main menu, click .
- Select the file Transfer Chute for SimSolid.dem and click Open.
- In the main menu, click to switch to the Simulator view.
-
Click
 to run the simulation for 10 seconds.
Figure 2. 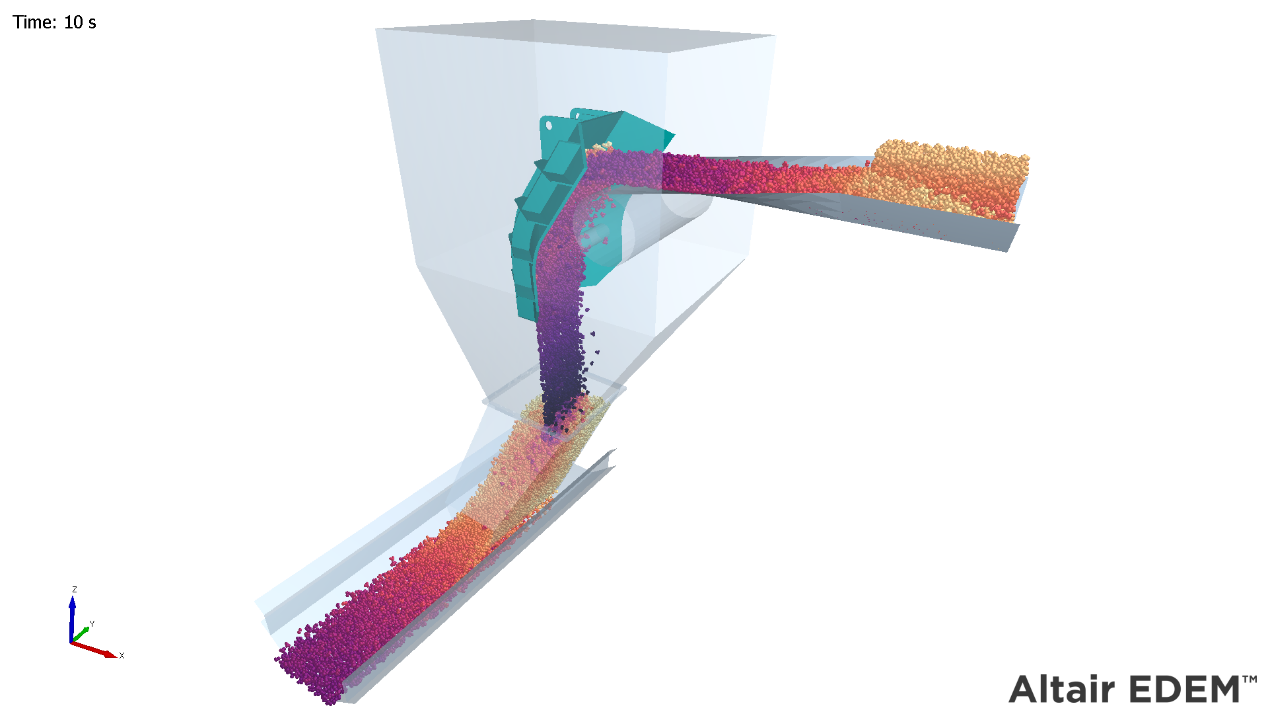
- In the main menu, go to to switch to the Analyst view.
- Go to .
-
Verify the Average to File option is activated.
This averages any forces acting on the plate over a chosen time range. For instantaneous forces, select timestep per file.
- For the Start Timestep, enter 2 seconds.
- For the End Timestep, enter 10 seconds.
- For Geometry, select the Deflector Plate.
- For Contact Force, add a file name.
- Click Export.
- Click Close.
Import Geometry
- Open a new SimSolid session.
-
Click
 Import from file .
- In the Open geometry files dialog, choose Deflector plate.step.
-
Click Open.
The assembly will load in the modeling window.
Assign Materials
- In the Project Tree, open the Assembly workbench.
-
In the Assembly workbench, select
 Apply/review
materials > Apply materials.
Apply/review
materials > Apply materials.
- Select Steel from the Generic materials list.
- Click Apply to all parts.
-
Click Close.
In the Assembly branch of the Project Tree, material properties are identified for each part.
Create Structural Linear Analysis
-
In the main window toolbar,
click
 Structural Analysis > Structural linear.
-
In the Analysis Workbench, select
 Constraints > Immovable support.
- In the dialog, verify the Faces radio button is selected.
-
In the modeling window, select the face(s) highlighted in
orange in the figure below.
Figure 3. 
-
In the Analysis Workbench toolbar, select
 Force/Displacement > Imported forces.
- Click Import from CSV.
-
Select the .csv file created previously.
The units should be set to mm and N.
- Click OK.
Edit Solution Settings
- In the Analysis branch of the Project Tree, double-click on Solution settings.
- In the Solution settings dialog, for Adaptation select Global+Local in the drop-down menu.
- Click OK.
Run Analysis
- In the Project Tree, open the Analysis Workbench.
-
Click
 Solve.
Note: When using Global solution settings, this analysis can take up to ten minutes to run.
Solve.
Note: When using Global solution settings, this analysis can take up to ten minutes to run.
Review Results
-
In the Analysis Workbench
toolbar, click
 Results plot.
-
Select any plot option from the menu.
The Legend opens and displays a contour plot of the chosen results.
- Use the display options in the Legend to alter the results view.