Assign Part Properties Automatically
Use the unified parts linked to assign part properties automatically.
-
In the Part library directory, click
 to navigate to explore the library path for the unified parts.
-
Click Synchronize to assign the part properties.
After the linking operation is successfully completed, iconic marks appear in the Package, Electrical, and Thermal columns.
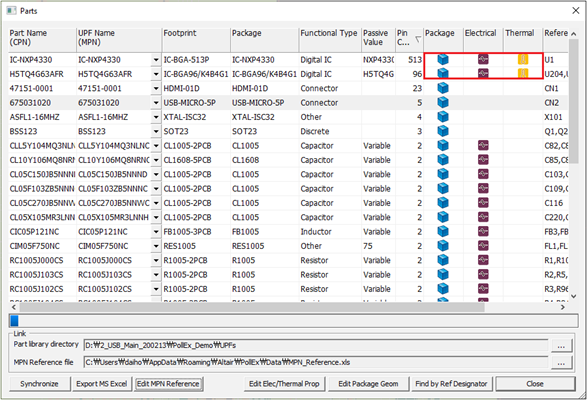
Figure 1.- Contents name under UPF Library Part column denotes that UPF file exists under local Parts folder for those parts.
- Icon under Package column denotes that 3D package geometry is linked with unified part.
- Icon under Electrical column denotes that electrical buffer model is called from unified part.
- Icon under Thermal column denotes that thermal information is called from unified parts.