Click the navigation menu () located in the
upper left-hand corner of the web page.
Click Compute Engine > VM instances.
Click CREATE INSTANCE.
Enter the following to create a virtual machine:
For Name, enter a name for the virtual
machine.
The name can be anything meaningful to your organization, e.g.,
bursting-vm.
For Zone, select a zone that is in the same
Region as the subnet of the previously created VPC.
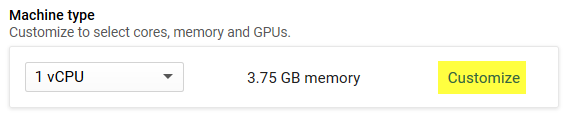
In the Machine type, click the
Customize link. Choose a family (Compute
Optimised) and then a machine type from the dropdown.
Figure 1. Customize the Machine Type
Specify the CPUs, GPUs and RAM.
Consider the nature of the applications that you plan to deploy on the instance, the number of users that you expect to use the applications, and also how you expect the load to scale in the future. Remember to also factor in the CPU and memory resources that are necessary for the operating system.
For Boot disk, click
Change.
Choose an OS that supports cloud-init and is supported by your workload
manager.
For Boot disk type, choose one of the following
options:
Standard persistent disk
SSD persistent disk
Choose SSD for I/O-intensive applications, where low latency and high
throughput are critical. For testing, consider Standard persistent
disk to keep costs down.
For Size, specify the size of the boot
disk.
Click Select.
Under Identity and API access, for Service Account, select
No service account.
For Firewall, choose Allow HTTP
traffic and Allow HTTPS
traffic.
Click the Networking, Disks, security, Management,
Sole-Tenancy dropdown to get the list of options
available.
Click the Networking section.
Click the default network menu and choose the VPC you created
previously.
For Network Service Tier, click
Standard.
Click Done.
Delete any default network interfaces that might have been
automatically generated.
Click the Security section.
For SSH Keys, copy the SSH public key (i.e.,
id_rsa.pub) of a user account that exists on your site's workload
manager and paste it. Append ==<username>at the end
of your key. e.g. ==centos.
This user will have sudo rights and will be able to SSH into the VM to
install the PBS MoM.
 ) located in the
upper left-hand corner of the web page.
) located in the
upper left-hand corner of the web page.