Register the NavOps Application with Azure
Register NavOps with Azure so that you can later add a cloud credential in NavOps.
Azure documentation can be found at Quickstart: Register an application with the Microsoft identity platform.
- Application ID generated when registering NavOps with the Azure Active Directory.
- Client secret key generated for the newly registered NavOps application.
- Subscription ID
- Tenant ID
- Login in to your Microsoft Azure account.
Register NavOps to the Azure Active
Directory.
-
Using the search box, enter app reg.
A list of search results is listed.
- Under Services, click App registrations.
- Click New registration.
-
Enter the following to register NavOps to the Azure Active
Directory:
-
Click Register.
Once the application registration is complete, its details are displayed, including an Application ID.
Obtain the application id of the newly registered
application.
- Hover over the Application (client) ID and click the copy to clipboard icon when it appears.
-
Store the Application ID to a file.
The Application ID is used later to create a cloud credential in NavOps.
Create a client secret key for your newly registered
application.
-
Click Certificates and secrets from the Manage menu
located on the left-hand side of the web page.
Figure 1. Certificates and Secrets 
- Under Client secrets, click New client secret.
-
Enter the following to add a client secret:
- For DESCRIPTION, enter pc_client_secret.
- For EXPIRES, select 24 months.
-
Click Add.
A client secret key is generated and is displayed under the heading VALUE.
- Click copy to clipboard icon next to the client secret key.
-
Store the client secret key to a file.
The client secret key is used later to create a cloud credential in NavOps.
Obtain your Azure subscription
ID.
-
Using the search box, enter subscription.
A list of search results is listed.
- Under Services, click Subscriptions.
-
Locate and click your subscription.
Details about the subscription are displayed, including a Subscription ID.
- Hover over the Subscription ID and click copy to clipboard icon when it appears.
-
Store the Subscription ID value to a file.
The Subscription ID is used later to create a cloud credential in NavOps.
Assign an access control role to the newly registered
application.
-
Click Access control (IAM).
Figure 2. Add Access Controls 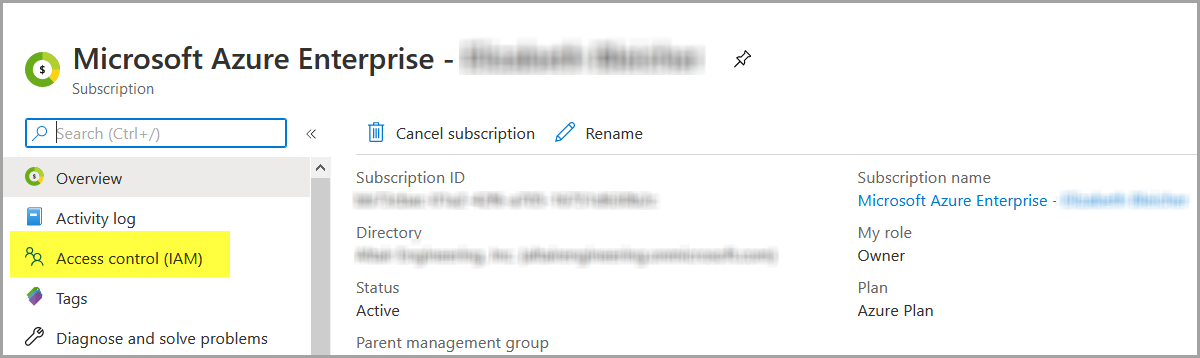
- Click Add.
- Click Add role assignment.
-
In the Add role assignment panel, enter the following to assign a role to the
newly registered application:
- For Role, select Contributor.
- For Assign access to, select user, group, or service principal.
- For Select, search for the newly registered application by entering its name, e.g., pc_cloudapp.
- Select the application by clicking on it.
-
Click Save.
Note: For scaling to work in Azure, a minimal permission can be set that a Role of Contributor is available at the Resource Group level for the Resource Groups we will use for scaling.
Obtain your Azure tenant ID:
- At the top of the web page, click ?.
-
Click Show diagnostics.
A dialog box is displayed allowing a file called PortalDiagnostics.json to be saved.
- Open the file using any text editor.
- Search for tenantId.
-
Store the value of tenantId to a file.
The Tenant ID is used later to create a cloud credential in NavOps