Use the Section Cuts tool to cut planar or spherical
sections through a model.
Create Section Cuts
From the View Controls toolbar, click .
In the Section Cuts dialog, click to create a
new section cut.
Click of the left side of the
microdialog to select either a planar or spherical
section cut.
Change the display and position of the section cut using the other microdialog options.
Display only the section cut by clicking .
Reverse the part of the model that is hidden by clicking .
Trim elements along the plane/sphere to create a smooth section cut by
clicking .
Translate or rotate the section cut using graphical manipulators by
clicking . For
spherical section cuts, the yellow manipulator can be used to adjust the
radius of the sphere.
Tip: You can also click and drag the frame directly. After
exiting the section cut tool, these frames remain visible, allowing
you to translate or rotate a section cut at any time. For planar
section cuts, click and drag the center of the frame to translate.
Click and drag a corner or an edge to rotate.
Align the section plane to the x, y, or z-axis by clicking .
Note: Only available for planar section cuts.
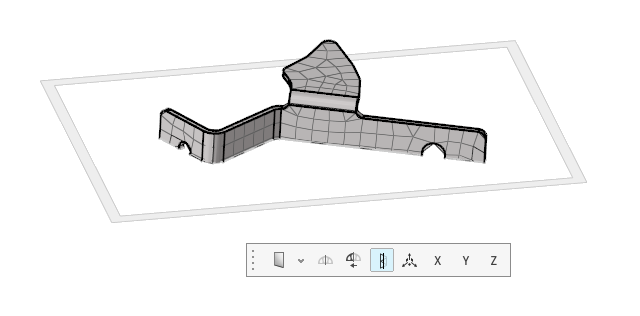
Figure 1. Planar Section Cut
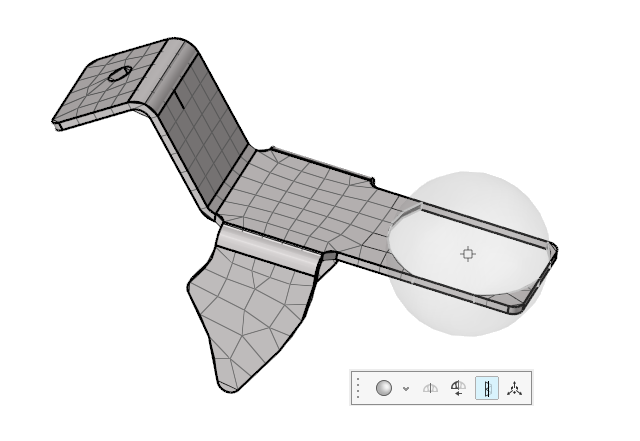
Figure 2. Spherical Section Cut
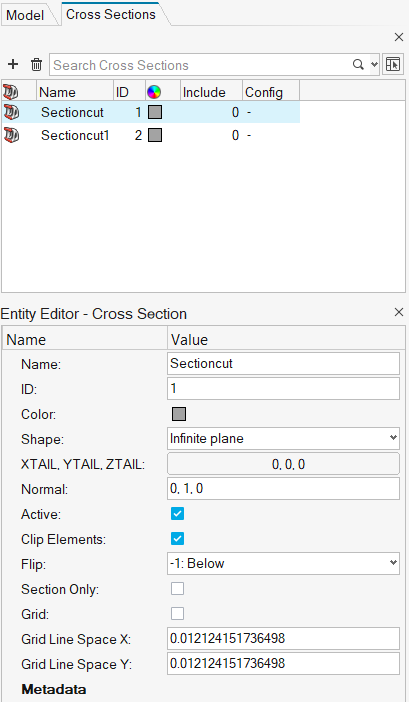
After creating a section cut, it is added to the Model Browser as a Cross Section entity. Its basic parameters can
then be changed in the Entity Editor. To edit and adjust a
section cut in the tool, right-click on it in the Section Cuts
dialog and select Edit.Figure 3.
The display of the section cut frame can be changed at
any time using standard Show/Hide operations. Note that this does not make the
section cut inactive.
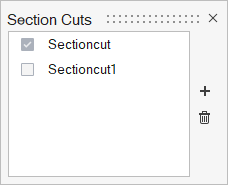
View Section Cuts
From the View Controls toolbar, click .
In the Section Cuts dialog, enable the checkboxes of the
section cuts you wish to view.
 .
.
 to create a
new section cut.
to create a
new section cut.
 of the left side of the
microdialog to select either a planar or spherical
section cut.
of the left side of the
microdialog to select either a planar or spherical
section cut.
 .
. .
. .
. . For
spherical section cuts, the yellow manipulator can be used to adjust the
radius of the sphere.Tip: You can also click and drag the frame directly. After exiting the section cut tool, these frames remain visible, allowing you to translate or rotate a section cut at any time. For planar section cuts, click and drag the center of the frame to translate. Click and drag a corner or an edge to rotate.
. For
spherical section cuts, the yellow manipulator can be used to adjust the
radius of the sphere.Tip: You can also click and drag the frame directly. After exiting the section cut tool, these frames remain visible, allowing you to translate or rotate a section cut at any time. For planar section cuts, click and drag the center of the frame to translate. Click and drag a corner or an edge to rotate. .Note: Only available for planar section cuts.