
Edit the Camera
By customizing the camera's position, angle, rendering image resolution, and rendering image quality, you can view and render your models from multiple perspectives and create a more distinctive scene.
Define the Camera's Rendering Resolution
Choose from a list of presets or enter a custom width and height.
-
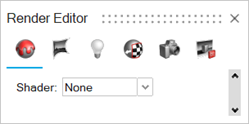
On the Rendering tab, select the
Editors tool.
Tip: To find and open a tool, press Ctrl+F. For more information, see Find and Search for Tools.The Render Editor appears.
-
Select the Camera tab.
-
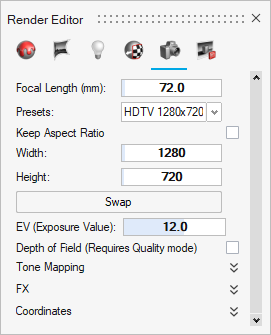
In the Render Editor, you can do the following:
- Select from a list of presets.
- Or select Custom, and then:
- Select an Aspect Ratio.
- Enter the Width and Height. To swap the width and height, click Swap.
Tip:- To swap the width and height, click the Swap button.
Define the Camera's Rendering Quality
Configure various options such as panoramic, depth of field, exposure, tone mapping, filtering, and rendering effects.
-
On the Rendering tab, select the
Editors tool.
Tip: To find and open a tool, press Ctrl+F. For more information, see Find and Search for Tools.The Render Editor appears.
-
Select the Camera tab.
-
In the Render Editor, you can define the following options:
Option Description Focal Length (mm) Enter the distance between the point where light converges in a lens and the camera's sensor or film. A short focal length creates a wider angle of view, making the subject appear smaller in the image. Lenses with shorter focal lengths are better for landscapes.
A long focal length creates a narrower angle of view, making the subject appear larger in the image. Lenses with longer focal lengths are better for wildlife or sports photography.
Exposure Value (EV) Controls the camera's shutter speed. Lower values result in brighter images. For an overly bright scene, use a positive value. For an overly dark scene, use a negative value. Depth of Field (Perspective Camera) Adjust the camera focal point and the distance of the focal area. Use a large DOF when you want the entire image to be sharp. Use a small DOF when you want to emphasize the subject and de-emphasize the foreground and background. By default, the camera is automatically focused on the closest point in the scene.Note: Depth of Field requires Display Mode to be set to Quality Render or Performance Render. For the latter, it is available as an approximation.- Strength
- Adjust the range of points that will stay in focus. A larger value will blur more of the surrounding scene, while a smaller value will diminish the blurring effect.
- Manual Focus
- Use the following options to manually focus on a
certain point or distance from the camera. You can
apply each option independently of the other
option, but if you select a focal point, the Focus
Distance automatically updates to reflect the
point's distance from the camera.
- Focus Distance
- The distance from the camera to focus on.
- Select Focal Point
- Use the mouse to select a point to focus on.

Tone Mapping - Filmic
- The Filmic option only works if you turned on
Filmic in the Camera/Rendering settings.
- Highlights
- Higher values will make highlights stronger.
- Burn
- The burn value minimizes the burnt areas of an image. Lower values will reduce burnt areas.
- Brightness
- Use a value from ‐100% to 100% to control the tone of the texture. A brightness of ‐100% makes the image completely black.
- Contrast
- Higher values will give higher contrast.
- White Balance (K)
- Can be used to balance an image using color temperature. A value of 6500K is usually used to balance light coming from the sun.
FX - Vignetting
- It mimics the phenomenon where light comes through the lenses near the edges. Higher values will make the edges of the image look darker.
Coordinates - Position
- Enter precise x, y, z coordinates or drag the Position point in the modeling view to change the camera's position.
- Target
- Enter precise x, y, z coordinates or drag the Target point in the modeling view to change the camera's target.
- Orientation
- Enter precise x, y, z coordinates to change the camera's orientation.
Note: In the modeling window, drag the rectangle of Field of View to resize the observable area seen through the camera.