
Add Lights
Add, reposition, and edit lights for the scene.
Add Environment Lights
Add ambient lighting to your scene.
-
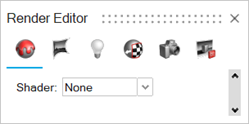
On the Rendering tab, select the
Editors tool.
Tip: To find and open a tool, press Ctrl+F. For more information, see Find and Search for Tools.The Render Editor appears.
-
Select the Environment Lights tab.
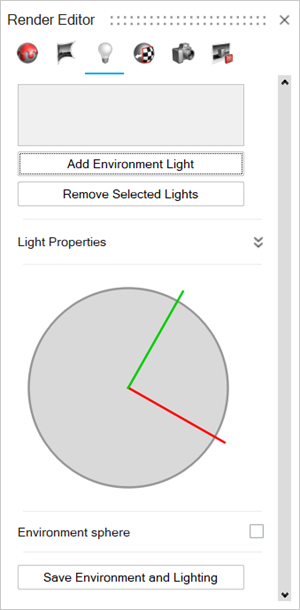
- Next to Environment Lights, click the chevron.
-
Do one of the following:
- To add an environment light at the default location, click the Add Environment Light button.
- To interactively add an environment light:
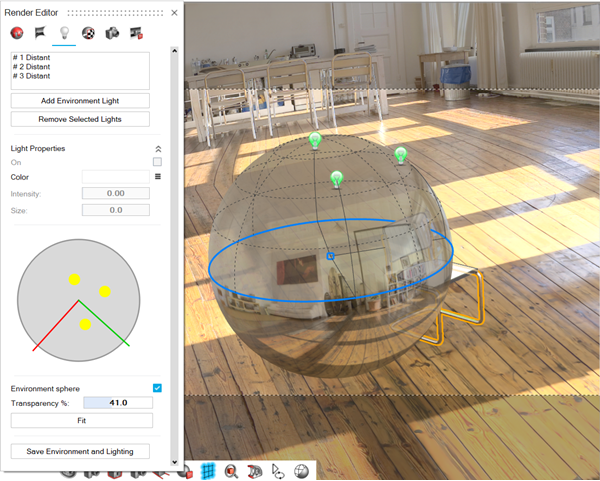
- In the Render Editor, turn on Environment sphere.
- While holding down Alt, click the desired location in the modeling window.
Note: You can add up to three environment lights.The lights are added to the list.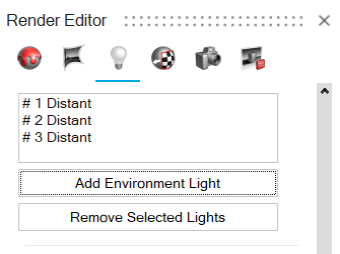
-
To modify the lights:
-
Select the desired lights from the list or in the illustration.
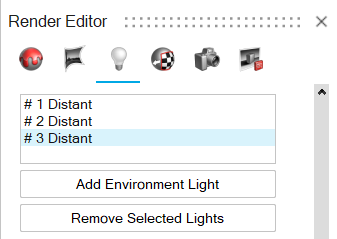 In the illustration, the selected lights are outlined in red.
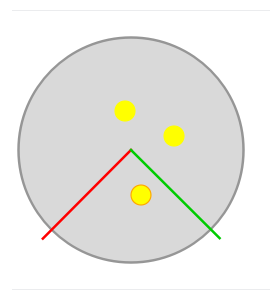
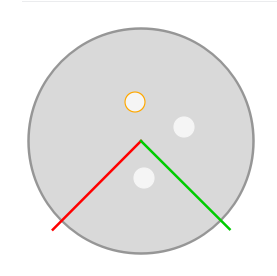
To Do this (Render Editor) Do this (Environment Sphere) Turn lights on or off in the final rendering Under Light Properties, enable the On switch. Lights that are on are highlighted yellow in the illustration. 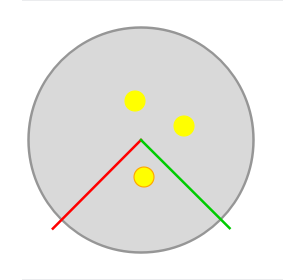
Disable the switch to turn the light off. Lights that are off are gray.
- In the Render Editor, turn on Environment sphere.
- In the modeling window, select a light.
- In the microdialog, enable or disable the On switch.
Change the color - Under Light Properties, do
one of the following:
- Next to Color, select preview image. By default, it is a white box.
- Next to Color, select
 , then click
Select a Color.
, then click
Select a Color.
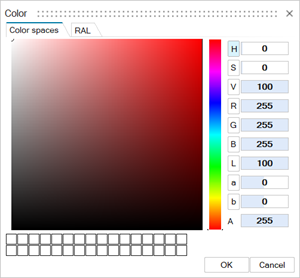
- Define the color of the light, then click
OK.
- In the Render Editor, turn on Environment sphere.
- In the modeling window, a sphere appears with light
bulbs, indicating lights and their positions within
the environment sphere. Selected lights are outlined
in yellow.
- Click a light.
- In the microdialog, next to
Color, select , then click
Select a Color.
- Define the color of the light, then click
OK.
Reposition a light In the illustration, drag a yellow circle, which represents a light in the scene. - In the Render Editor, turn on Environment sphere.
- In the modeling window, a sphere appears with
light bulbs, indicating lights and their positions
within the environment sphere. Selected lights are
outlined in yellow.
- Drag a light.Note: To reposition multiple lights simultaneously, hold down Ctrl while dragging the lights.
Change the intensity Under Light Properties, enter the Intensity. - In the Render Editor, turn on Environment sphere.
- In the modeling window, a sphere appears with light
bulbs, indicating lights and their positions within
the environment sphere. Selected lights are outlined
in yellow.
- Click a light.
- In the microdialog, enter the Intensity.
Change the physical size Under Light Properties, enter the Size. - In the Render Editor, turn on Environment sphere.
- In the modeling window, a sphere appears with light
bulbs, indicating lights and their positions within
the environment dome. Selected lights are outlined
in yellow.
- Click a light.
- Enter the Size.
Position the light's target Position Target is only available in the Environment sphere microdialog. - In the Render Editor, turn on Environment sphere.
- In the modeling window, a sphere appears with light
bulbs, indicating lights and their positions within
the environment dome. Selected lights are outlined
in yellow.
- Click a light.
- Click Position Target.
- Click the area you'd like illuminated.
Position the light's reflection Position Reflections is only available in the Environment sphere microdialog. - In the Render Editor, turn on Environment sphere.
- In the modeling window, a sphere appears with light
bulbs, indicating lights and their positions within
the environment dome. Selected lights are outlined
in yellow.
- Click a light.
- Click Position Reflections .
- Click the area where you'd like the light to be reflected.
Adjust the transparency of the environment sphere - Turn on Environment sphere.
- Define the Transparency.
Transparency can only be adjusted using the Render Editor. Automatically fit the lights to the scene - Turn on Environment sphere.
- Click Fit.
The Fit option is only available in the Render Editor. Remove a light - Select a light from the list or in the illustration.
- Click Remove Selected Lights.
Remove Selected Lights is only available in the Render Editor. -
Select the desired lights from the list or in the illustration.
-
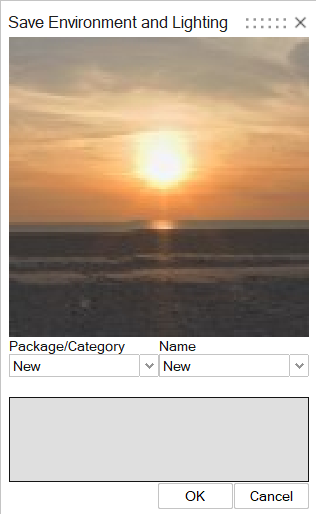
To save the environment and lighting parameters to use as a preset later, click
Save Environment and Lighting.
The Save Environment and Lighting window appears.
Add Physical Lights
Add point lights, which radiate light in all directions and are useful for generating soft shadows. Common examples include light bulbs and candles.
-
On the Rendering tab, select the
Editors tool.
The Render Editor appears.
-
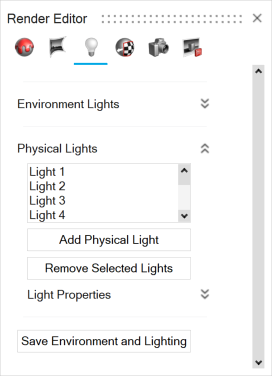
Select the Environment Lights tab.
- Next to Environment Lights, click the chevron.
- Next to Physical Lights, click the chevron.
-
For each light you want to add, click the Add Physical
Light button.
The lights are added to the list.
-
To modify the lights:
-
Select the desired light from the list.
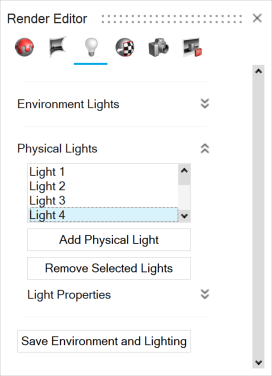
To Do this Turn lights on or off in the final rendering Under Light Properties, enable the On switch. Disable the switch to turn the light off. Lights that are on are highlighted yellow in the modeling window.
Lights that are off are hidden.
Change the light type Under Light Properties, from the Type dropdown menu, Point is currently the only option available. Change the unit Under Light Properties, from the Unit dropdown menu, choose from the following: - Watts/LED
- Watts/Incadescent
- Lumens
The Power value is adjusted automatically.
Adjust the power Under Light Properties, enter the Power. Change the color of a light It is recommended to use subtle, light colors for better results. - Under Light Properties, do
one of the following:
- Next to Color, select preview image. By default, it is a white box.
- Next to Color, select
, then click
Select a Color.
- Define the color of the light, then click
OK.
Reposition a light In the modeling window, drag an arrow to move the light along the x-, y-, or z-axis. Change the physical size of the light Under Light Properties, enter the Size. Remove a light - Select a light from the list.
- Click Remove Selected Lights.
Show a light in interactive rendering mode Under Light Properties, turn on Show/Hide. Hide a light in interactive rendering mode Under Light Properties, turn off Show/Hide. -
Select the desired light from the list.
-
To save the environment and lighting parameters to use as a preset later, click
Save Environment and Lighting.
The Save Environment and Lighting window appears.