Upload Functional View
You can build your own Functional Views from an external Excel file. The uploaded Functional View creates a new Functional View from an external Excel file or updates the current Functional View by inserting the structure described in the external Excel file.
- Click .
-
Click the
 icon.
icon.
-
In the Import Functional View dialog box, select one of
the following options:
- Update Current Functional View
- Create New Functional View
Update Current Functional View
The Functional View that you upload will update the current Functional View by inserting the structure described in the external Excel file.
-
In the Update current Functional View tabbed page, click
Upload to navigate to the Excel file that you
want to upload.

-
Select any of the following three options:
- Fuse selected node with file's root node or
Append the file's root node as child of the selected
node.Turn on the Append the file's root node as a child of the selected node toggle if you want to append the root node defined in the Excel file as a child of the node selected in the current Functional View.Note: Turning on this toggle will disable the other two options.
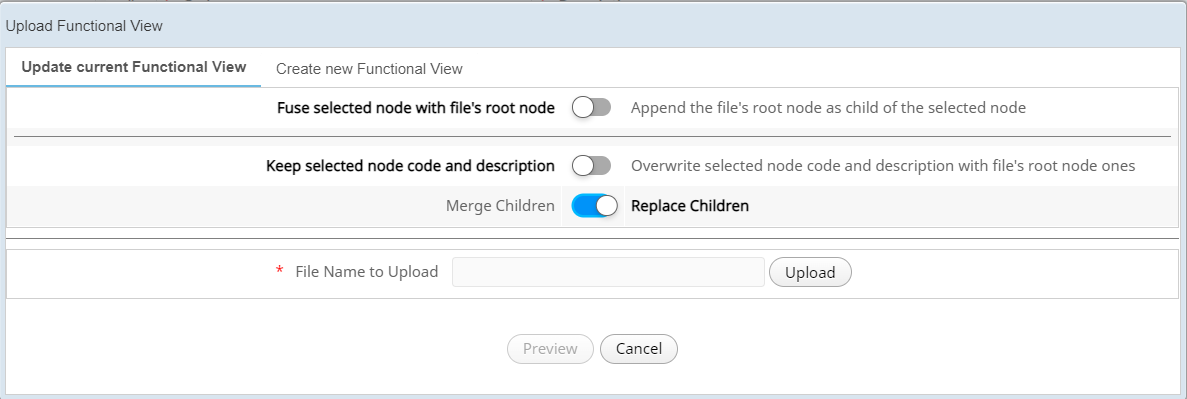
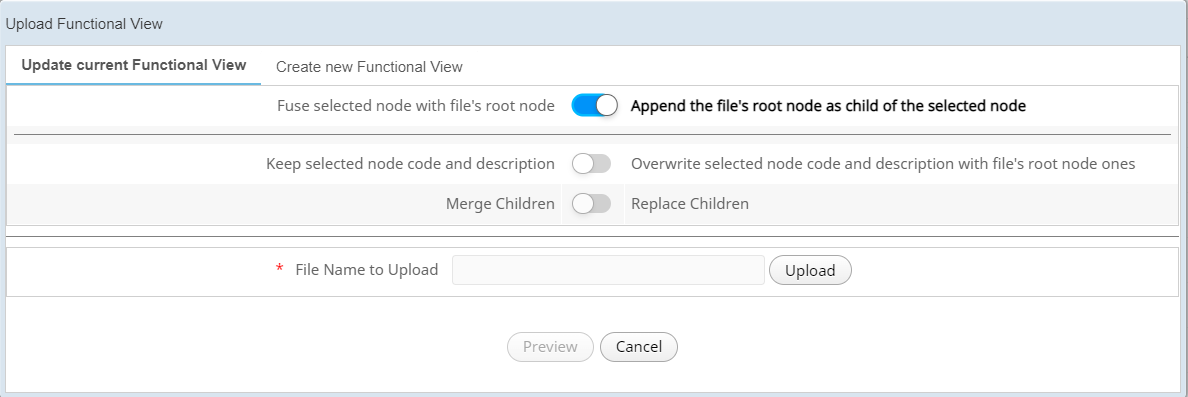 Turn on the Fuse selected node with file's root node toggle if you want the root node defined in the Excel file to be positioned instead of the selected node of the current Functional View.Note: In this case, the following two toggles are enabled.
 - Keep selected node code and description or
Overwrite selected node code description with file's root
node ones.
Turn on the Keep selected node code and description toggle to maintain the code and description of the node selected in the current Functional View, and discarding the code and description of the root node defined in the Excel file.
Turn on the Overwrite selected node code description with file's root node ones toggle if you want the selected node replaced by the file root node. The selected node's children are maintained.
- Merge Children or Replace
Children.Turn on the Merge Children if you want to maintain both the structures under the selected node and the structure defined in the Excel file under the root node by merging these two sets.
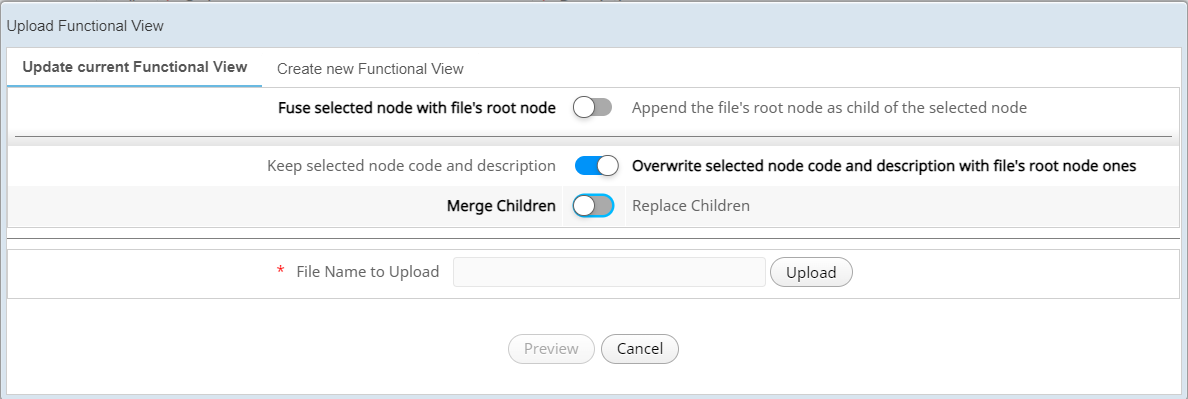 Note: This toggle helps configure how the functionality will behave with the children of Current Functional View 's selected node with respect to the children of root node as defined in the Excel file.
Turn on the Replace children toggle if you want to delete the current Functional View's selected node children and replace them with the content of the Excel file (children of root node).
- Fuse selected node with file's root node or
Append the file's root node as child of the selected
node.
Create New Functional View
You can create a new Functional View from an external Excel file.
- Select the Create new Functional View tabbed page.
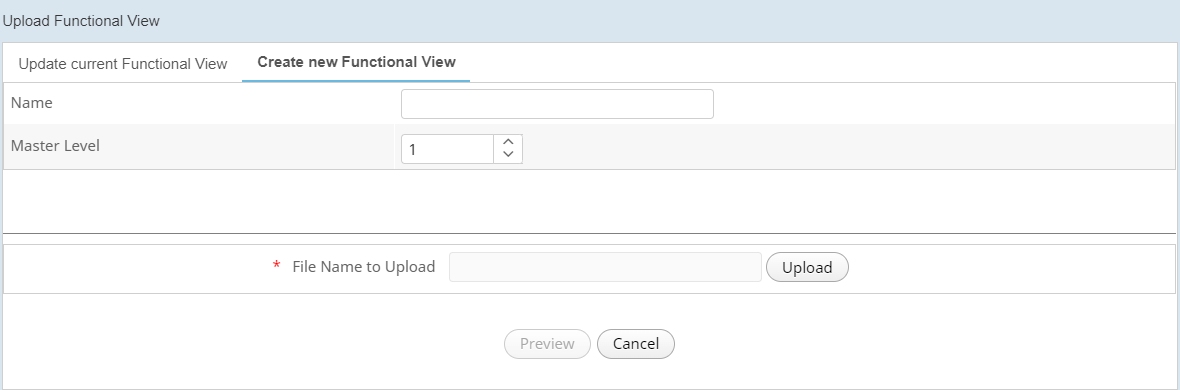
- Specify the name of Functional view to be created.
- Specify the Master Level which is the number of sub-levels that the Functional View must contain in the Max Level field.
- Click Upload to navigate to the file that you want to import into the node.
- Click Preview and then click
Confirm to create the new Functional View.
The content of the entire file is moved to the selected node of the Functional View.