Submit a Job from a Shared File System
Submit a job from your shared file system after mapping a network drive and configuring shared file system.
Map a Network Drive
Map a network drive to create a shortcut to the shared file system path.
Mapping a network drive will help you to access the shared files just the way you access your local files. When you map a network drive, it will display as a new drive in the File Explorer.
- Open File Explorer.
-
Perform one of the following options based on Windows version:
- In Windows 7, right click Computer and select Map network drive... from the context menu.
- In Windows 8 or 10, right click This PC and select Map network drive... from the context menu.
A Map Network Drive menu is displayed.Figure 1. Map Network Drive 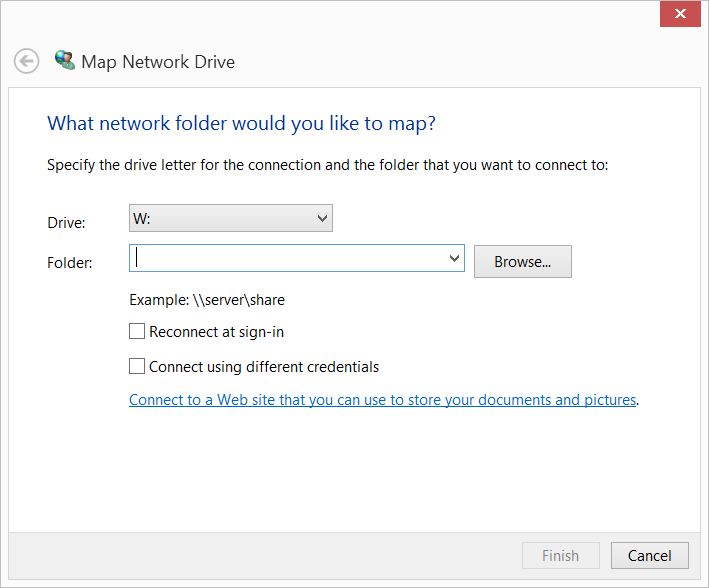
- Select the drive letter you want to use for the network folder.
-
Choose one of the following options:
- Enter the shared file system path provided by the administrator.
- Click Browse to navigate to the folder or path you want to map and click OK.
An example of a windows network drive is: \\hwesuse110-14\share - Enable Reconnect at sign-in, so it is always available to you when you login to the system.
- Enable Connect using different credentials to login to the mapped network drive with a different user credentials.
- Click Finish.
Configure a Shared File System Path
Configure a shared file system path to submit jobs from the mapped server.
You must have already mapped the network drive to the shared file system.
Mapping the shared file system allows Access Desktop to read and write files from the shared server by accessing the drive.
- Open the Windows system tray.
-
Double-click the Access Desktop icon
 .
.
-
Click
 .
.
-
Select Preferences from the menu.
A preferences menu is displayed.
Figure 2. Preferences 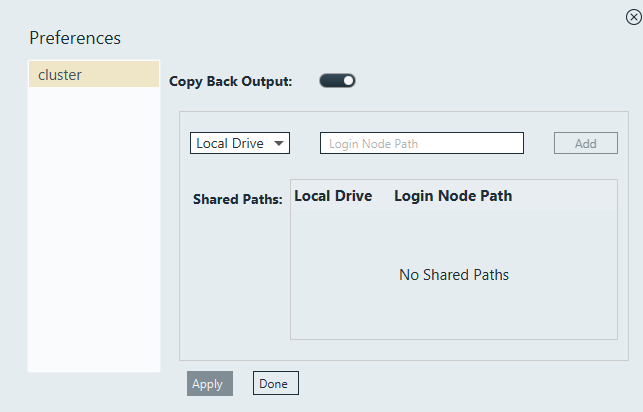
- Select the cluster from the list that is displayed in the left to map the shared network path.
- Select the mapped drive from the Local Drive list.
-
Enter the Linux shared file system path in Login Node
Path.
An example of the Linux shared file system path is: /hwesuse110-14/samba/share
- Click Add.
- Click Apply.
- Click Done to close the preferences menu.
Submitting a Job by Selecting an Input File in the Shared File System
Submit a job by selecting a job input file from your shared file system.
By submitting a job from a shared file system, the process will be fast and quicker as the files are not getting uploaded or downloaded from your local host.
The job output files will be written out to the shared file system.
- the input files referenced in the master file can be in shared file system path.
- the input files referenced in the master file can be in your local system.
- the input files referenced in the master file can be in your local system and in the shared file system path.
- Open your mapped network drive in Windows Explorer.
- Select the project folder in the shared file system.
- Right-click the job input file.
- From the context menu, select Process With.
A list of solvers and saved job profiles along with the server name specific to the file type of the job input file are displayed.
Figure 3. Solvers and Job Profiles Specific to the Job Input File Type 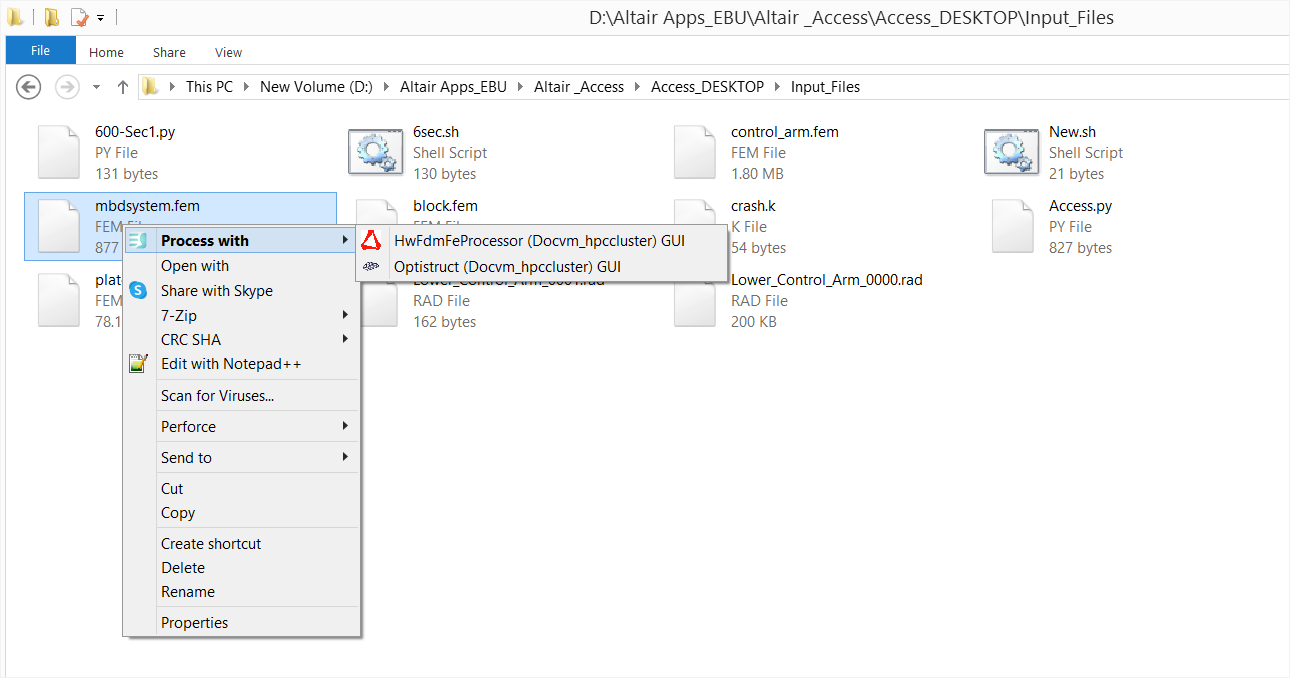
- Select a solver or job profile.
If additional information is necessary to submit the job, then a job submission form is displayed containing the required solver arguments. Otherwise, the job is submitted.Tip: To display all available solver arguments, click All Fields.
-
Fill in any required solver arguments.
To reuse the values you entered, click Save as Profile. The next time you choose Process With from the context menu, the saved profile is displayed.
- Click Submit.
The job is submitted and a notification is displayed providing the status of the job.
Tip: If the file is taking too long to upload or if you provided a wrong input file for the job, then you can cancel the file upload by clicking associated with the job and click
Remove from the context menu.
associated with the job and click
Remove from the context menu.