Face Round
Create a separate filleted surface from two intersecting faces sets.
- On the ribbon, click the Modify tab.
-
Click the Face Round icon.
- Select one or more faces as the first set. Right-click to confirm.
-
Select one or more faces as the second set. Right-click to confirm.
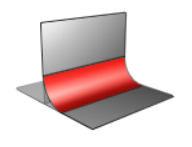
A separate filleted surface is created from the two intersecting face sets. By default, the intersecting face sets are trimmed and a blend between the edges of the two trimmed face sets is created.
-
Edit the face round:
To Do this Note Reselect the face sets - In the guide bar, select First Face Set or Second Face Set.
- Click the face sets you want to add or remove.
- Right-click to confirm.
Resize the radius In the guide bar, enter a Radius. To create a round with a constant width, turn on Constant Width. Choose the type of trimming operation to perform on the face sets In the Control Panel, for Boundary trimming type, select one of the following options: - Create a blend (default): Trimming creates a blend between the edges of the trimmed face sets.
- Trim on minimal intersection: If the face sets intersect partially, select this option to trim along the minimal intersection.
- Trim on maximal intersection: If the face sets intersect partially, select this option to trim along the maximal intersection.
- No trimming: No trimming is performed. This can be useful in case you want to perform some manual trimming.
Select all faces with continuous tangents In the Control Panel, select Propagate Over Continuous Tangents. Instead of individually selecting each face, use this option to select all faces of an object with continuous tangents, like the faces of an extruded curve. Force curvature continuity In the Control Panel, select Curvature Continuous. You can then change the Magnitude. - Right-click and mouse through the check mark to exit, or double-right-click.