Screening
Review the screening process in HyperLife Weld Certification
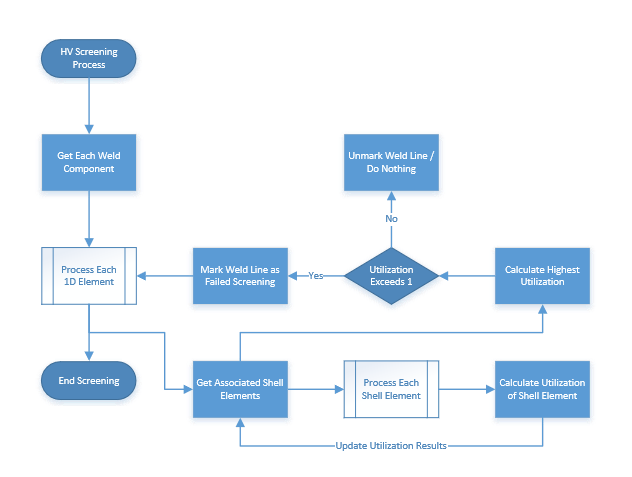
Screening will identify critical weld lines based on a simplified approach and limited user input. The intention of screening is to help minimize the preparation and calculation efforts by reducing the number of welds that need to included in the full evaluation to only those that are critically failing. In this step, the welds are screened based on certain criteria and only those welds that fail the criteria are considered for evaluation.
- Read the von Mises stresses from the FE result files.
- Compare the stress values of the elements (located within the evaluation zone) with the user-specified threshold stress value.
- Based on the comparison, determine which weld lines have passed the screening and which have failed.
- Mark the failed weld lines in the browser.
- Generate the screening results.

Calculation of Utilization Ratio
The steps used to calculate utilization are as follows:
Utilization Ratio (UR) = Elemental Stress / Threshold
Stress |
If the calculated UR value for a weld line is greater than 1, then that weld is marked as failed. If the calculated UR value for a weld line is less than 1, then the weld is considered to be safe and no action is taken upon it.
Screen Welds
Use the Inspect tool to screen welds in the model.
-
Click the Inspect tool.
Figure 2. 
The Inspect Browser dialog opens. -
Select a subcase from the drop-down menu.
You can also select a derived load case if one has been created with the Loadcase tool.
-
Enter a value for the threshold.
Von Mises stress results from the Z1 layer are used as the threshold value. Stresses which are above the specified threshold value are marked as welds to be considered for further evaluation.
-
Click Inspect.
Once the screening is complete, any failed weld lines are automatically marked for evaluation.
-
Select a visualization option.
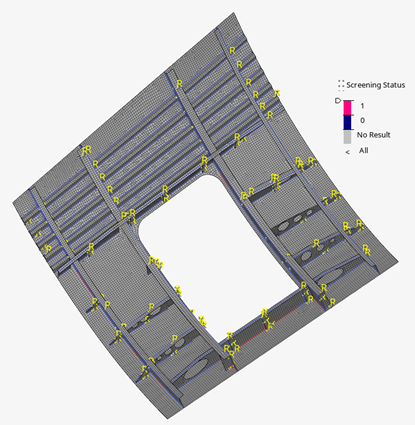
- Status
 - The
weld line screening status is shown for each weld line. Weld lines that are
colored blue indicate a passed status in screening. Weld lines that are
colored pink indicate a failed status in screening.
- The
weld line screening status is shown for each weld line. Weld lines that are
colored blue indicate a passed status in screening. Weld lines that are
colored pink indicate a failed status in screening.Figure 3. 
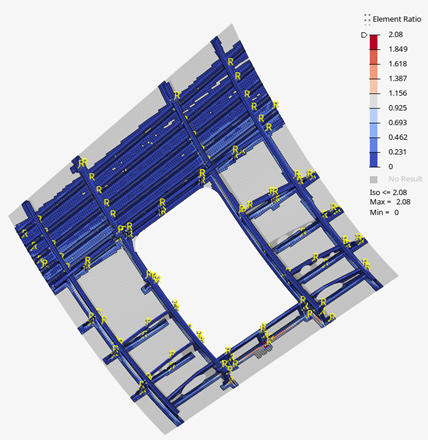
- Ratio
 - The
ratio of the von Mises stress value of an element and the threshold value
you provided is displayed.
- The
ratio of the von Mises stress value of an element and the threshold value
you provided is displayed.Figure 4. 
- Status