Visualize Results
Use the Evaluate tool explore the results of the run.
-
From the Evaluate tool group, click the
Evaluate tool.
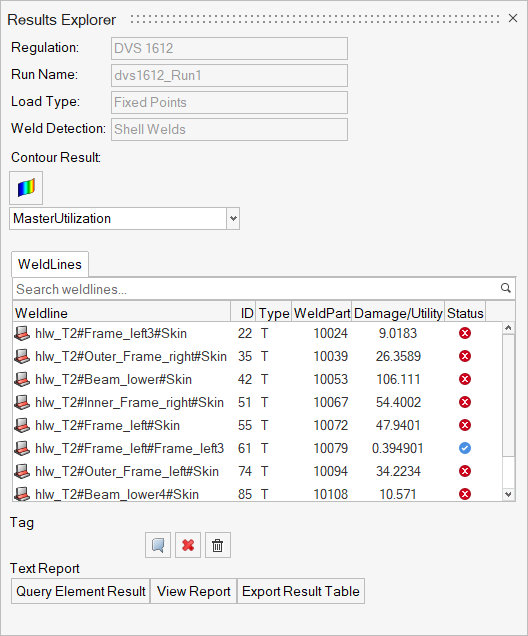
Figure 1. 
The Results Explorer is displayed.Figure 2. 
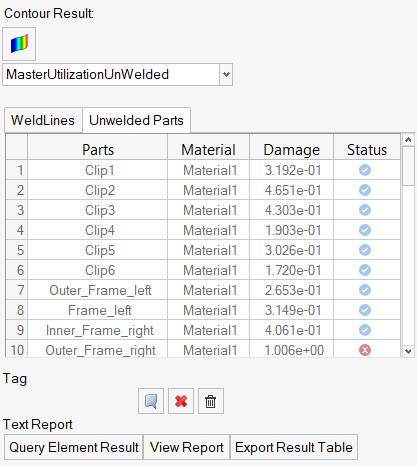
Note: If unwelded components are a part of your evaluation domain, by default you will see the contour for the unwelded base material in the modeling window.For Unwelded evaluation domains, the weld line browser is replaced by a part browser in the Results Explorer.Figure 3. 
-
Select a contour result option from the drop-down menu.
If you select a location or a layer, a second drop-down menu becomes available allowing you to select a utilization option (for both welded and unwelded domains) or specific stresses (for welded domains).
-
Click
 to update
the results in the modeling window.
- Using the legend on the right side of the modeling window, inspect the utilization values for desired elements.
- Optional: Click Export Result Table to export the Result Table as a *.csv file to your working directory.
Tip:
- Drag the slider on the legend to exclude certain value ranges from the visualization.
- Right-click on the legend to view options for numeric precision, format, level numbers, and model display.
Add Tags to Elements
Add a tag that displays an element's ID and utilization value.
Tip: From the Preferences dialog,
HyperLife Weld General section, you can change the default tag color.
-
Under the Tag field of the Results Explorer, click
 .
An entity selector appears.
 - Select elements to tag.
-
Click
 on the entity selector.
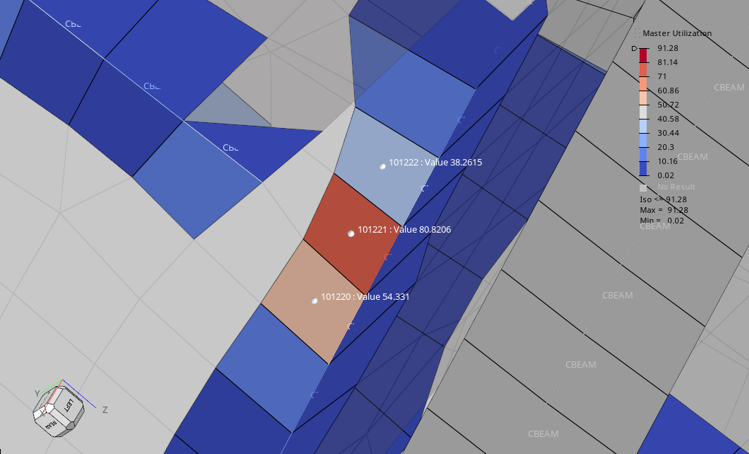
The selected elements are tagged with IDs and utilization values.
on the entity selector.
The selected elements are tagged with IDs and utilization values.Figure 4. 
Tip: To exit the context, click x on the entity selector.
Delete Tags
Remove element tags.
Remove tags individually or all at once.
| Option | Description |
|---|---|
| Delete individual tags |
Tip: To exit the context, click x on
the entity selector.
|
| Delete all tags | Under the Tag field of the Results Explorer,
click |
Query Element Results
Use this option to query multiple elements and add their results to the Utilization Results report.
-
Under the Text Report field of the Results Explorer,
click Query Element Result.
An entity selector appears.
- Select elements to query.
-
Click
 on the entity selector.
The Utilization Report is updated.
Tip: To exit the context, click x on the guide bar.
View Report
View the Utilization Results in a text file.
Text output contains the details of the critical evaluation locations and any element results that have been queried.
Under the Text Report field of the Results Explorer,
click View Report.
A Utilization Results text file opens.
Generate CSV Report
Click Generate CSV Report to export a
.csv file containing a complete dataset, including:
- Input properties defined under Points and Materials
- Output properties from the Utilization Report
This feature supports both welded and base metal evaluations.
Note: The CSV report is generated based on the Utilization TXT Report, which is created
automatically. If you've updated or added element/nodal results using
Query Element Result, click Generate CSV
Report again to include those changes.
The .csv file is saved to the run directory and is not opened automatically after export.
Important: If both welded and unwelded results are evaluated, the CSV and
Utilization Reports will reflect only the currently selected result. For example, if
welded results are currently displayed, only welded data will be included in the
exported files.