Add a Microsoft Azure Cloud Account
Add an Azure cloud account to Altair NavOps to create a cloud bursting scenario.
Before you begin: You should have the following
information stored in a file:
- Client application ID generated when registering Altair NavOps with the Azure Active Directory.
- Client secret key generated for the newly registered Altair NavOps application.
- Subscription ID
- Tenant ID
This information is necessary to create a cloud account in Altair NavOps. Azure documentation can be found at Quickstart: Register an application with the Microsoft identity platform.
For more information about tenants How to get an Azure Active Directory tenant. As a final step, add users to the Active Directory.
-
Click
 .
.
-
Enter the following to add a cloud account:
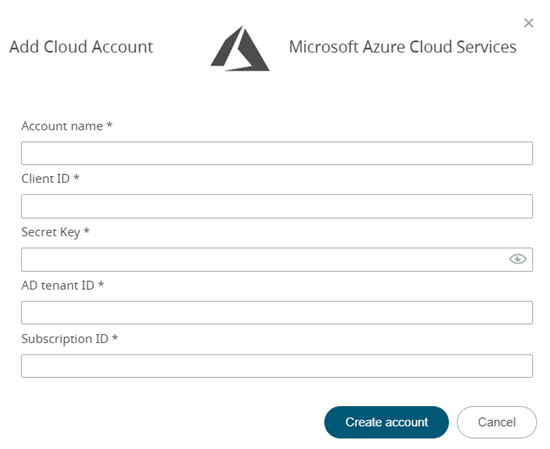
Figure 1. Add Azure Cloud Account