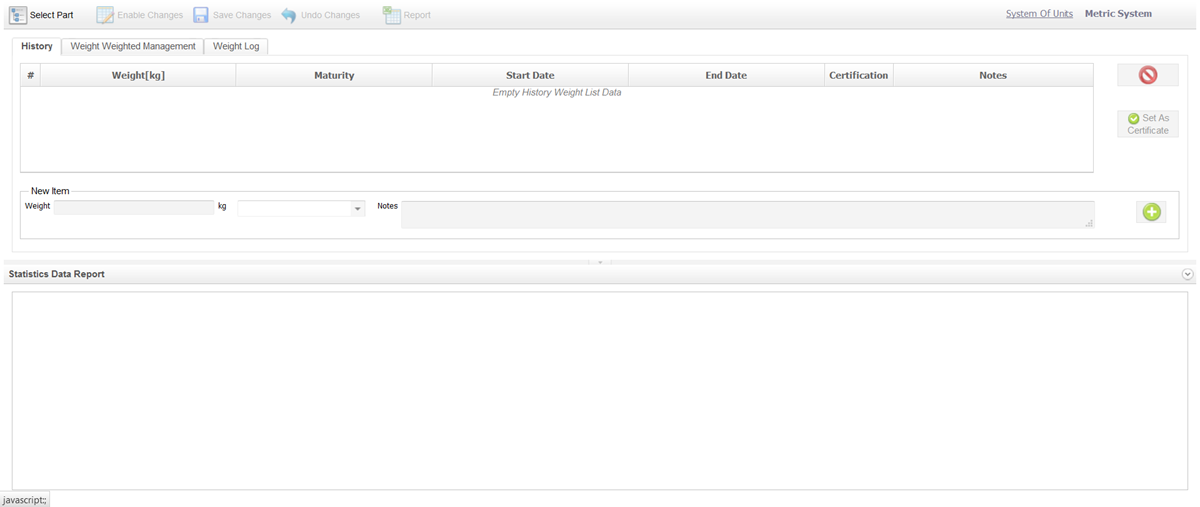
The weight history management section consists of three tabs:
History
Weight Weighted Management
Weight Log
History Tab - This tab shows the weights that have been assigned to a part in a table
form a well as in the form of a bar chart.
Weight Weighted Management - This tab allows you to create an average weight by
selecting a set of weights that have the weight maturity of Weighed.
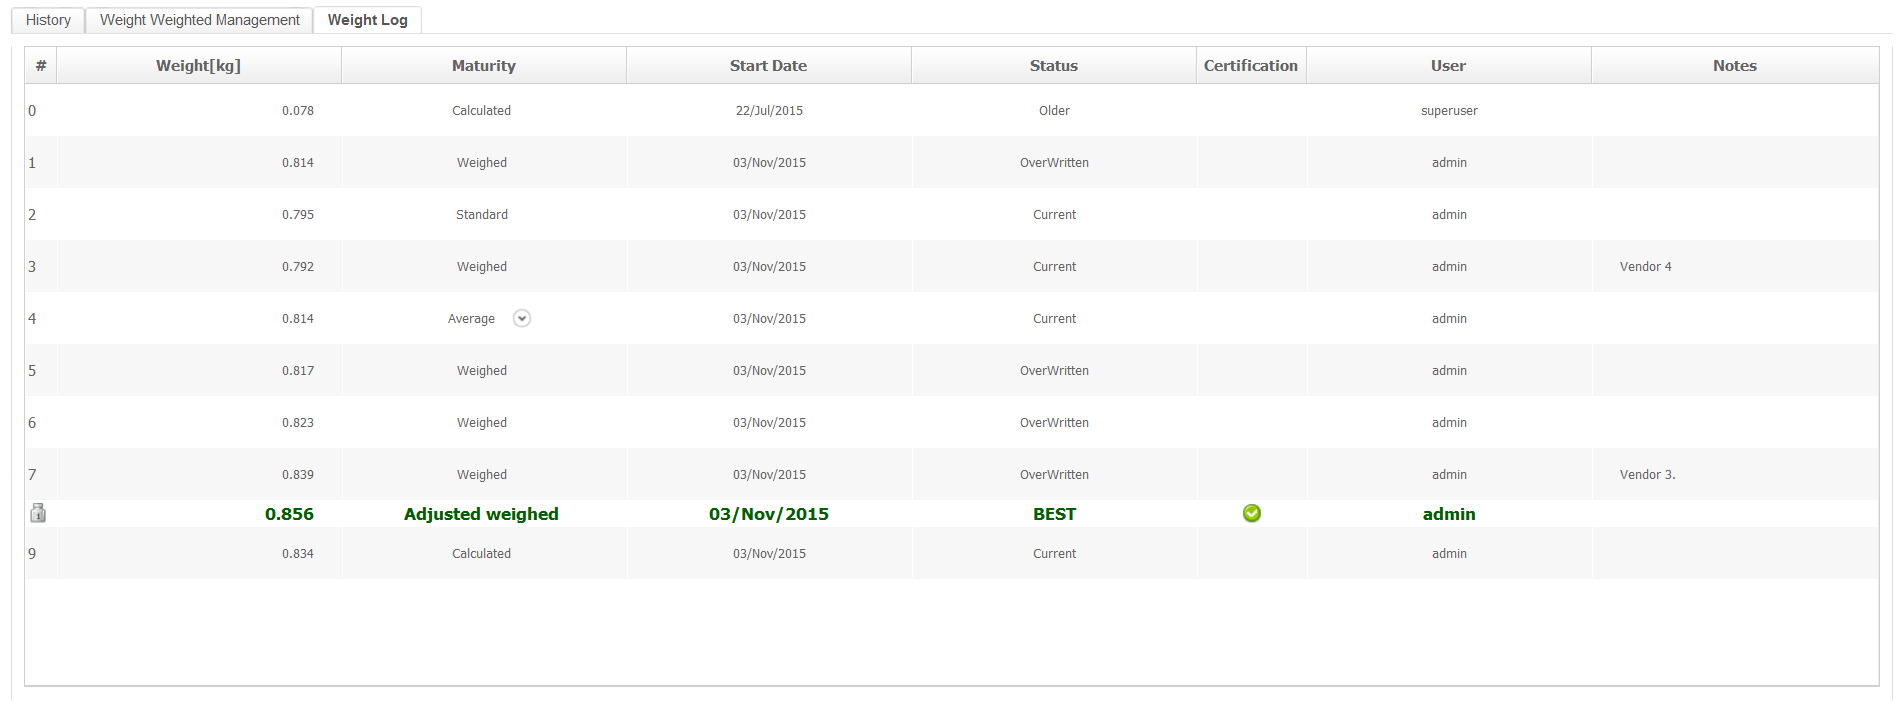
Weight Log - This tab displays all the weights that are assigned to a part. This
tabular list includes even those weights that may be currently disabled.
Click Parts Catalog > Weight History Management.
The Weight History Management page is displayed.
The page has three key tabs:
History
Weight Weighted Management
Weight Log
Click Select Part.
A part selection dialog appears.
Use the part search functionalities on the Select Part window.
The weight history of the selected part is displayed on the page.
The page will display the History tab by default. The weights table shows the weights assigned
to the selected part along with the weight maturity applied for each of the weights. The
best weight is highlighted in bold and with a green text color. The weights assigned to
the selected part are also displayed graphically as a bar chart in the Statistics Data Report section of the page.
History Tab
To edit the weight of the selected part, click Enable Changes.
The fields under New Item become editable.
Enter the value of the weight in the Weight field.
From the drop down list adjacent to the Weight field click the required weight maturity that you want to
assign to this weight.
Enter appropriate note in the Notes field.
Click Add New Item.
To disable a weight from the weight history, click the weight row that you want to
disable and click Disable Weight.
A dialog is displayed that asks for confirmation of the disable action.
Click OK to confirm the disable
action.
To specify a weight as a certified weight, click the weight row in the table and
click Set As Certificate.
The Certification column for the selected row in the table is updated with a
symbol.
Click Save Changes after the edits are done.
The weight history will be updated with the newly entered data.
Weight Weighted Management Tab
Click the Weight Weighted Management tab.
The tab will be displayed on the page.
The table in this tab displays all the weights that have been assigned to this
part with a weight maturity of Weighed.
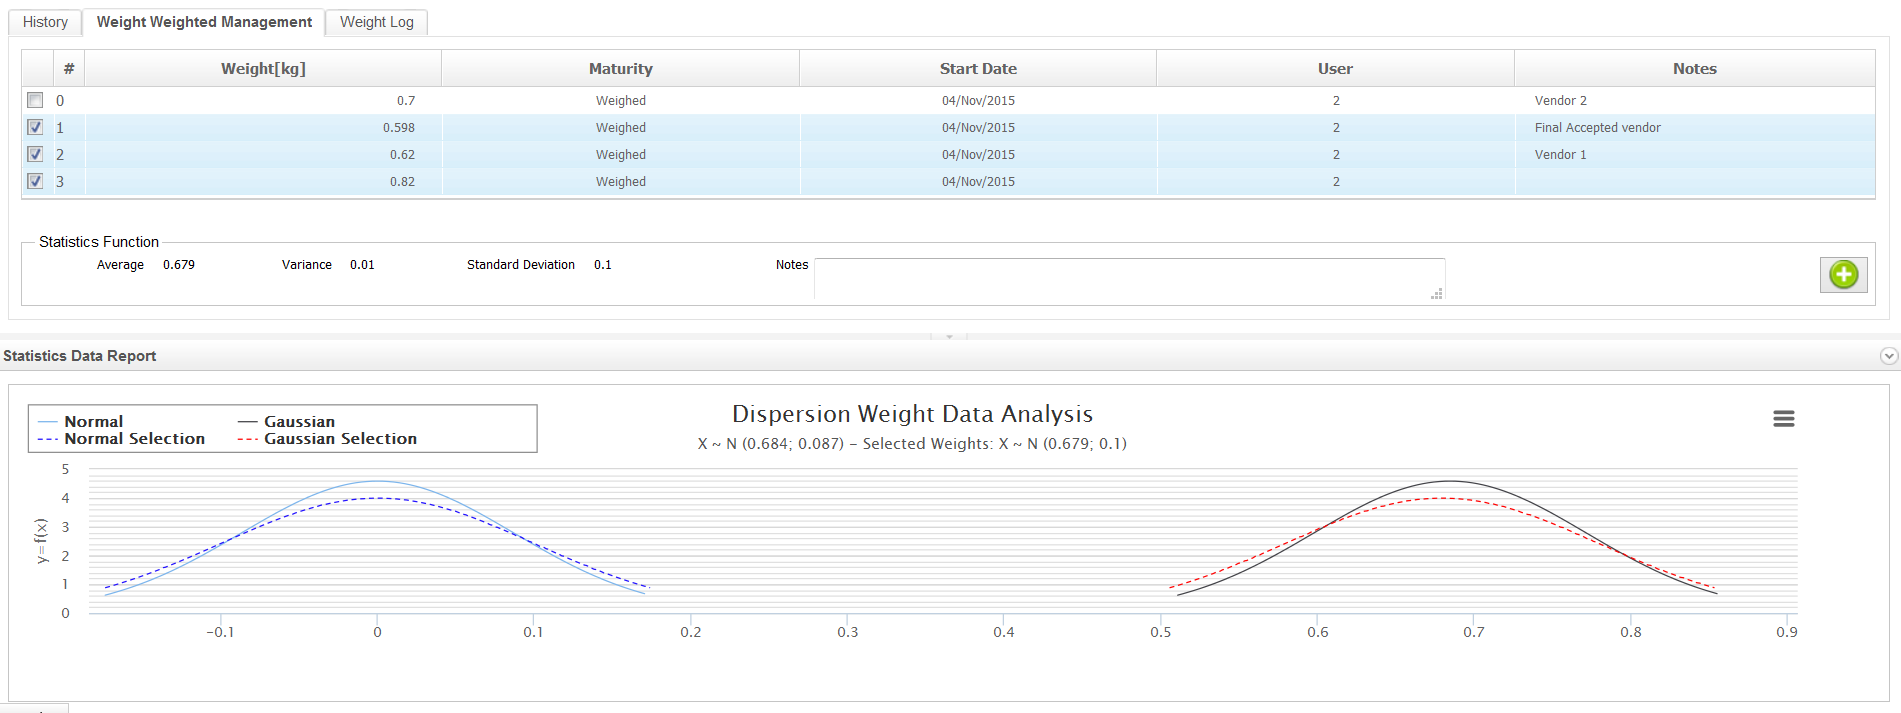
Click Enable Changes.
The weight rows in the table are populated with check boxes.
Select the check boxes for the weights that you want to use for creating an average
weight.
The Dispersion Weight Data Analysis graph is updated with the Normal and Gaussian dispersion
curves for the selected weights.
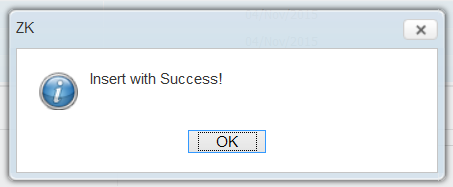
Click Add to History List.
A success message is displayed.
And the average is created and updated in the History tab.
Weight Log Tab
Click the Weight Log tab.
The weight log tab is displayed on the page.
If one or more of the weights have a maturity status of Average then the
respective rows show a symbol in the Maturity column.
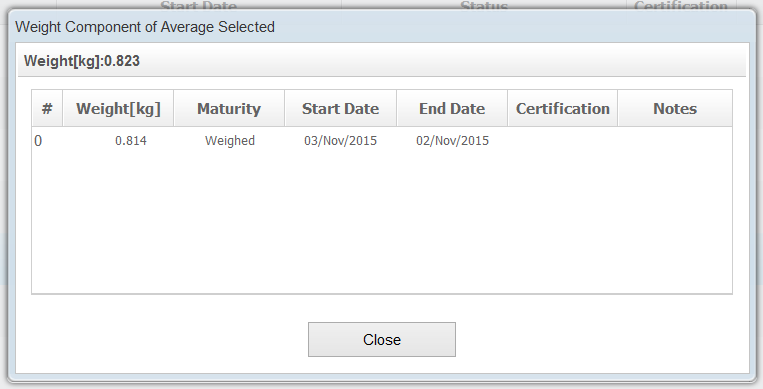
Click the row that shows the weight maturity status of Average and the symbol.
A dialog titled Weight Component of Average
Selected appears.
The dialog shows the weight of the part as well as all the weights that were used
to calculate the average value.
 .
A part selection dialog appears.
.
A part selection dialog appears.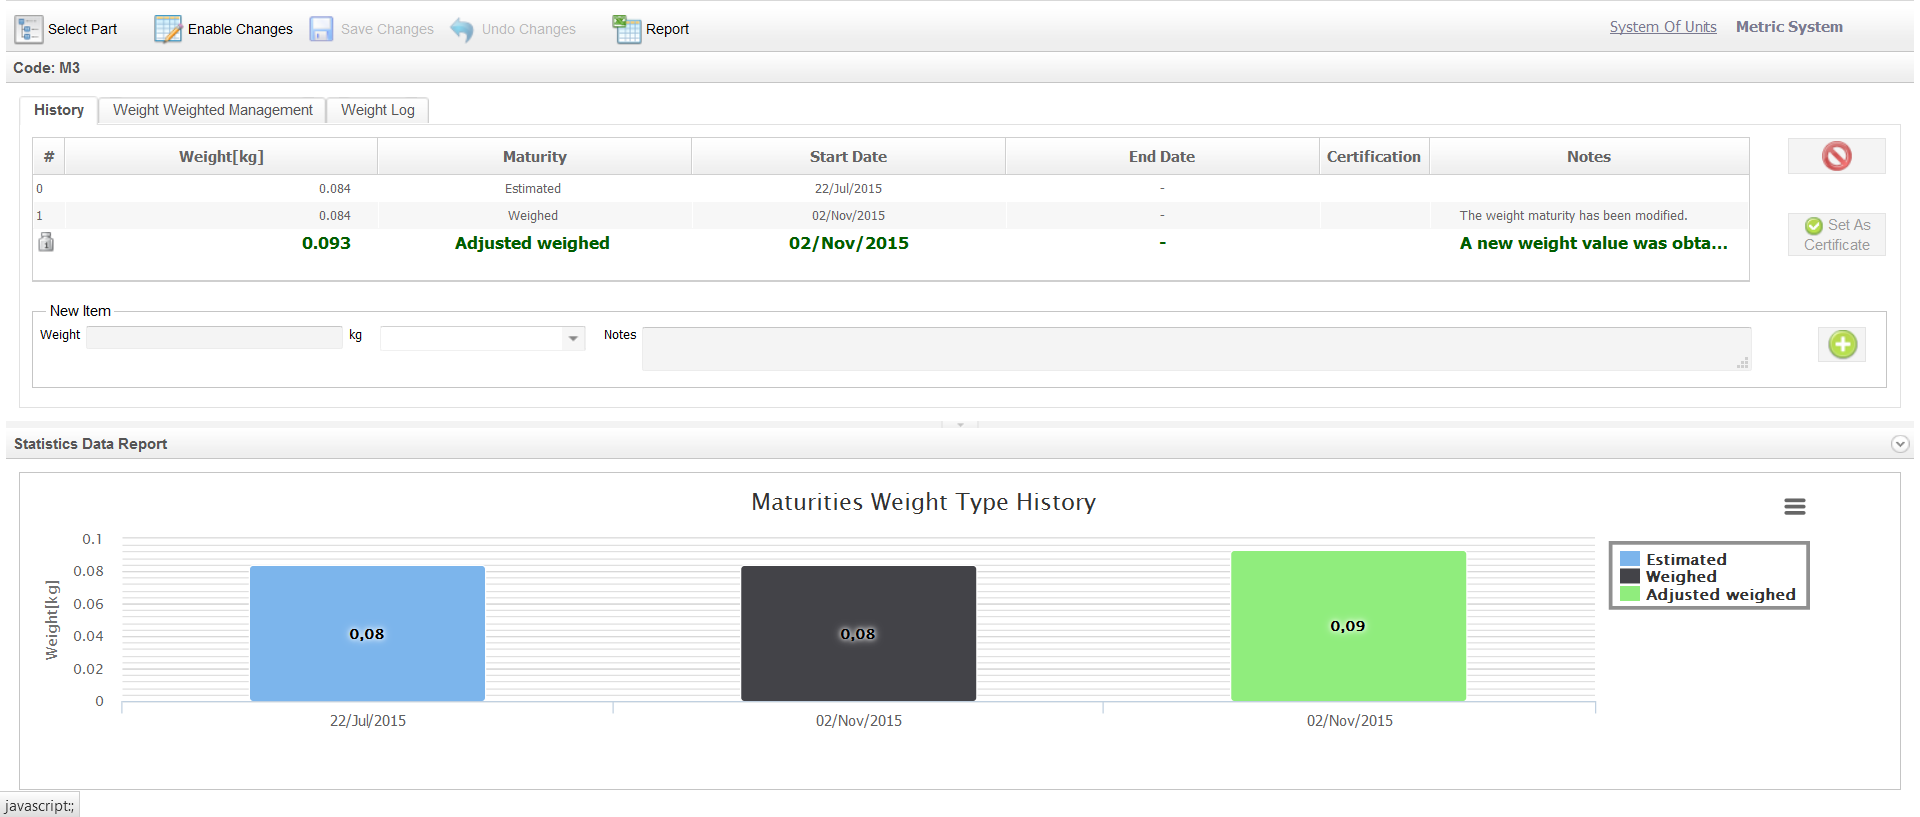
 .
The fields under New Item become editable.
.
The fields under New Item become editable. .
.
 .
A dialog is displayed that asks for confirmation of the disable action.
.
A dialog is displayed that asks for confirmation of the disable action.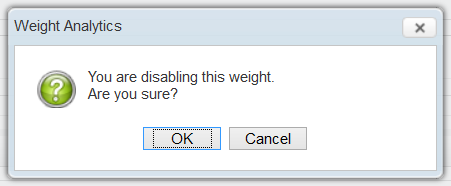
 .
The Certification column for the selected row in the table is updated with a
.
The Certification column for the selected row in the table is updated with a symbol.
  after the edits are done.
The weight history will be updated with the newly entered data.
after the edits are done.
The weight history will be updated with the newly entered data.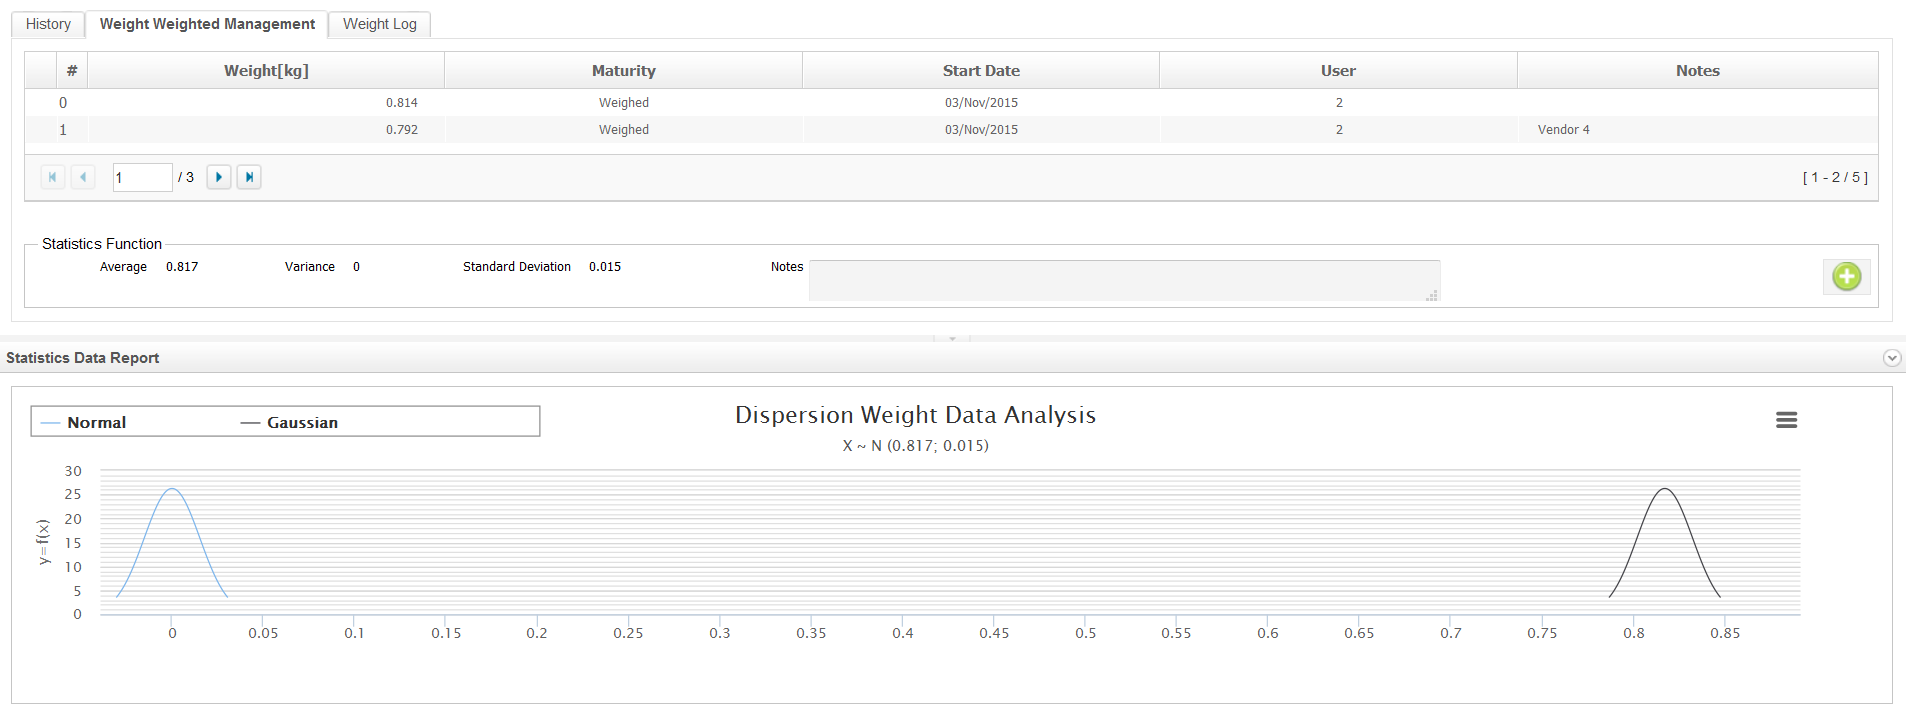


 symbol in the Maturity column.