The assembly comparison section facilitates comparison between two parts or assemblies
that exist in the system.
To perform assembly comparison:
The parts/assemblies can belong to any two of the
following types of container entities:
Programs
Versions
Variants
Products
Revisions
The comparison between two parts/assemblies can be done using two methods:
Compare on Part Number
Compare on Item Number
Consider the following illustration that represents two assemblies and their
constituent sub assemblies and parts.Figure 1. Example Assemblies
The Compare on Part Number option compares two assemblies and tries to
first match the parts / sub-assembly numbers at the same levels first before performing the
delta comparison between the two parts. The system will compare the parts numbers of the
parts in the selected assembly disregarding their position order in the hierarchy. For
example, (referring to the preceding illustration), when 01 - Sub-Assembly
1 is compared with 01 - Sub-Assembly K even though the order of
the parts in the two assemblies is different, since the comparison is based on the part
numbers, WA will compare part 104 - Part 4 in
01 - Sub-Assembly 1 with 104 - Part 4 in 01 -
Sub-Assembly K.
The Compare on Item Number option compares two
assemblies and tries to match the parts and sub-assemblies based on the position of the same
in the part/assembly hierarchy. The part numbers of the parts in the assembly is disregarded
and the comparison is performed only based on their position and order in the assembly
hierarchy. For example, (referring to the preceding illustration), when 01 -
Sub-Assembly 1 is compared with 01 - Sub-Assembly K even though
the part numbers of the parts in the two assemblies is same, since the comparison is based
on the item numbers, WA will compare part 104 - Part
4 in 01 - Sub-Assembly 1 with 103 - Part 3 in
01 -
          Sub-Assembly K
.
Click Parts Catalog > Assembly Comparison.
In the Assembly Comparison page, click the first Select Part icon to select the first part/assembly.
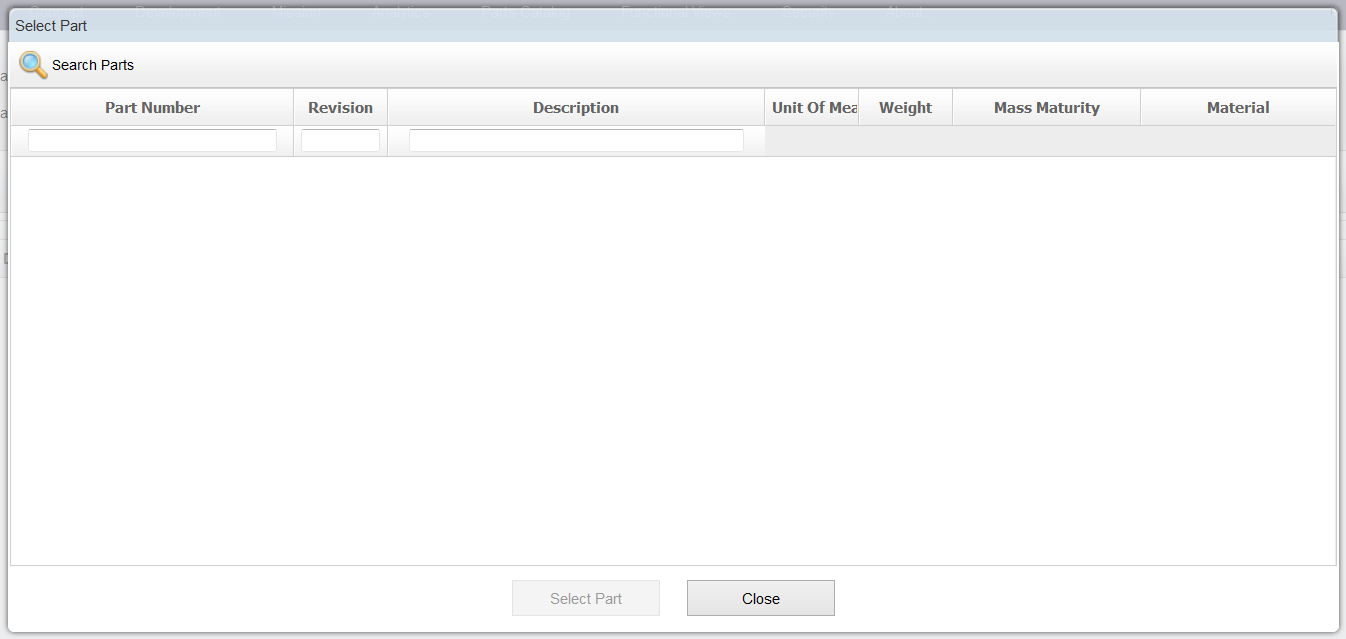
In the Part Selection dialog box, search for the part or
assembly that you want to use as the Part 1 of the comparison.
Click the required item in the Part Number column.
Click Select Part.
The part/assembly is selected for comparison, and the part number and code of the
selected part is displayed on the page:
Repeat the same steps to select the second part/assembly to be used in the
comparison.
The part number and code of the selected part is displayed on the page:
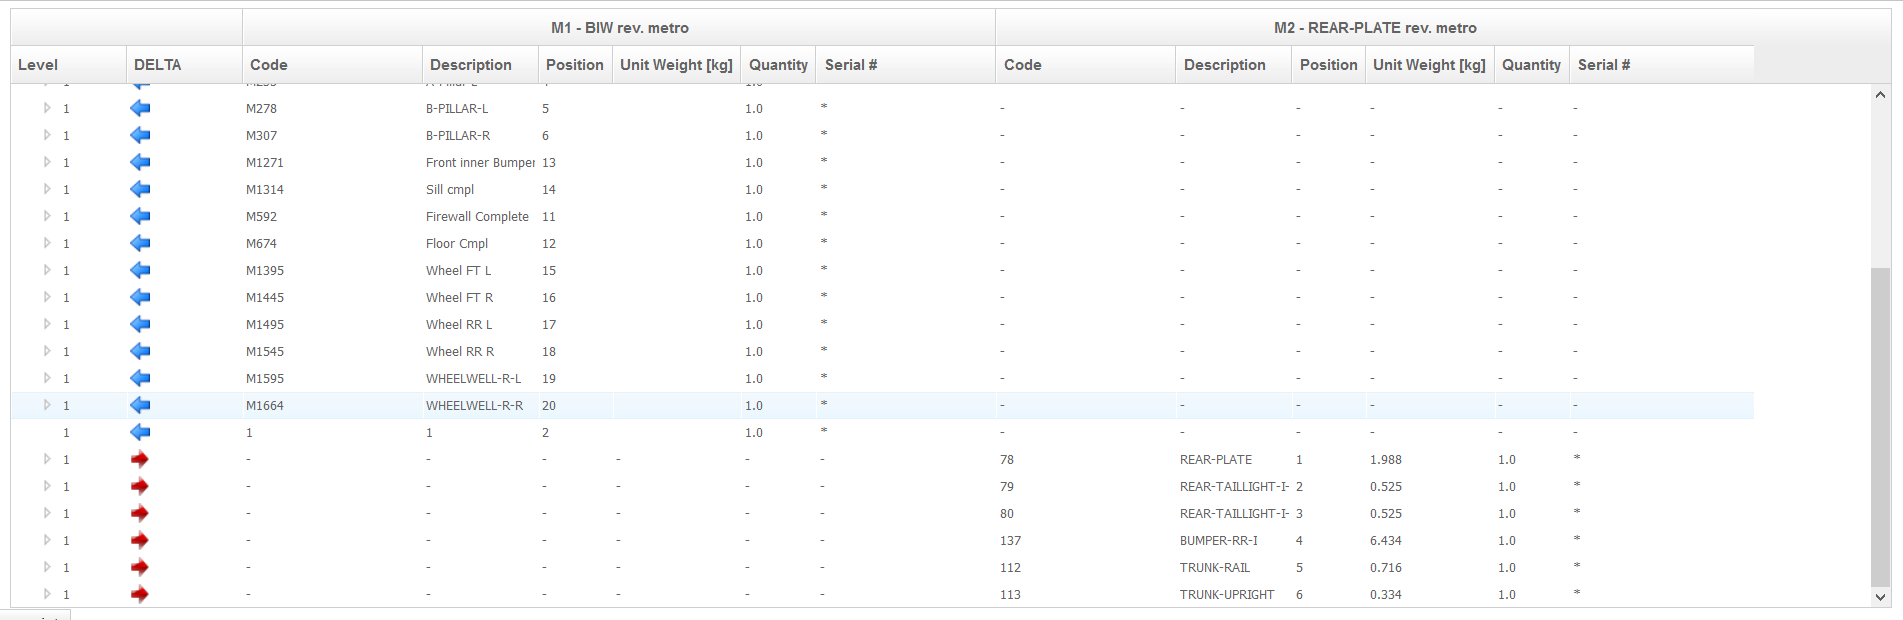
The results of the comparison are shown in the results section of the page.
The DELTA column of the report shows one of more of a pre-defined set
of icons to represent the meaning of the comparison results for each row of the result. To
understand the meaning of each of the delta status icons refer to the table below.
- Check
No delta on this part.
- Center of Gravity
The part has a different CoG between the snapshots.
- Weight
The part has different weights between the snapshots.
- Cost
The part has different costs between the snapshots.
- Right Arrow
The part exists only in the second snapshot of the comparison.
- Left Arrow
The part exists only in the first snapshot of the comparison.
-
123
The part has a different quantity between the Snapshots.
- Revision
The part has a different revision between the Snapshots.
Click the Compare on Part Number icon to perform the comparison based on the part numbers.
The comparison results are refreshed and the selected type of results are
displayed.
Click the Compare on Item Number icon to perform the comparison based on the item numbers of the
parts in the assembly hierarchy.
The comparison results are refreshed and the selected type of results are
displayed.
To export the comparison results to an Excel file, click the Report icon.
The results will be exported in tabular format to an Excel file.
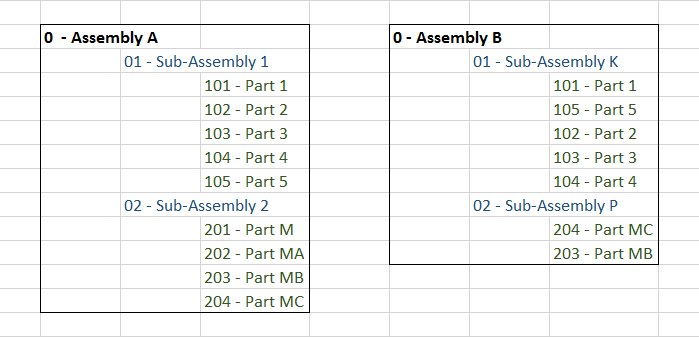 Figure 1. Example Assemblies
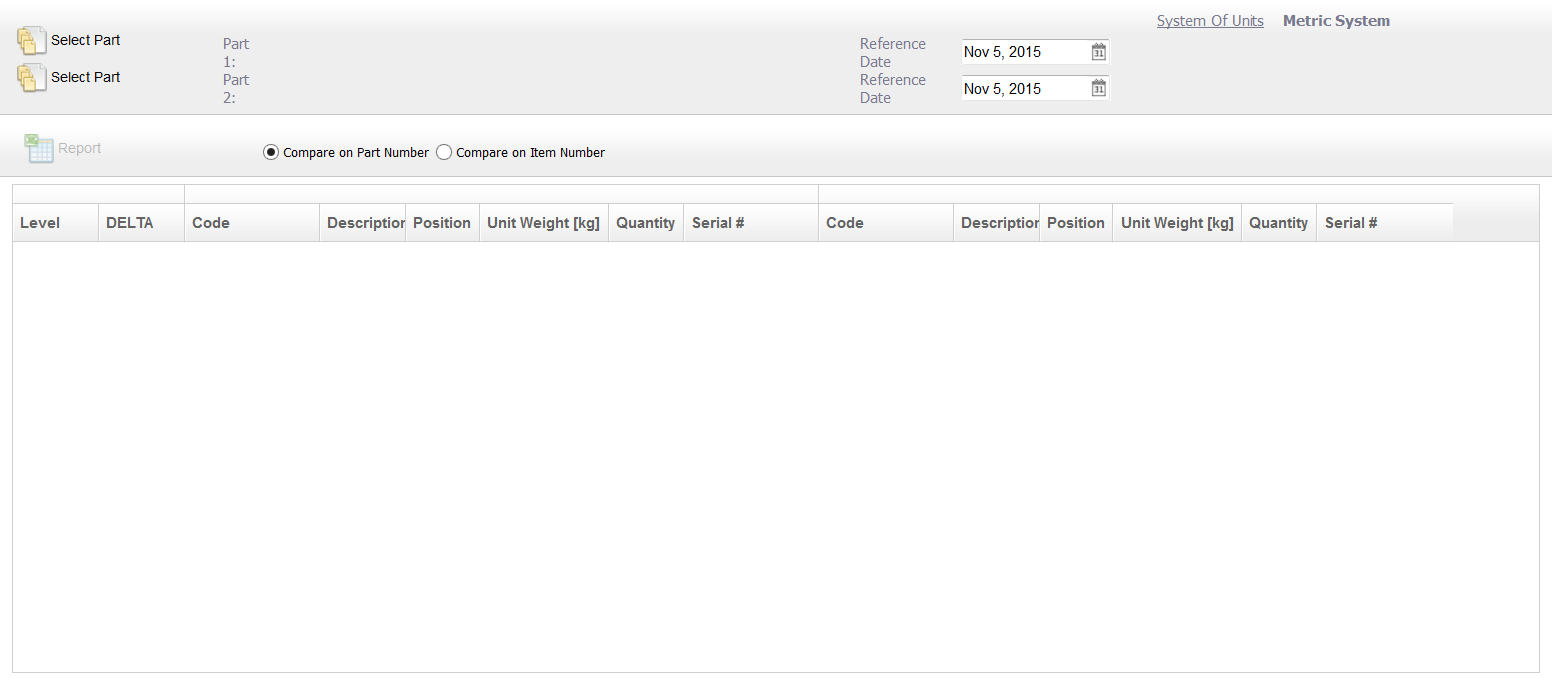
 icon to select the first part/assembly.


 - Check
 - Center of Gravity
 - Weight
 - Cost
 - Right Arrow
 - Left Arrow
 -
-
 - Revision
 icon to perform the comparison based on the part numbers.
The comparison results are refreshed and the selected type of results are displayed.
icon to perform the comparison based on the part numbers.
The comparison results are refreshed and the selected type of results are displayed. icon.
The results will be exported in tabular format to an Excel file.
icon.
The results will be exported in tabular format to an Excel file.