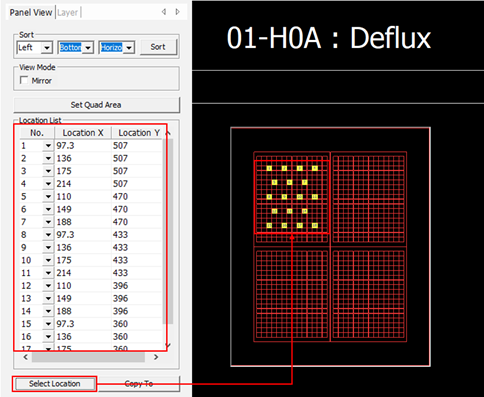
After selecting the Panel View icon and dragging the mouse to the right page screen
to create a composition area, a new Panel View is created in the page list. Figure 1.
Sort: Sorts the selected
panel measurement positions according to the set order.
View mode-Mirror: Selects
whether to mirror the panel view.
Set Quad Area: Select the
layer on which the quad area is drawn and switch to quad view.
Location List: Shows the
selected panel measurement location.
Select Location: Selects and
displays the measurement location with the mouse.
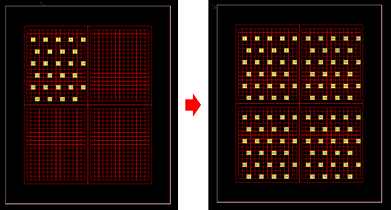
Copy To: Copy the locations
between quad areas. After specifying the locations with Select Location,
click Copy To to automatically copy the remaining
areas.
Figure 2.
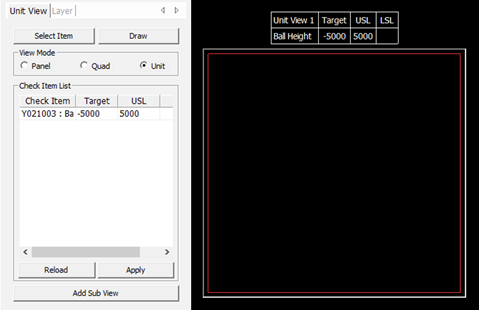
Unit View
Create and edit Unit Views and Layers.
Unit View
After selecting the Unit View icon and dragging the mouse to the right page screen to
create an area, a new unit view is created in the page list. Figure 3.
Select Item: Selects the items
to be measured from the view among the items assigned to the
page.
Draw: Make or edit drawing
objects such as Line, Arc, Circle, and Rectangle in the view
area.
Draw Object Type:
Selects the object type to draw inside the view.
Fill
Circle/Rectangle/Polyline: Selects whether to fill the draw
object.
Color: Selects the
color of the draw object.
Width: Defines the
width of the draw object.
View Mode: Selects view mode
from Panel, Quad and Unit.
Check Item List: The selected
check items are listed.
Reload: Reverts to before
modifying the list.
Apply: Applies check item data
in the List.
Add Sub View: Adds a sub
view.
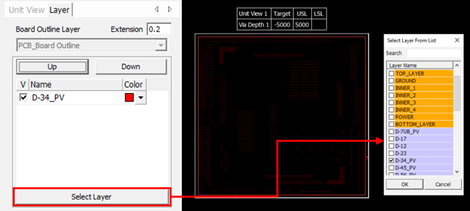
Layers
In the Layer tab of the unit view, sets the layer to display the inspection
items.
Click Select Layer. Select a layer in the Layer
List dialog. Figure 4.
Sub View
Create and edit Sub Views.
Click Add Sub View in the Unit View tab to create a sub view
on the right page of the screen. A point view (sub view) is created in the page
list. Figure 5.
Select Item: Selects the item
to be measured in the corresponding view from the items assigned to the
page.
Draw: Make or edit drawing
objects such as Line, Arc, Circle, and Rectangle in the view area.
Check Item List: The selected
check items are listed.
Reload: Reverts to before
modifying the list.
Apply: Applies check item data
in the list.
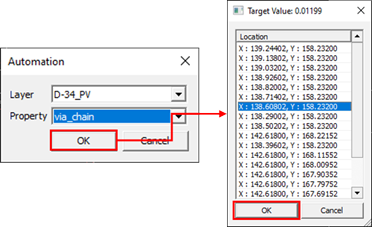
Automation: Selects one of the
items to be measured and lists the objects corresponding to the minimum
value. Figure 6.