Since version 2026, Flux 3D and Flux PEEC are no longer available.
Please use SimLab to create a new 3D project or to import an existing Flux 3D project.
Please use SimLab to create a new PEEC project (not possible to import an existing Flux PEEC project).
/!\ Documentation updates are in progress – some mentions of 3D may still appear.
BPM Overlay
How to use the 3D Overlay BPM?
To use the 3D Overlay BPM please follow these steps:
| Step | Action |
|---|---|
| 1 | Open a new Flux project and leave the Modeler context |
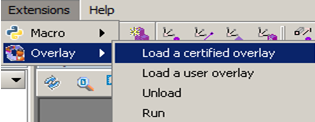
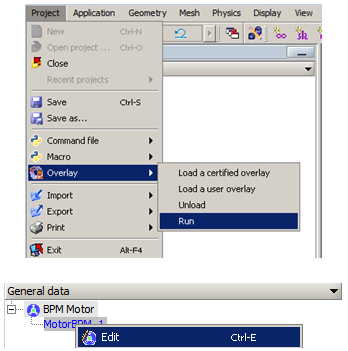
| 2 |
Click on :
|
| 3 |
Choose the Overlay to load: Brushless_Permanent_Magnet_Motors_3D.PFO |
| 4 |
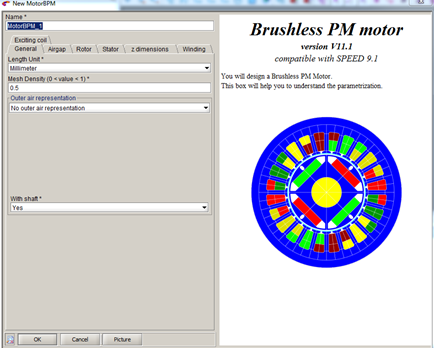
Right click on New:
|
| 5 |
Once the BPM Overlay is loaded you must:
|
| 6 |
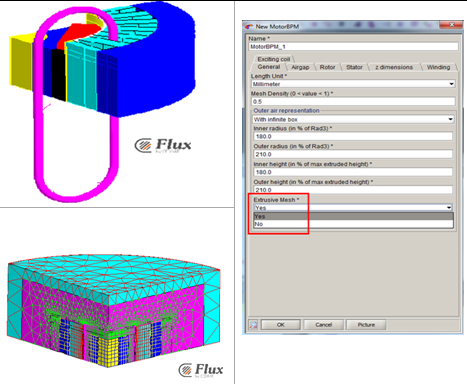
As output, Flux creates the machine with: periodicity, symmetry, mesh, winding, mechanical sets and volume regions
|
| 7 |
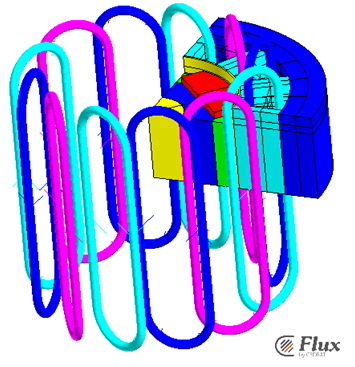
The user can modify the geometry, the mesh and the winding. To do it: Right-click on Edit
|
Advices
- In the case of extrusive mesh, if you change the structure of your geometry outside the overlay, it is recommended to assign an extrusive mesh for all volumes.
- If symmetry is taken into account, we recommend to enter ½ of the actual length of the stator, the rotor and the magnet in the Oz direction.
- If a circuit is needed, once your geometry is created with the winding via the 3D
Overlay, 3 non meshed coils and 3 Coilconductor components are created.
- Create your circuit with 3 new CoilConductor components
- Manually assign the new CoilConductor components to the non meshed coils
- Delete the Coilconductor components created by the Overlay