Since version 2026, Flux 3D and Flux PEEC are no longer available.
Please use SimLab to create a new 3D project or to import an existing Flux 3D project.
Please use SimLab to create a new PEEC project (not possible to import an existing Flux PEEC project).
/!\ Documentation updates are in progress – some mentions of 3D may still appear.
Environment of Flux Supervisor
Access
To start the Flux Supervisor from the Windows taskbar:
-
point on (or your installation directory) and click on Flux
The Supervisor Window
The Flux Supervisor window is divided into several zones. The different zones are identified in the figure below and then detailed in following blocks.
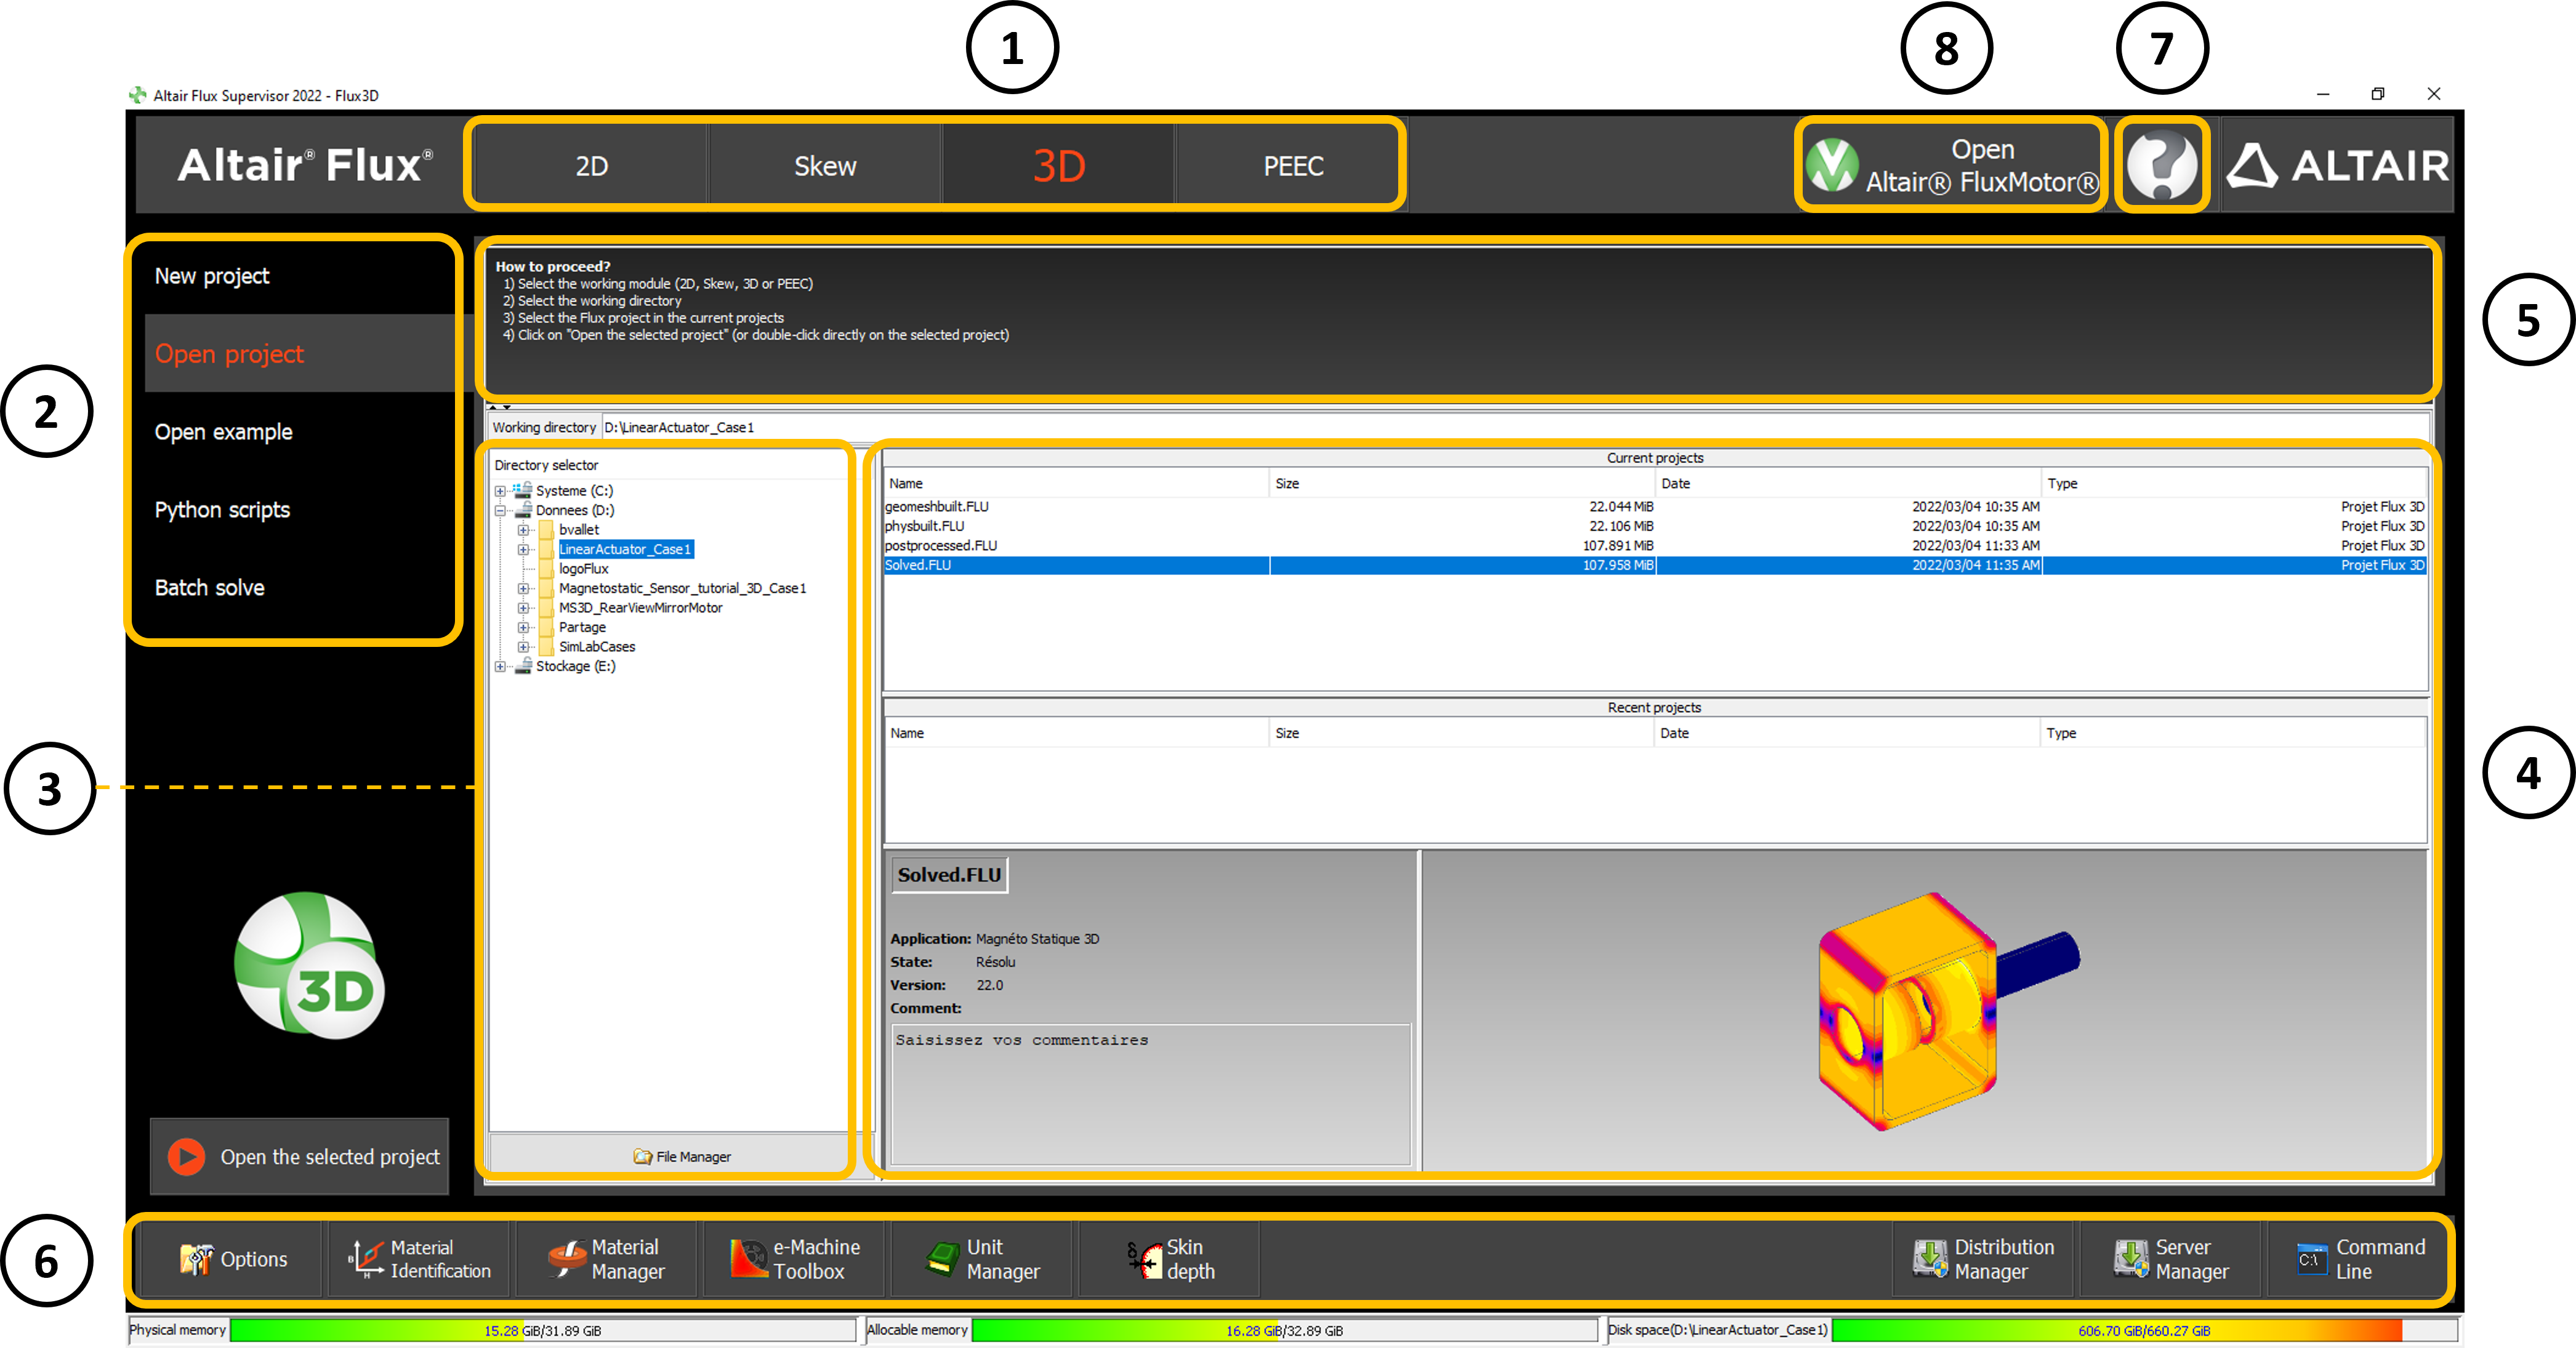
Areas of the Supervisor
The different areas of the Flux Supervisor and their functions are presented in the table below.
| Zone | Function |
|---|---|
| 1: Dimensions |
The user selects the module in which he wishes to model his project: 2D or Skew Note: Please note that 3D and
PEEC are now integrated into Altair® SimLab®.
|
| 2: Contexts |
The user has the choice between several use contexts of supervisor:
|
| 3: Working directory |
The user chooses a working directory. The path of this directory is displayed. It is possible to manage folders and files by clicking on button: |
| 4: Customized area |
The content of this area is adapted according to the context of use chosen. The action button |
| 5: How to proceed ? |
The process of use of each context is in this zone. It is possible to hide/display this zone by
clicking on |
| 6: Cross functions |
The user also has access via the supervisor to cross-functions (functions
specific to Flux):
|
7:
 |
This icon allows to access to:
|
| 8: Open FluxMotor | This button allows opening FluxMotor supervisor |
| 9: Open SimLab | This button allows opening SimLab Note: The
user needs to enter the SimLab installation directory in the Supervisor Options - Access paths. |