Create and Manage Users
Weight Analytics allows you to create and manage users.
-
Click .

-
In the Users page, click the Create User
 icon.
icon.
-
In the Add User dialog box, specify the User
Code, First Name, Last
Name, and Email Address, and then click
Add.
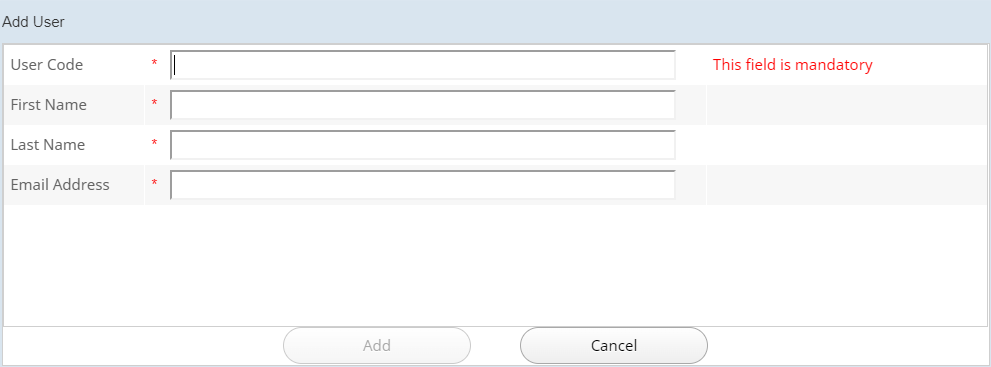 The new user is created and displayed in the Users page.
Removing a User
Weight Analytics allows you to remove a user.
-
Select a user and then click the
 icon to delete the selected user.
A message confirming the deletion of the selected user is displayed.
icon to delete the selected user.
A message confirming the deletion of the selected user is displayed.
Edit User Data
Weight Analytics allows you to edit the user data after creating a user.
-
In the Users page, search for any user in the Value text field and click the
 icon.
The existing users that match with the value entered is displayed.
icon.
The existing users that match with the value entered is displayed. -
You can navigate between the search results by clicking the
 and
and
 icons.
-
Select any user and click the Enable Changes
 icon to edit the user data.
-
Click the Save Changes
 icon.
The user details are updated with the changes that you have made.Note: When Weight Analytics is connected with LDAP, clicking the Synchronize data
icon.
The user details are updated with the changes that you have made.Note: When Weight Analytics is connected with LDAP, clicking the Synchronize data icon will synchronize the users list from LDAP to WA.A message confirming the synchronization process is displayed.
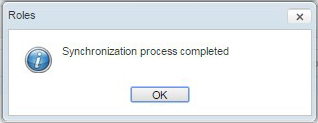
-
Optionally, click the Undo Changes
 icon to discard the changes that you have made to the user data.
Assign Groups
After creating a user, you can assign the new user to a Group.
-
In the Users page, click the Groups tabbed page.
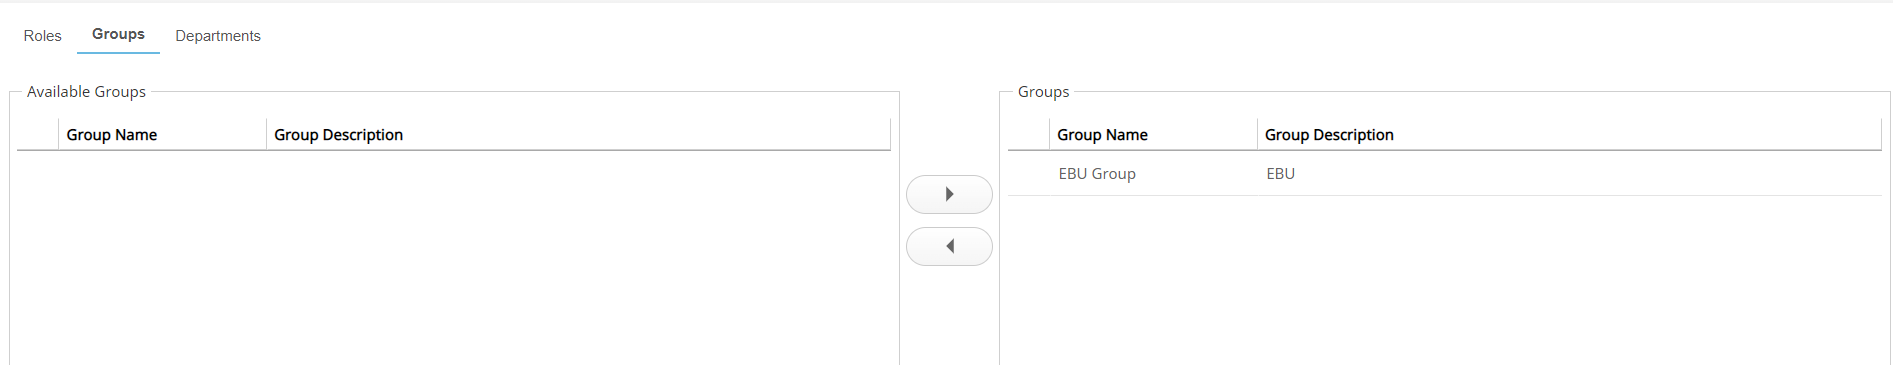
- Available Groups: Displays all the available Groups except those in which the user is already included.
- Groups: Displays all the selected groups for a user.
-
Select the required Group in the Available Groups section and then click the
 icon.
The user is moved to the list of Groups.Note: Similarly you can assign Roles and Department to the new user.
icon.
The user is moved to the list of Groups.Note: Similarly you can assign Roles and Department to the new user. -
Click the required Group in the Groups list and click the
 icon.
The selected user is removed and moved to the Available Groups list.
icon.
The selected user is removed and moved to the Available Groups list. -
After selecting a Role, Group, amd Department for the user, click the
Save Changes
 icon.
The user data is updated in the system.
icon.
The user data is updated in the system. -
To cancel any unsaved changes, click the Undo Changes
 icon.
icon.
Assign a Department
After creating a user, you can assign the new user to a Department.
-
In the Users page, click the Departments tabbed
page.

- Available Departments : Displays all the available Departments except those in which the user is already included.
- Departments : Displays all the selected Departments for a user.
-
Select the required Department in the Available
Departments section and then click the icon.
The user is moved to the list of Departments.Note: Similarly you can assign Roles and Groups to the new user.
-
Select the required Department in the Departments
list and click icon.
The selected user is removed and moved to the Available Departments list.
-
After selecting a Role, Group, amd Department for the user, click the
Save Changes icon.
The user data is updated in the system.
-
To cancel any unsaved changes, click the Undo Changes icon.