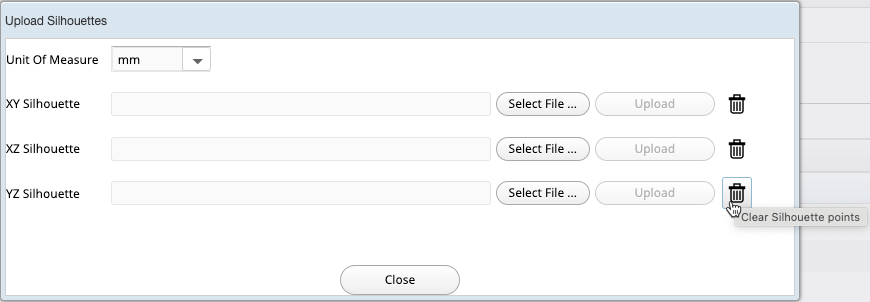
Upload Silhouettes
A Silhouette is the image of a object or scene represented as a solid shape of a single color, usually black, with its edges matching the outline of the subject.
-
Click the Upload Silhouette
 icon.
icon.
-
In the Upload Silhouette dialog box, select the unit of
measure from the Unit Of Measure dropdown list.
-
Navigate to the respective files that you want to upload for XY
Silhouette, XZ Silhouette, and
YZ Silhouette and then click
Upload.
Note: A Silhouette file is a TXT file with three columns without any header and comprising values separated by a comma “,”.
- When you upload a XY Silhouette file (used in Top View), only the
first two columns are considered and the third column is
ignored.
Example
0,-1600,011500,-1600,011500,1600,00,1600,00,-1600,0This example describes a rectangle with base (X) between 0 and +11500, and height (Y) between -1600 and +1600.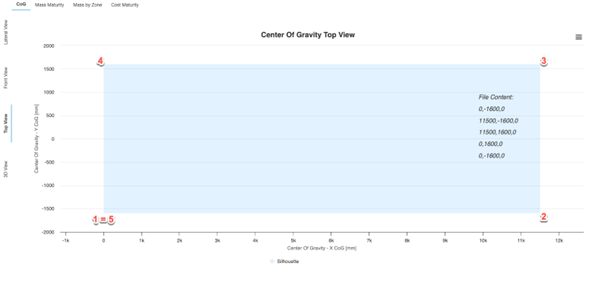
- When you upload a XZ Silhouette file (used in Lateral View), the
first two columns are considered, and the third column is
ignored.
Example
0,0,011500,0,011500,4500,00,4500,00,0,0This example describes a rectangle with base (X) between 0 and +11500, and height (Z) between 0 and +4500.
- When you upload a YZ Silhouette file (used in Front View), only the
second and third columns are considered and the first column is
ignored.
Example
0,-1600,011500,-1600,450011500,1600,45000,1600,00,-1600,0This example describes a rectangle with base (Y) between -1600 and +1600, and height (Z) between 0 and +4500.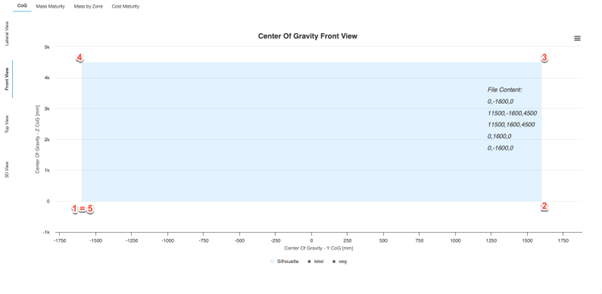
Optionally click the icon
to clear the selected Silhouette points.
icon
to clear the selected Silhouette points. - When you upload a XY Silhouette file (used in Top View), only the
first two columns are considered and the third column is
ignored.