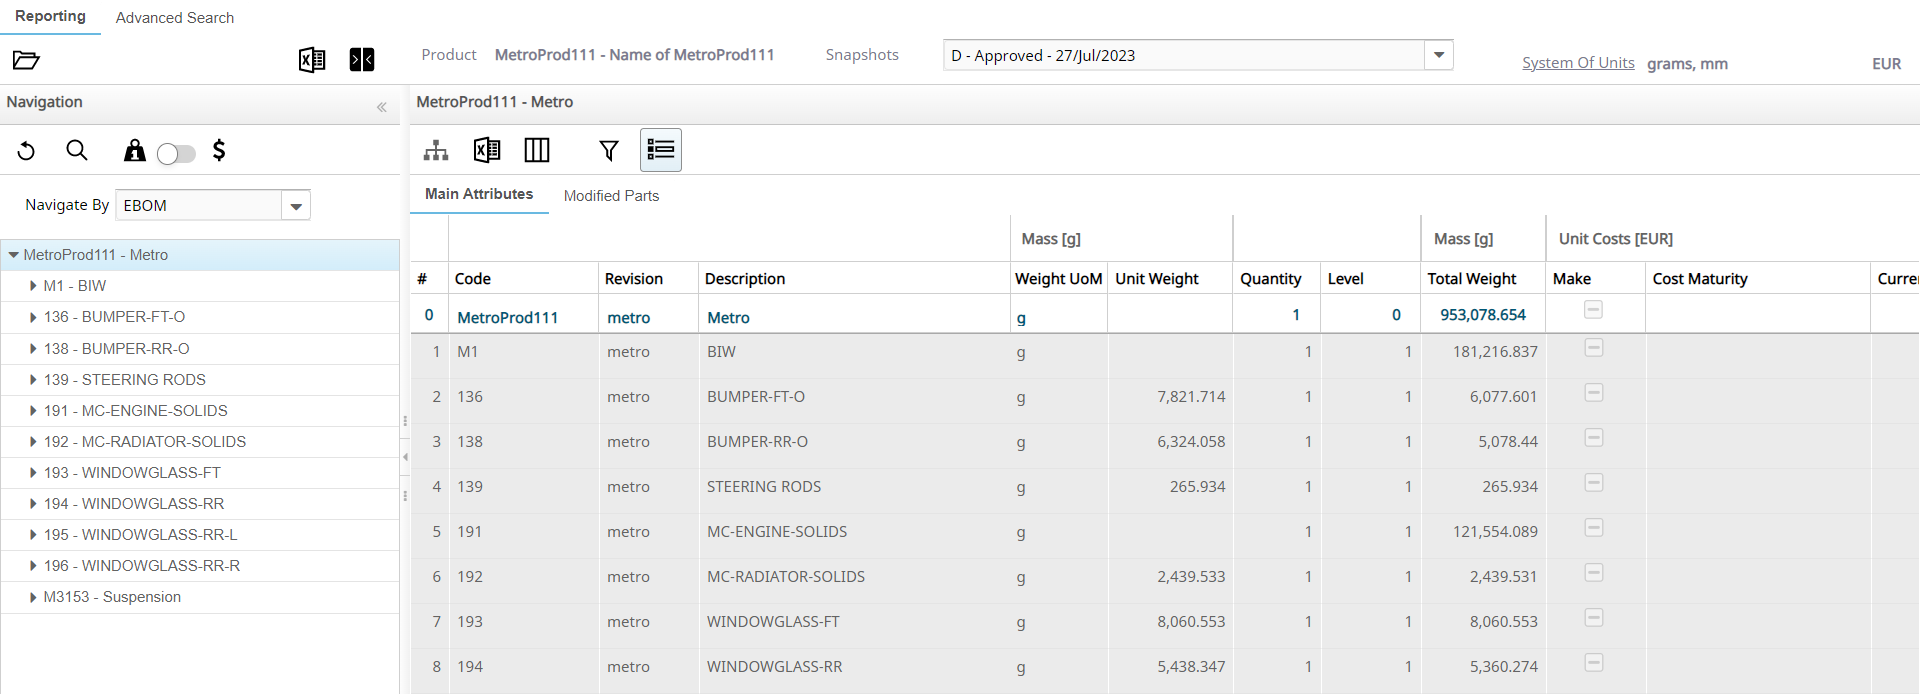
Reporting
WA allows you to query the related data in a report. Any product created has a Concept or a Snapshot available in Work in Progress or in the Approved status.
The Reporting page is displayed based on the functional views selected for a specific product .. The Reporting page allows you to:
- Download two types of reports for a product, namely:
- BoM Report for the selected Product.
- Grid Report for the parts in the selected Product.
- Compare two different Snapshots for the same or different Products.
- View reports for a selected Product.
- Download a report in Excel spreadsheet format.
- Activate the product compare feature.
- Select Snapshots or Concepts for a Product.
- Select the required System of units for the selected Product.
- Reload the Product tree in the navigation panel.
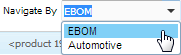
- Navigate the Program tree based on E-BoM or the selected Functional Views.
Generate Report
-
Click .
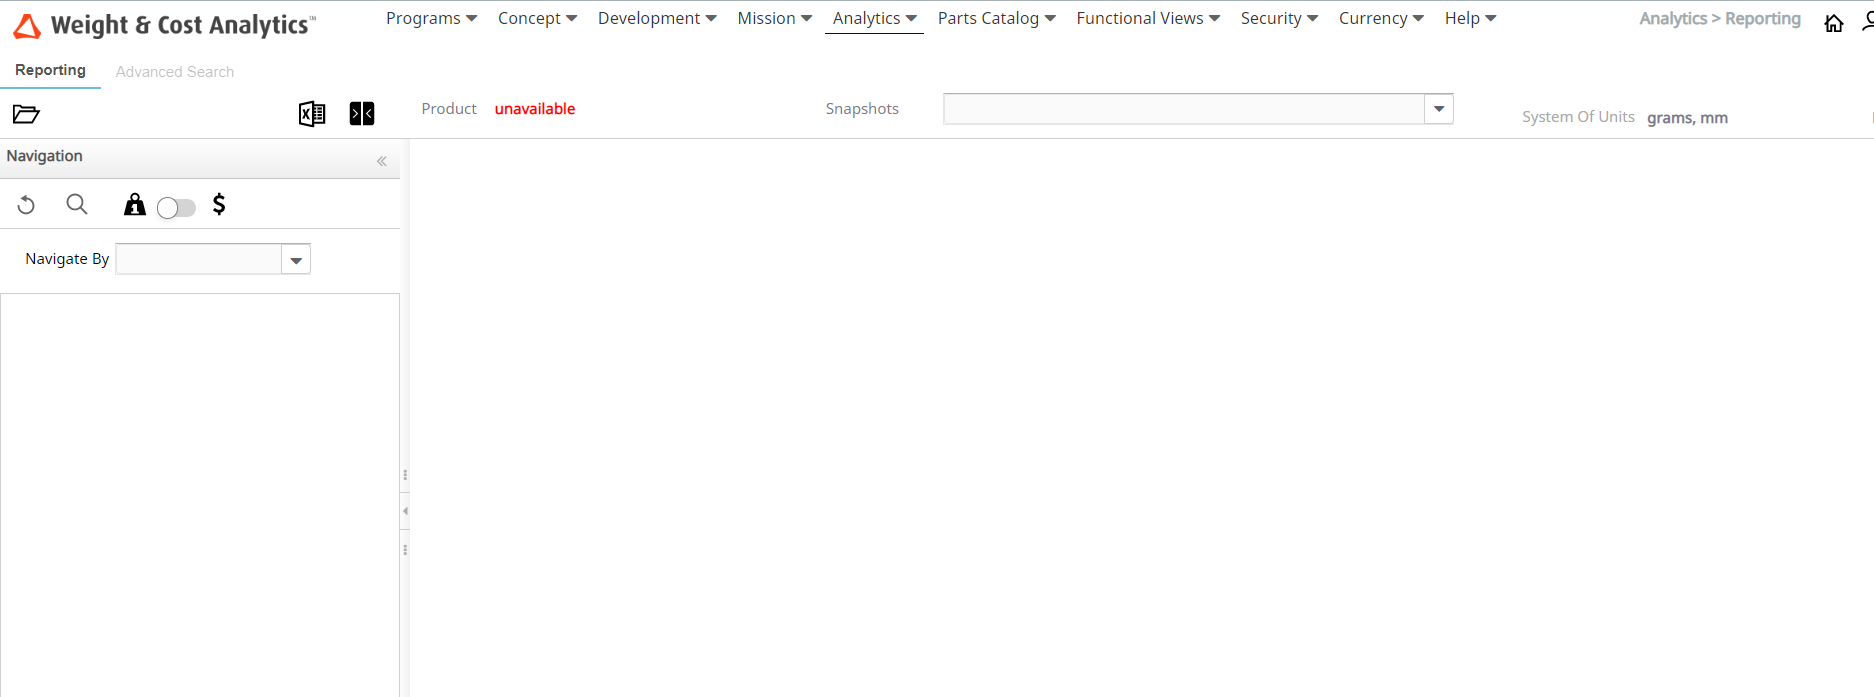
 The Reporting page is displayed.
 -
Click the Select Product
 icon.
Product Selection panel is displayed.
icon.
Product Selection panel is displayed.
-
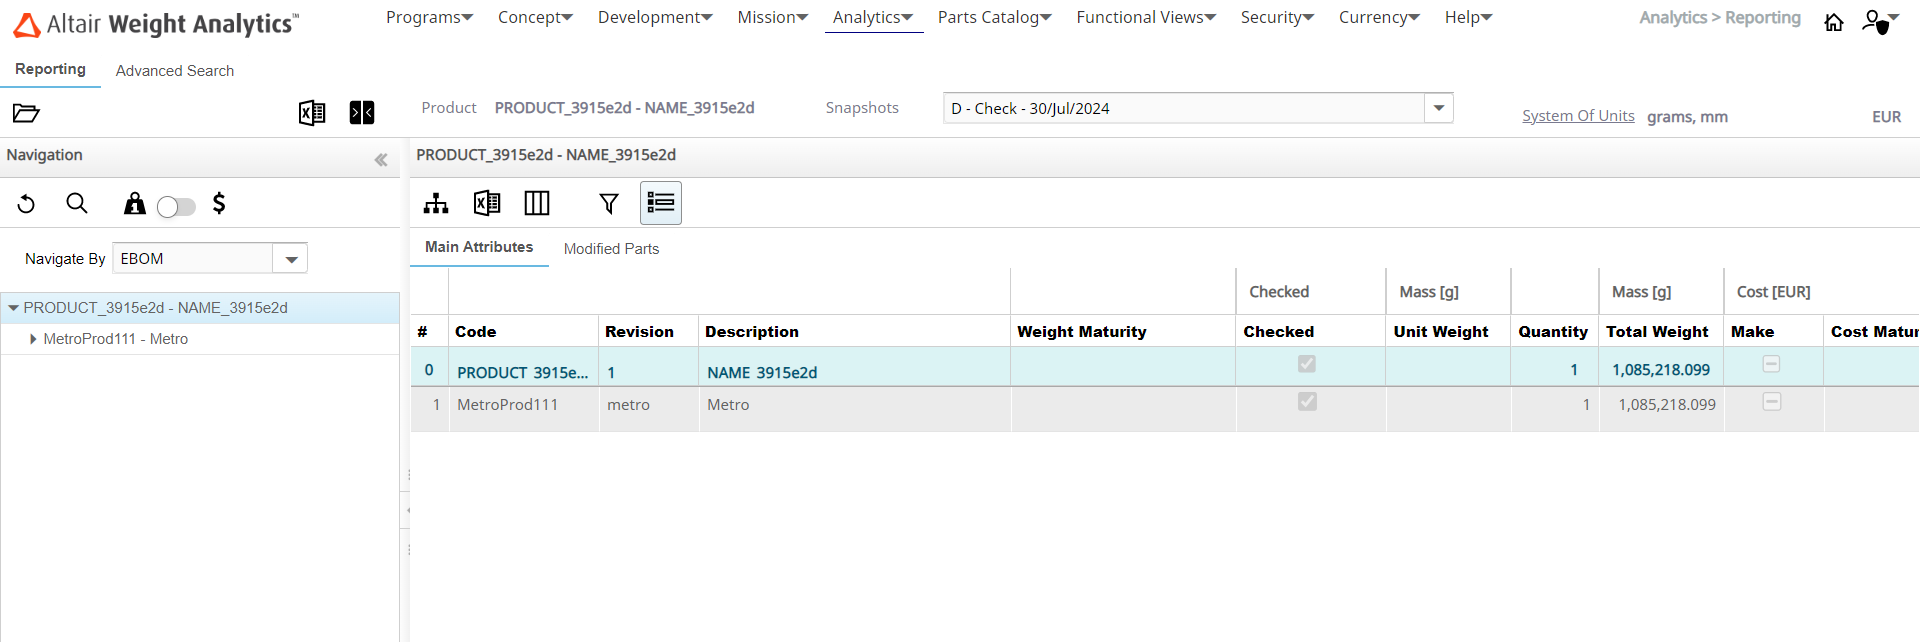
Select a Product that has a Snapshot and click the Select Product
icon.
The product name is populated against the Product label and the latest uploaded Snapshot is selected by default.Note: You can select the required Snapshot from the Snapshots dropdown list.
 The page is populated with the data table.
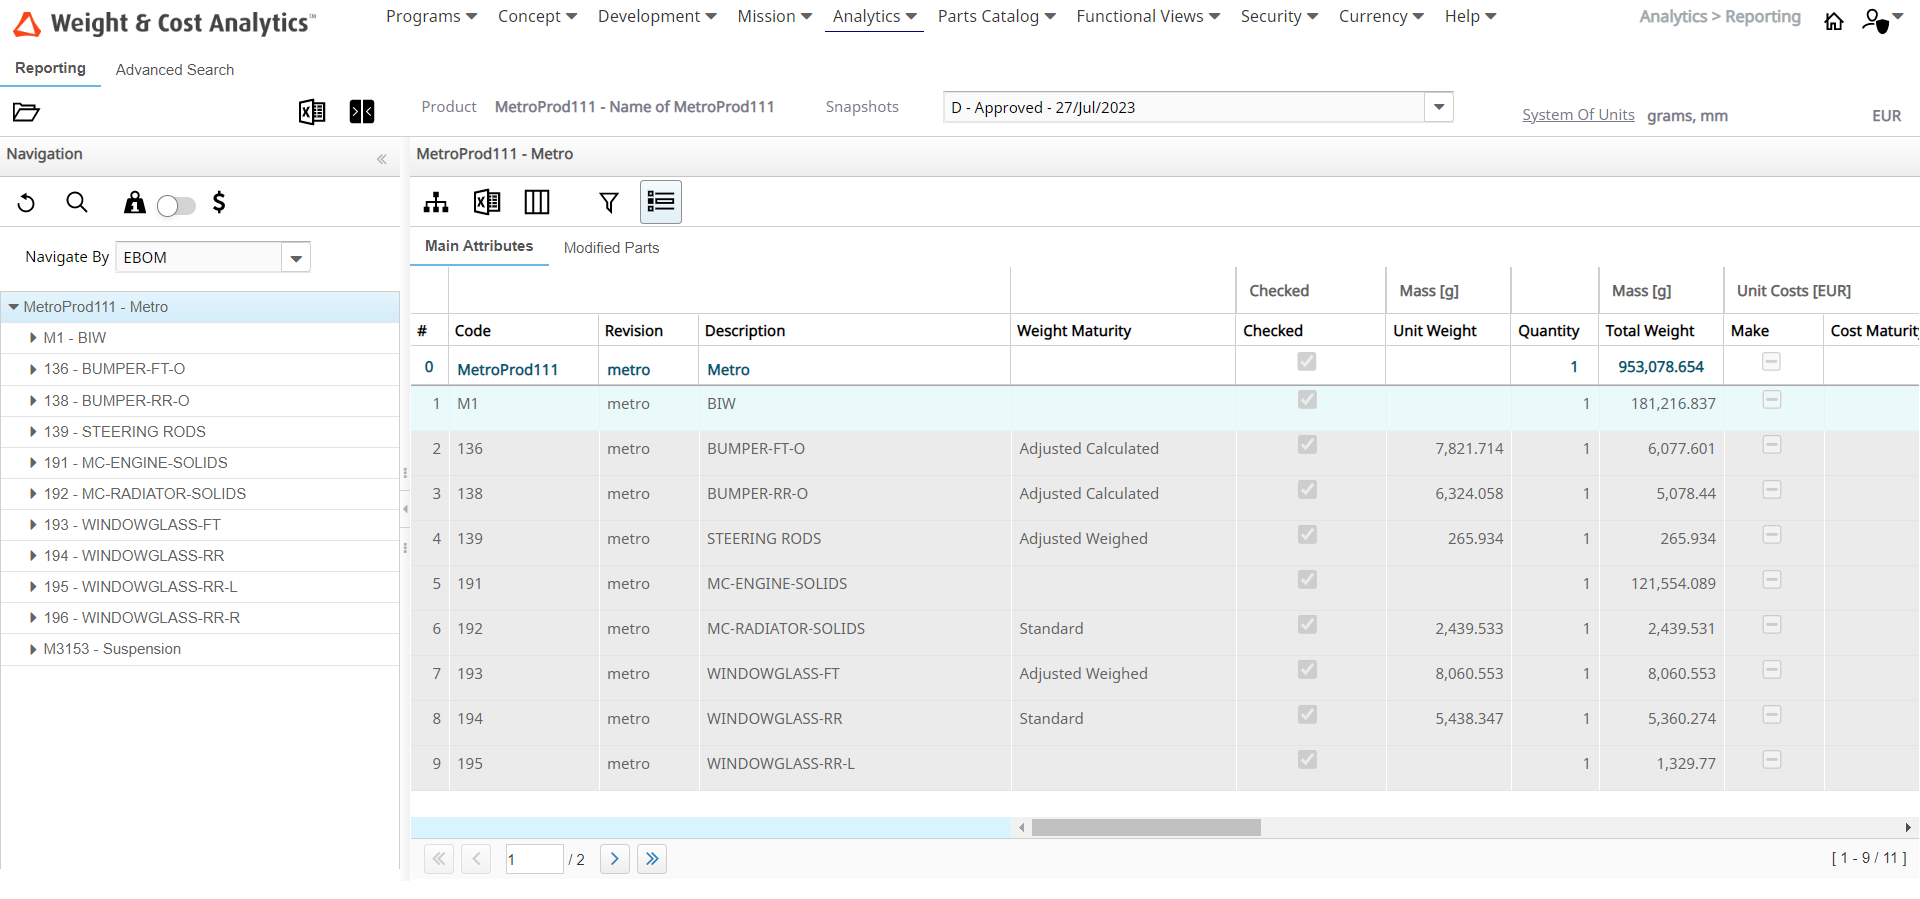
-
Select EBOM from the Navigate By dropdown list.
 Note: The EBOM is the real structure of the Products. You cannot modify the structure or values in the Reporting section.
 -
Click any row in the data table.
Part Structure
 button is activated and the Parts tab is populated with the product code name and
the selected columns.Note: When you view the part structure through the Functional View navigation method, the Part Structure popup displays the E-BoM part structure, from the selected node down to its structure.
button is activated and the Parts tab is populated with the product code name and
the selected columns.Note: When you view the part structure through the Functional View navigation method, the Part Structure popup displays the E-BoM part structure, from the selected node down to its structure.When you view the part structure through the E-BoM navigation method, the Part Structure popup is the same as the tree structure in the navigation panel.
-
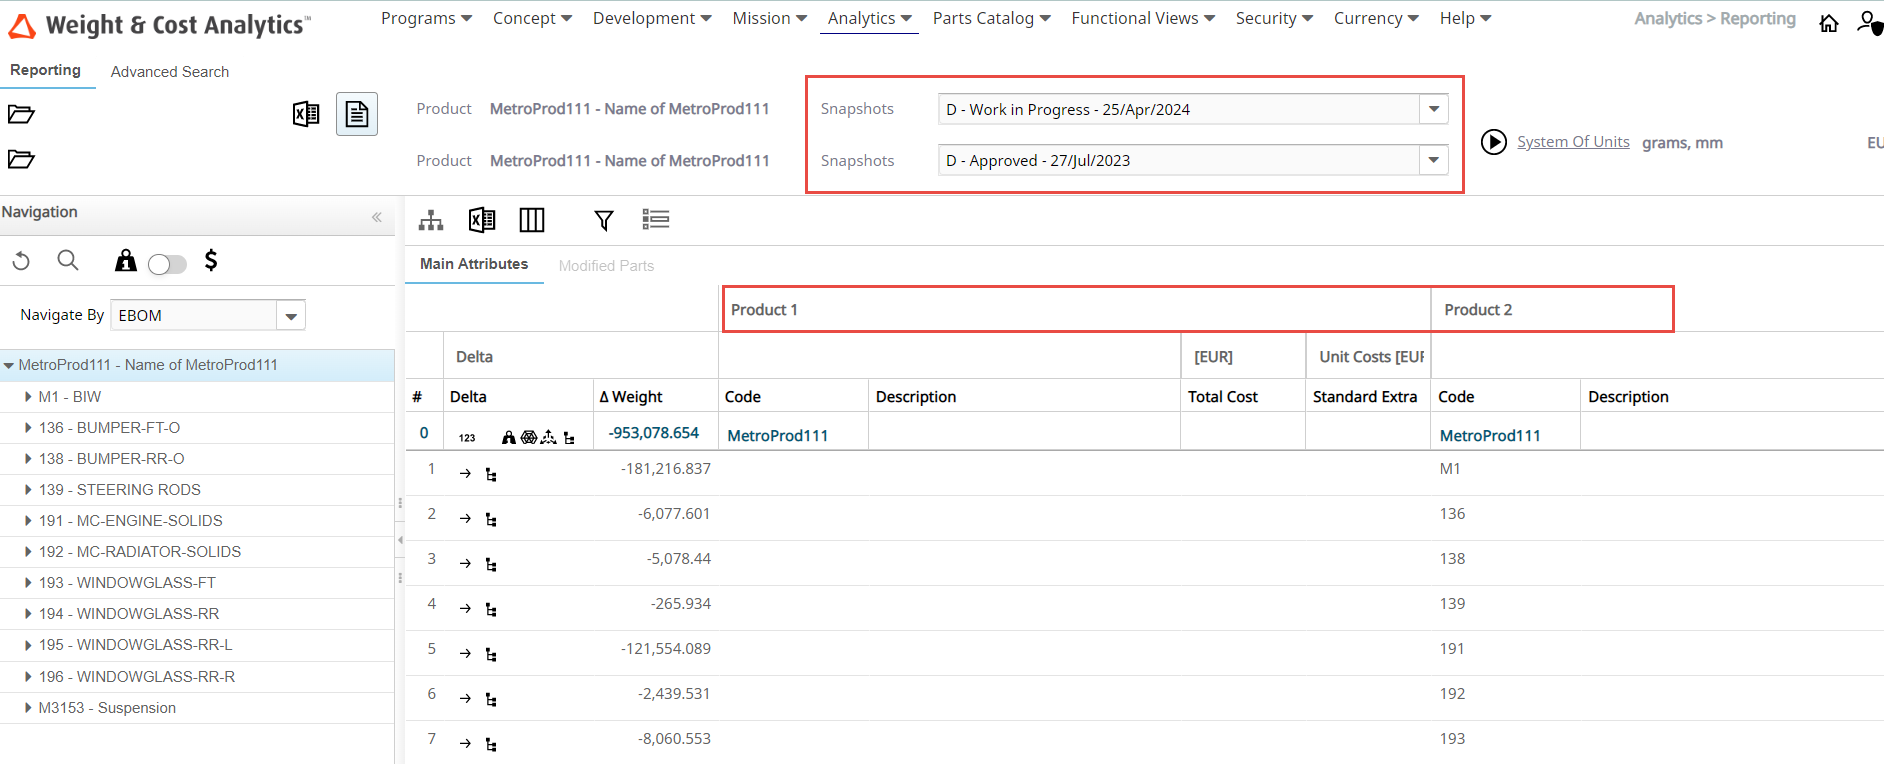
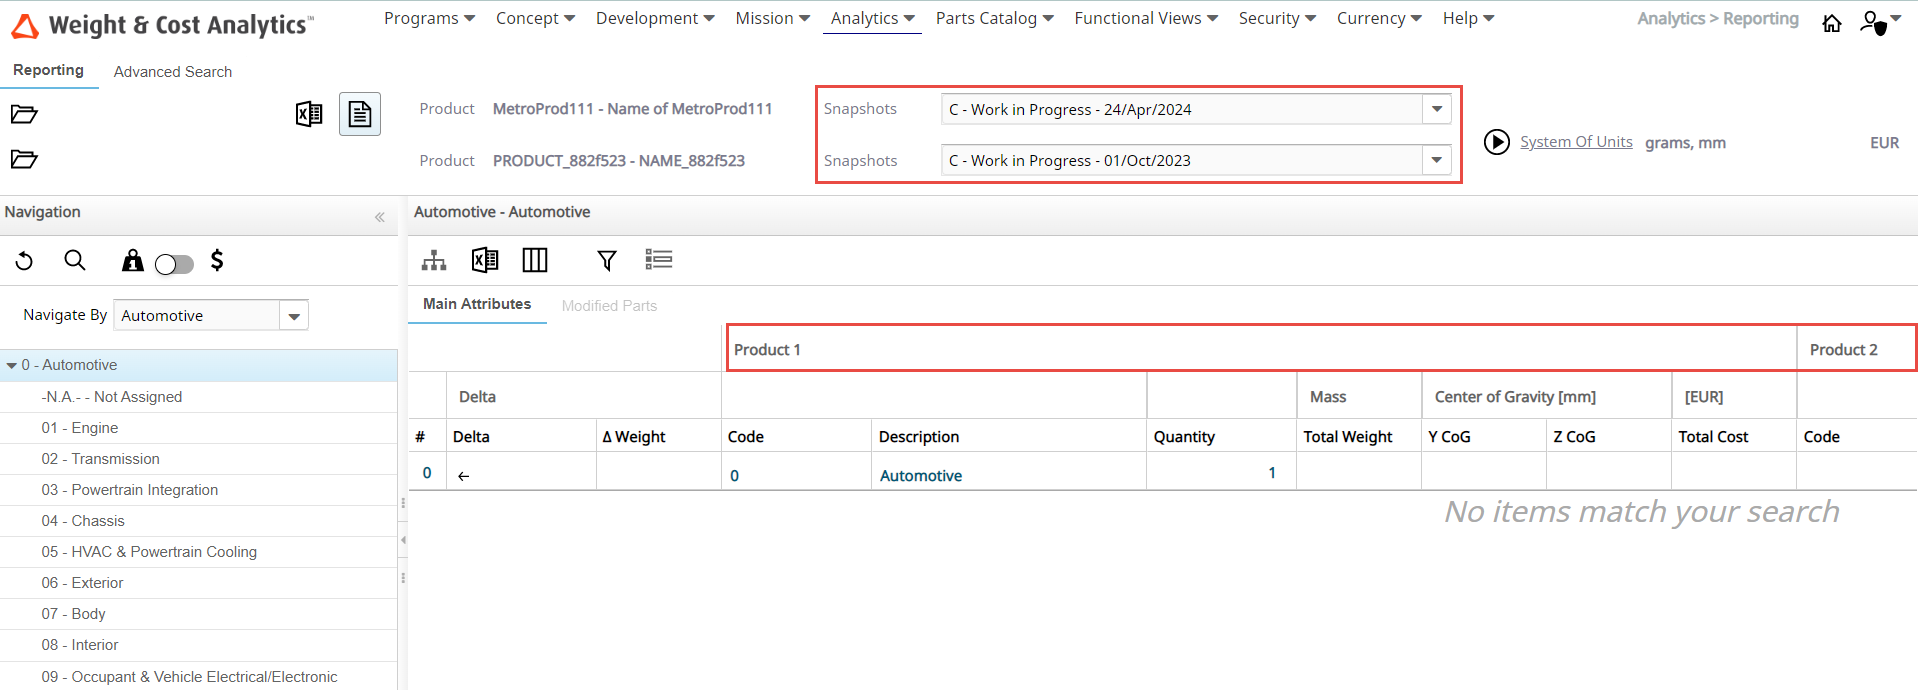
Click the
 icon to enable or disable Product comparison.
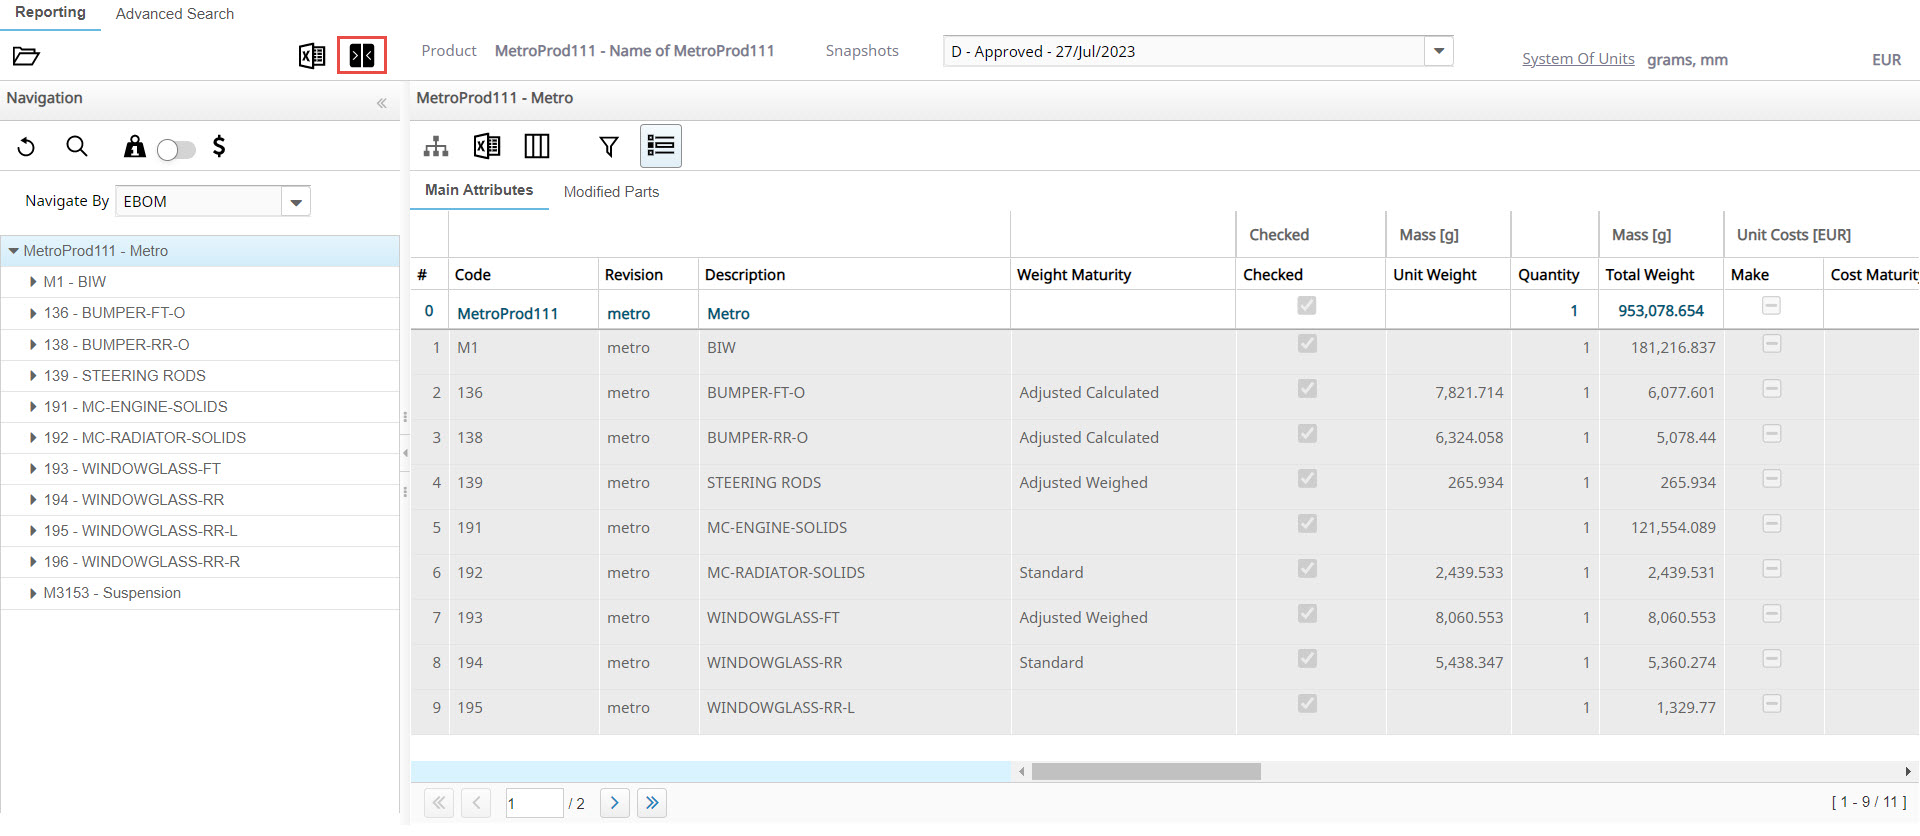 WA allows you to perform two types of comparisons: E-BoM comparison and F-BoM comparison.
- Comparison between two F-BoMs is available only when the two selected Products are defined as using the same Functional View (see Program Management to define Functional Views for Management and Reporting). In this case, the Selected snapshots can be of type Concept or Development.
- Comparison between two E-BoMs is available only when the two Snapshots of the selected Products are of type Development (E-BoM is not defined in a Concept Snapshot).
- Click the icon to select the second Product for
comparison.
- From the Snapshots dropdown list, select a
Development Snapshot (E-BoM comparison) for
each of the Products and then click the
 icon to start the comparison.Note: If you want to compare two F-BoMs, select a Concept Snapshot (F-BoM comparison) for each of the Products.
The results of the comparisons between the Snapshots for Product 1 and Product 2 are populated in the table.
- Click the
 icon to disable the comparison.
-
Select any row and click Part Structure icon.
The Part Structure dialog box displays the displays the structure of the selected node, and the position, quantity, weight maturity, cost maturity, validity, and so on for each child node.

-
Select the required date from the Reference Date text field.
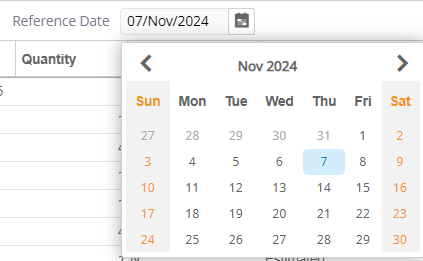 The Part Structure dialog box displays the position, quantity, and temporal validity and the range of serial numbers validity for each child node.
 -
Click the
 icon to customize the columns view.
-
In the Customize Grid View dialog box, select the column
or cluster check boxes that you want to include in the table.
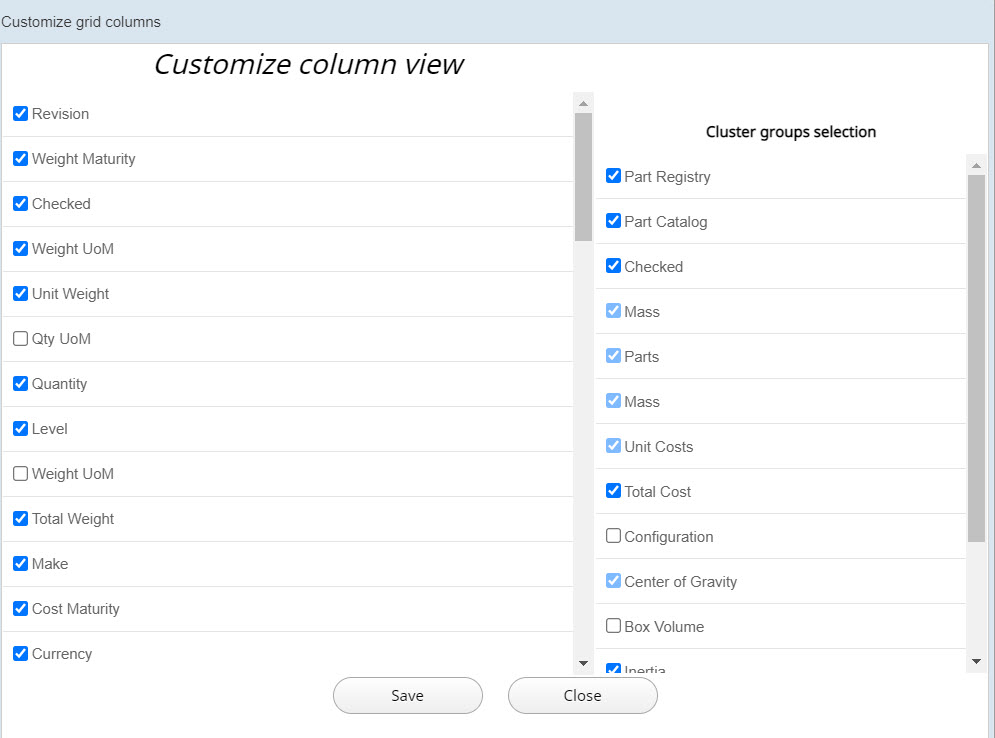
-
Click Save.
Added attributes is shown as columns in the table, and is populated with the selected product snapshot data.
-
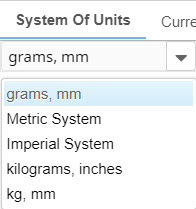
Click the System Of Units
 icon.
icon.
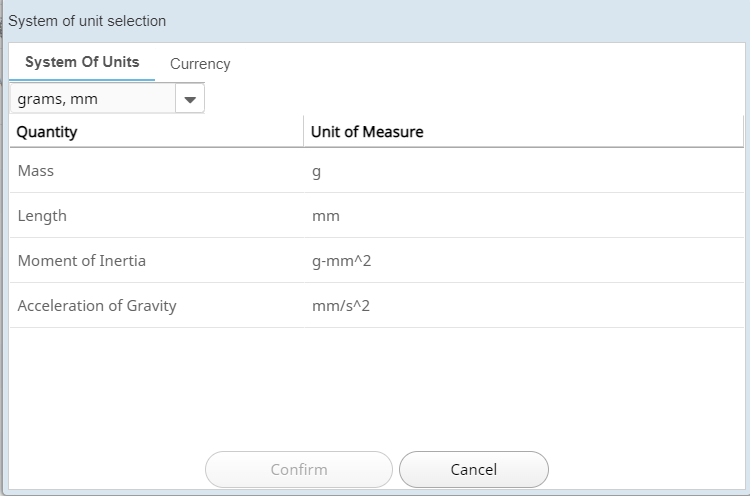 Note: In the System of unit selection dialog box:
- Quantity: Provides information about the quantity.
- Unit of Measure: Provides information about the unit of measurement for the quantity type in the Quantity column.
-
Select the required System of units from the Metric System dropdown list.
-
Click the
 icon adjacent to the Part Structure button.
The grid report of the parts of the selected product is downloaded in the Download folder.
icon adjacent to the Part Structure button.
The grid report of the parts of the selected product is downloaded in the Download folder. -
Click the icon at the top left of the window.
The complete BoM report file of the selected product is downloaded in the Download folder.
Cost Attributes
WA allows you to view the cost attributes for a Product in the form of a report.
-
Click .
The Reporting page is displayed.
-
Check the column visibility by clicking the Customize grid
columns
icon.
The following groups are displayed: Unit Costs, and Total Cost.
Unit Cost Details
WA allows you to view the Unit Cost details for every cost attribute that has been previously defined in the form of a report.
-
Click Unit Costs.
The unit costs description for each cost attribute are displayed in separate tabs.
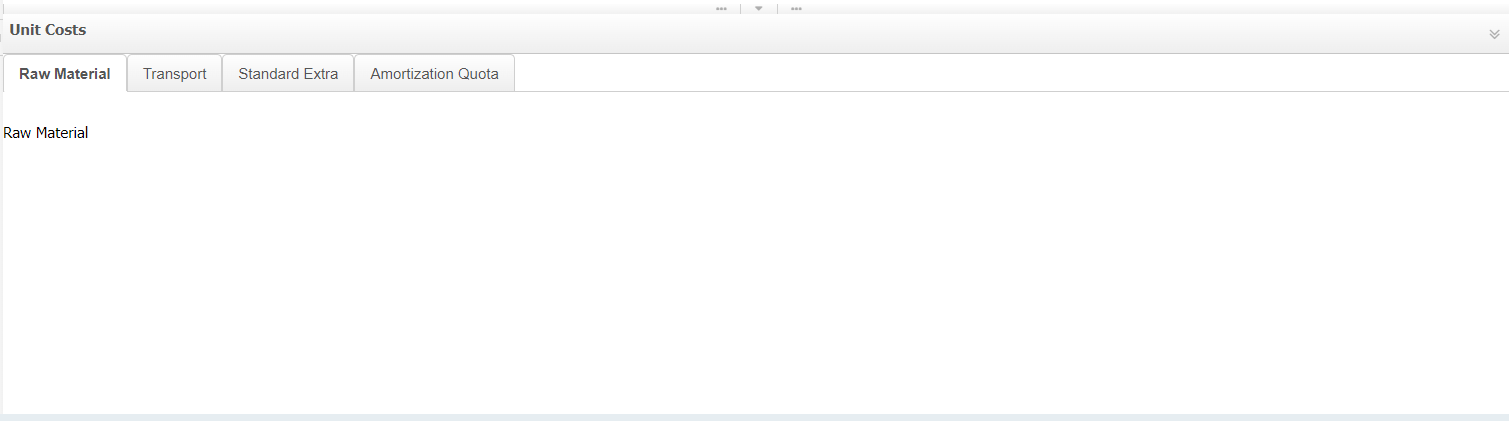
Note: In WA v2023.1, the string displayed as unit cost detail is fixed. Enhancements are planned for future releases.
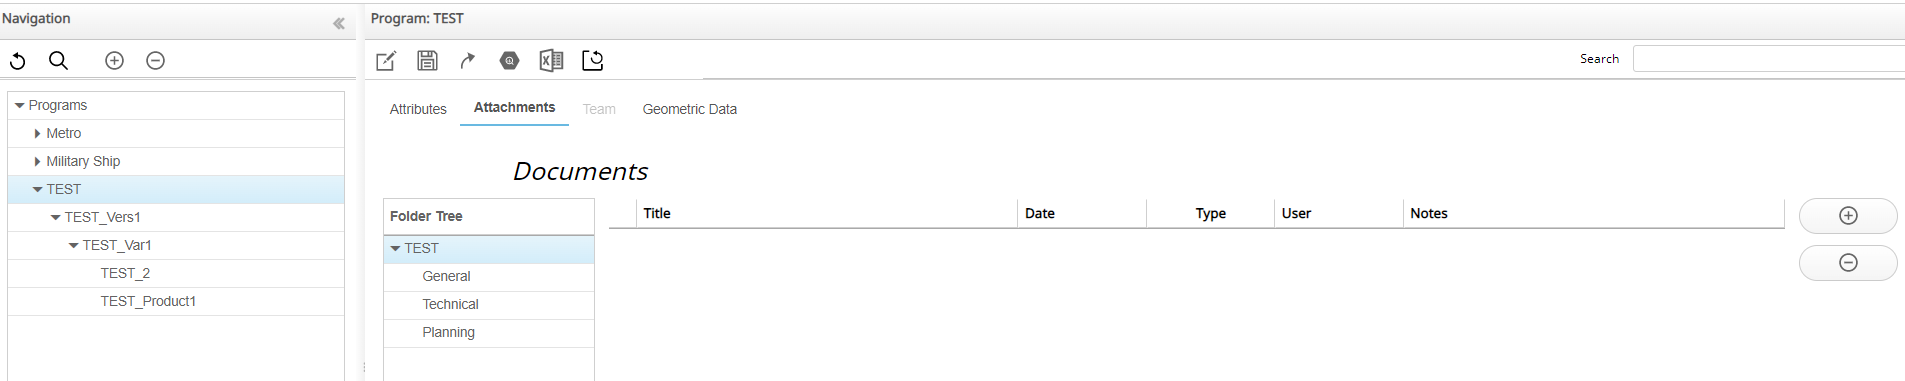
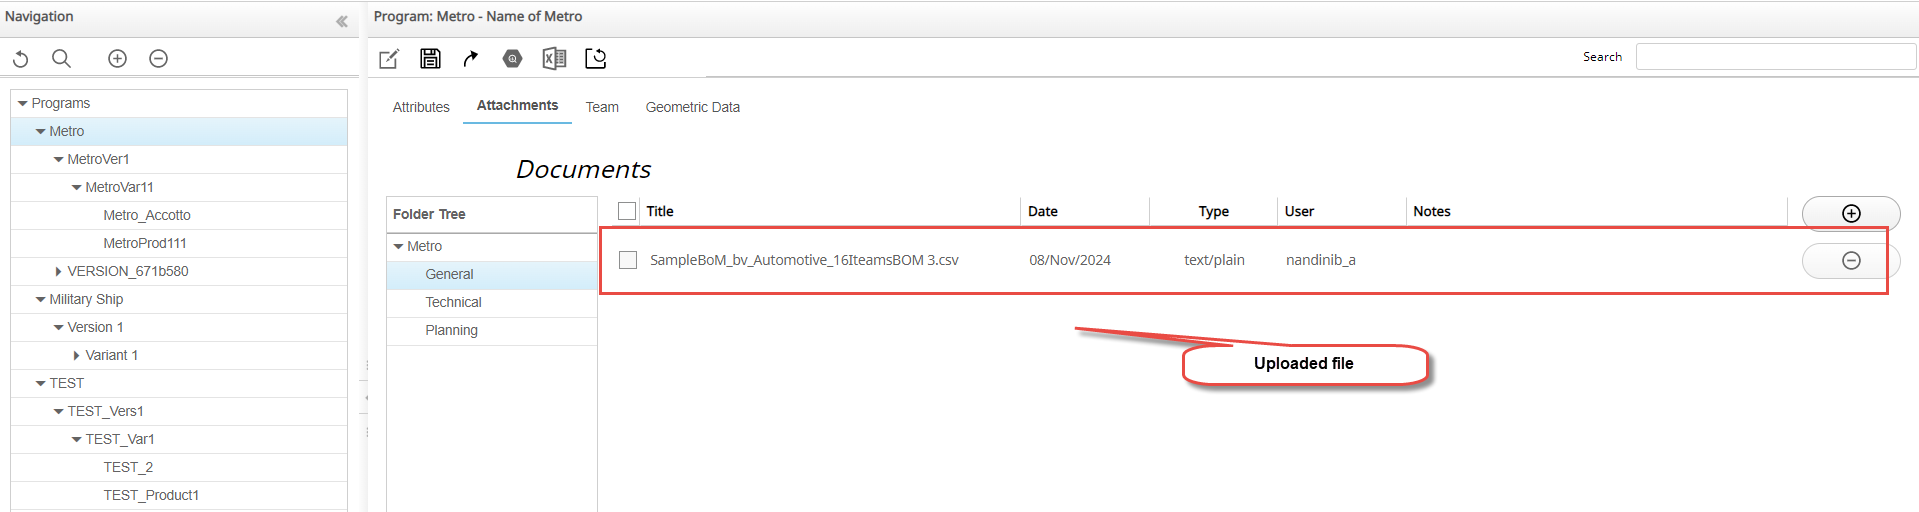
Add Attachments
WA allows you to add external documents at the Program, Version, Variant, and Product levels. You can upload and group the files under three pre-defined categories such as General, Technical, and Planning. You can also upload files at the top level outside of these three categories.
-
Select the Attachments tab.
-
Click the
 icon and then click the
  icon to add an attachment .
-
Navigate to the file that you want to upload and click Open.
The file will be selected and listed in the Documents table.
-
Click the Save Changes
 icon.
After completing the upload and deletion of files, you must save the changes made to the Attachments tab.Note: WA does not allow you to attach executable files for security reasons and performs two types of checks - one for file extensions, and second for file content.
icon.
After completing the upload and deletion of files, you must save the changes made to the Attachments tab.Note: WA does not allow you to attach executable files for security reasons and performs two types of checks - one for file extensions, and second for file content.
Delete Attachment
-
Click the Delete File
 icon.
The selected file is deleted from WA and the Documents table.
icon.
The selected file is deleted from WA and the Documents table.