InputGUI Tutorial
In this tutorial, you will create different InputGUI configurations of a Pulse generic task. The task has Python defined as an application and its script will perform three actions on files and directories: creating, copying, and deleting.
Before you begin the tutorial, download
the pulse folder with the tutorial materials.
Often, input is necessary for the execution of a Pulse process. An Author can use the InputGUI to structure and design how input should be prompted to an Analyst. By creating property editors, categories, tabs, and active conditions, an Author would have a wide variety of options to design the InputGUI.
 Figure 1. |
 Figure 2. |
In this tutorial, you will use the following resources:
- Pulse Library file of File Admin generic task.
- Demo folder, InputGUI _Files, which includes dummy files and directories to perform the actions.
Structure Input Variables with Categories
-
From the Library Browser, drag-and-drop the File Admin
task into the workspace.
Important: Python is needed to execute the task. Depending on your current local installation, you might be requested to map the application in the Application Mapping dialog, as shown in Figure 3.
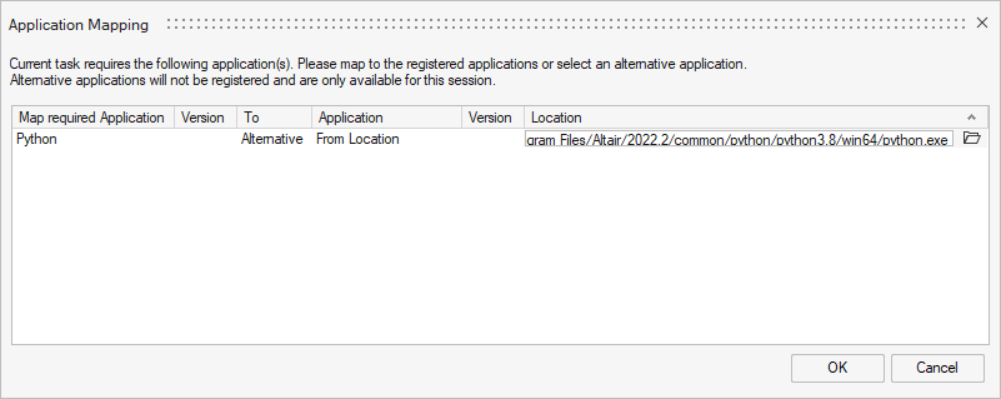
Figure 3. -
In the ApplicationTemplate: File Admin dialog, click the
InputGUI tab and expand Layout_1.
Note: The icons of the variables indicate the type: file, scalar, or directory.

Figure 4. -
Click Preview and review the listed variables in the
Preview: File Admin dialog.
Note: The variables are listed in the same order as in Layout_1.
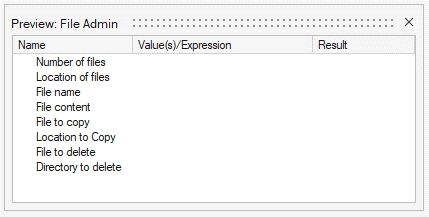
Figure 5. -
Drag-and-drop the variables shown in Figure 6 into the Files Creation category.

Figure 6.Tip: You can use the arrows in the InputGUI tab to modify the location of variables and categories. -
Repeat steps 9 and 10 twice to create two new categories named Copy
File and Delete Action with the variables
shown in Figure 7.
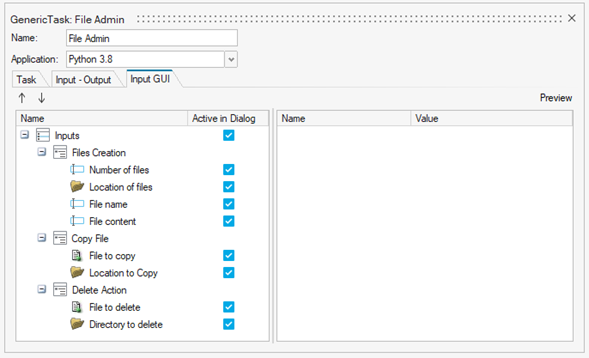
Figure 7. -
Click Preview and review the listed variables in the
Preview: File Admin dialog.

Figure 8. -
From the Author ribbon, Execute
group, click the Run too to execute the task.
You can define any file or directory as input.

Figure 9.Tip: In the tutorial directory under the InputGUI_Files folder, there are dummy files and directories you can use. You can create a copy of the directory for further runs.
Figure 10.
Structure Input Variables with Property Editors and Tabs
-
From the Library Browser, drag-and-drop the File Admin
Categories task into the workspace.
Important: Python is needed to execute the task. Depending on your current local installation, you might be requested to map the application in the Application Mapping dialog, as shown in Figure 11.
Figure 11. -
In the ApplicationTemplate: File Admin Categories dialog,
click the InputGUI tab and expand
Inputs.
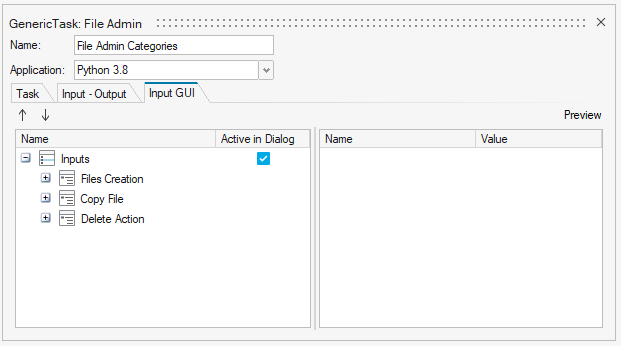
Figure 12. -
Drag-and-drop the Copy File category into the new
layout.

Figure 13. -
Drag-and-drop the Delete Action category into the new
property editor.

Figure 14. -
Right-click the blank space and select from the context menu.
All the Layouts move into the tab.

Figure 15. -
Enable the Active in Dialog checkboxes for both
tabs.

Figure 16. -
Drag-and-drop one Layout to each tab and change the names of the tabs to match
the name of the category they contain.

Figure 17. -
Change the name of each category to Inputs and click
Preview to review the listed variables in the
Preview: File Admin dialog.
Note: The variables are now arranged by tabs.

Figure 18.
Figure 19.
Define an Active Condition on Property Editors
Based on a variable value, define an active condition on property editors to control the shown inputs.
-
In the ApplicationTemplate: File Admin Categories dialog,
click the Input-Output tab and click
 to create a new
Input.
to create a new
Input.

Figure 20. -
Change the parameters of the new created variable as shown in Figure 21.
This variable will enable you to select which action you want to perform through a combobox.

Figure 21. -
Create three property editors and assign the categories and variable as shown
in Figure 22.

Figure 22. -
Click the layout containing the Copy File category and add
strcmp(action, 'Copy') as the active condition, as
shown in Figure 23.

Figure 23.This means that if the action variable has the value Copy, then Copy File category would be shown. -
Click the layout containing the Delete Action category and add
strcmp(action, 'Delete') as the active condition as,
shown in Figure 24.

Figure 24. -
Click the layout containing the Files Creation category and add
strcmp(action, 'Create') as the active condition, as
shown in Figure 25.

Figure 25. -
Click Preview to review how the category display is
updated based on the value of the action variable.

Figure 26. -
Right-click on the File Admin Active task and select
Edit Script from the context menu.
Since the active condition is setting up a logic in the InputGUI, we need to add that same logic to the script.The Pulse Script Editor dialog opens.

Figure 27. -
Starting from line 48 of the Pulse Script Editor dialog,
modify the last lines of the scripts as follows:
action=pulse.getVariableValue('action')
if action == 'Create':
    create()
elif action == 'Copy':
    copy()
else:
    deleteFile()
    deleteDir()
Tip: You can copy and paste this code directly in the script editor.
Figure 28. -
Once the script has been modified, click
 and save it as
File_Robuts_active.py.
Important: The .py extension must be included in the file name.
and save it as
File_Robuts_active.py.
Important: The .py extension must be included in the file name. -
In the Confirm Save as dialog, click
Yes to confirm you want to use this new script on the
task.

Figure 29.