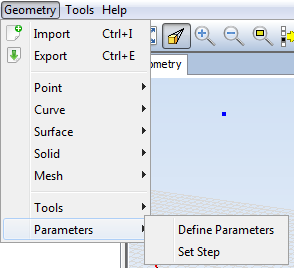
Parameters
The options in this submenu allow the user to specify certain parameters that act as variables for the geometry. This allows parametrizing our geometries in order to be able to run several simulations more easily by tuning the different parameters of the geometry (thus not being necessary to redo the geometry for different simulations).
This procedure works in the following way the user defines several parameters and their value arrays (i.e. the possible values for the parameters) and assigns them to the geometry. This creates several states for the geometry, which we will call “steps”. A step is a geometry state in which each of the parameters takes the value of a specific index of its set of values. As an example, in step 1, every parameter takes the value of the first value of its value array; in step 2 the second value and so on. This means that there will be as many steps as the length of the larger value array of those parameters used in the geometry.
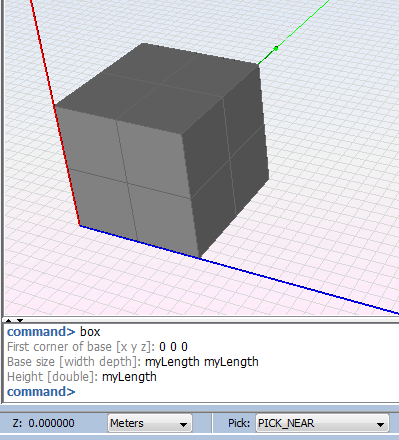
In this way, the user can use parameters while defining the geometry. For example, the following figure shows how to define a cube with a side length depending on a parameter called “myLength”.
When using a parametrized geometry, the user will be able to view the results for each step in the options of the Show Results menu.
The options explained below will allow adding parameters and visualizing the effect of these parameters in the geometry view.