
Selecting Materials
Use the Materials tool to select materials for the analysis.
-
From the Tool Deflection ribbon, click
the Materials tool.

-
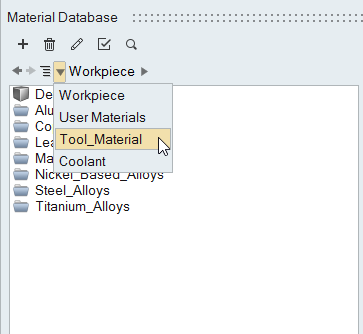
In the Material Database dialog, to the right of
 , click the triangle and select Tool_Material.
-
Select the appropriate material(s) for the analysis by right-clicking on the
material and selecting Select from the context menu, or
click
 .
You can select more than one material. The material(s) that you select will be shown in the Analysis dialog. In that dialog, you will have to identify the materials to be used during the analysis.You can select/unselect materials as you choose. For this analysis, however, you need only one material.
.
You can select more than one material. The material(s) that you select will be shown in the Analysis dialog. In that dialog, you will have to identify the materials to be used during the analysis.You can select/unselect materials as you choose. For this analysis, however, you need only one material.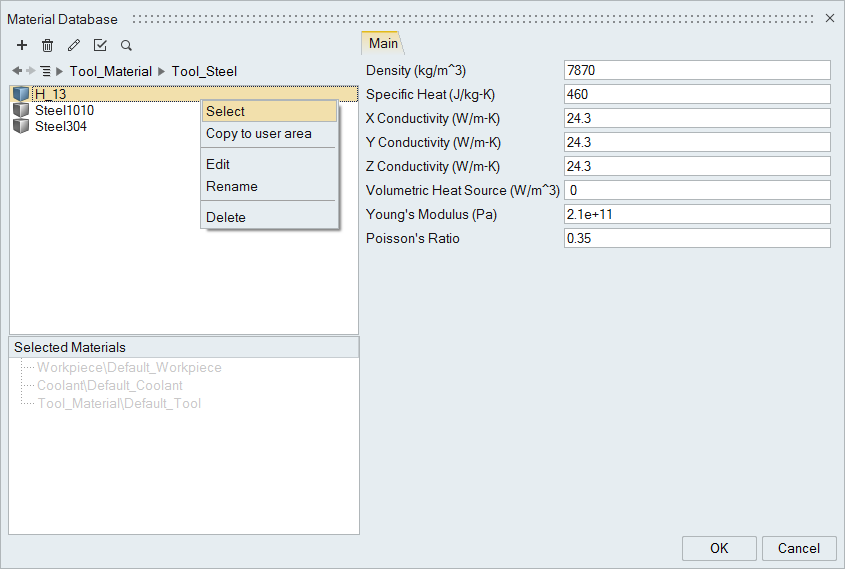
Copying Materials
Use the Materials tool to copy materials.
-
From the Tool Deflection ribbon, click
the Materials tool.
-
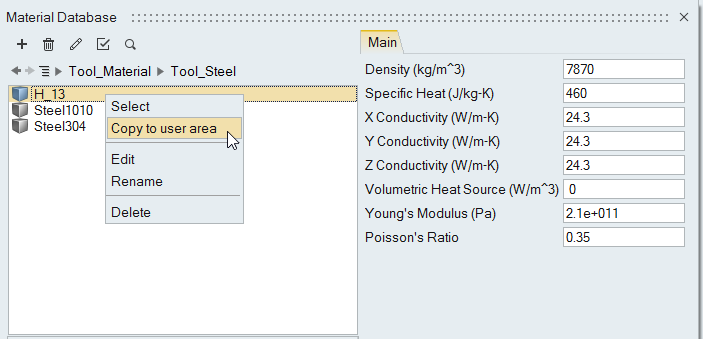
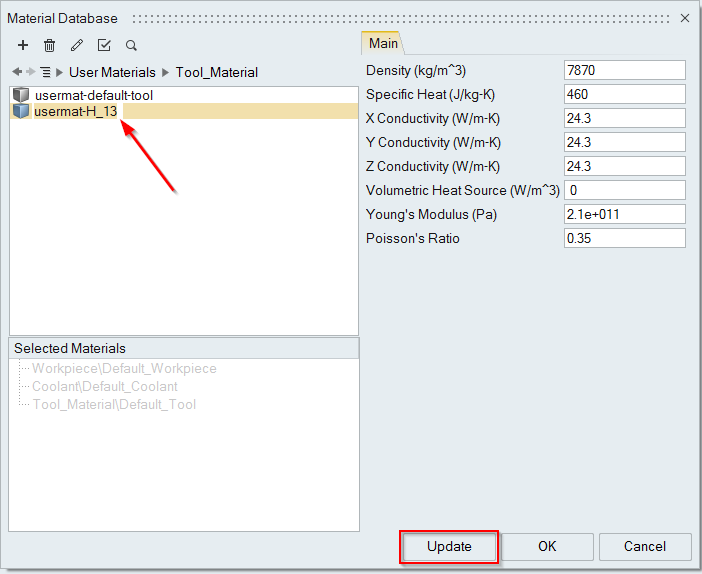
In the Material Database dialog, right-click on the
material and select Copy to user area.
Assigning Materials to Parts
-
To assign a material to a part, right click on the part and select the material
from the menu.
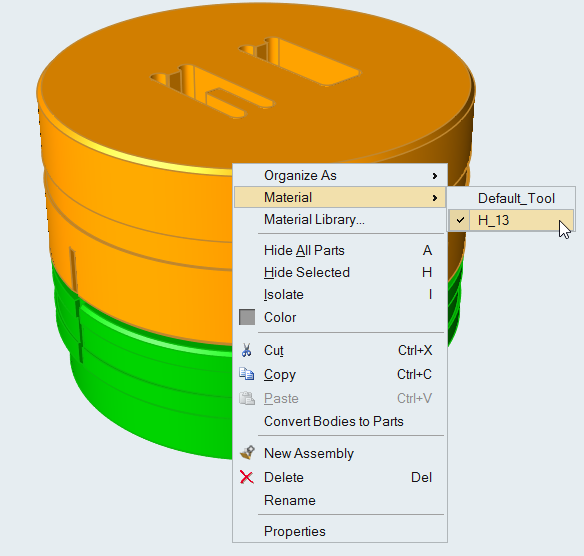
The materials shown in the menu are the selected materials in the Material GUI.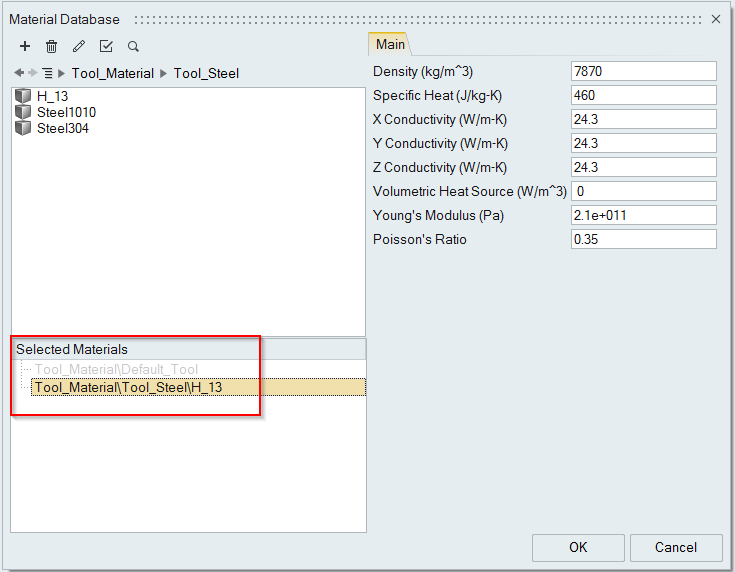
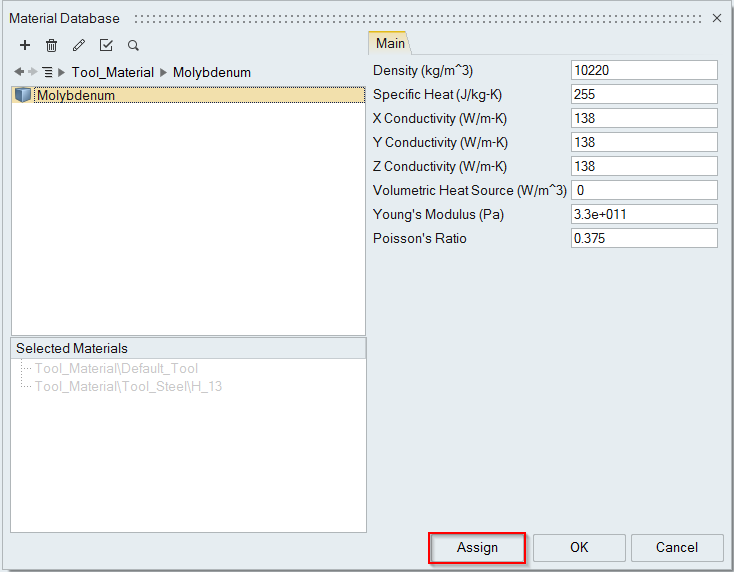
-
Click Material Library... to assign a different material
to the part. The Material Database window will be
populated. Choose an appropriate material and click
Assign.
Creating Tool Materials
- Click the Extrusion tab.
-
Click the Materials icon.
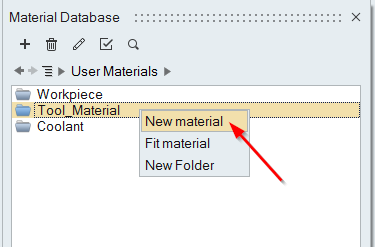
-
In the Material Database dialog, right-click on the Tool_Material folder and
select New material.
-
Enter a name for the new material, select Tool for the
Material Class and Yes for
Include Plastic Data, and click
Next.

-
Click the Plastic tab to add temperatures and
corresponding curves.
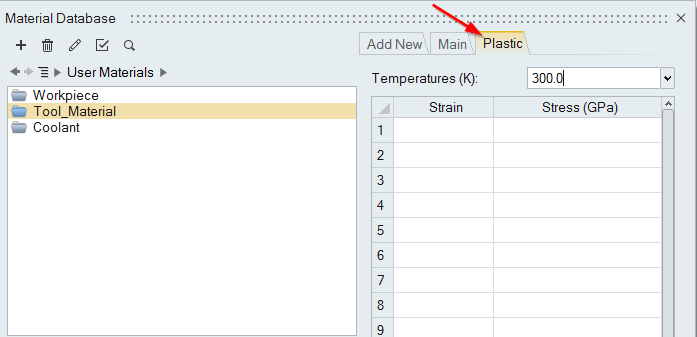
-
Click
 to add a new temperature.
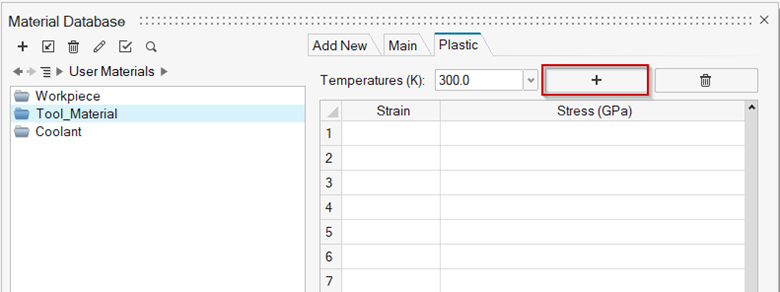
Edit the temperature and press Enter.
-
Select a temperature and enter the Strain and
Stress values in the table then press
Enter to accept the changes.
Note: The first point in the table must be (0,0). A minimum of three points is required for every curve.
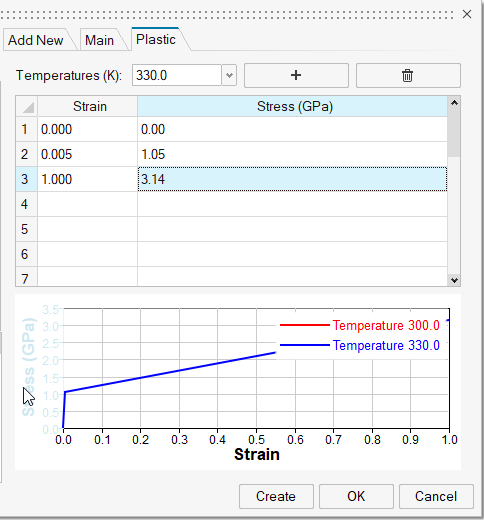
A plot for the temperatures is shown in the bottom panel.
-
Click
 to delete
the respective curve.
to delete
the respective curve.
- Click Create to create the new material with curve data.