
Print Part (Sinter)
Select parts to print and assign materials for binder sintering.
-
Select the Print Part
 tool on the Print3D
ribbon.
Tip: To find and open a tool, press Ctrl+F. For more information, see Find and Search for Tools.
tool on the Print3D
ribbon.
Tip: To find and open a tool, press Ctrl+F. For more information, see Find and Search for Tools. - Select one or more parts in the modeling window to prepare it for 3D printing.
-
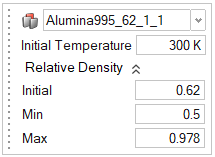
Assign a material, initial temperature, and relative density to the part in the
microdialog.
- Right-click and mouse through the check mark to exit, or double-right-click.
Note:
- You can view the Materials Database and create your own materials by
clicking the
 icon on
the microdialog.
icon on
the microdialog. - When using the Print 3D module, materials should only be assigned or changed using the Print Part tool. Assigning a material using the part context menu or the Property Editor will instead assign an Inspire structural material, which should be ignored.
- If you select multiple parts to print, you then define the orientation and apply supports for each print part individually. When you run the simulation, the analysis will consider all the parts jointly in its calculations.
Designate Parts as Live Setters
Designate existing parts as live setters for binder sintering.
Note: Live setters are printed along with the print part and are
subject to deformation just as the print part is. To avoid this, use the Setter tool
to create a virtual ceramic setter instead.
-
Select the Designate Live Setters
 tool on the Print Part icon.
Tip: To find and open a tool, press Ctrl+F. For more information, see Find and Search for Tools.
tool on the Print Part icon.
Tip: To find and open a tool, press Ctrl+F. For more information, see Find and Search for Tools. - Select parts to designate them as live setters.
- Right-click and mouse through the check mark to exit, or double-right-click.