Animation Toolbar
Use the animation toolbar to play, record, and configure the animation.

- Animation Settings
- Click to open the Animation Settings.
- Play and Record/Stop Recording
- Click the button to begin recording the results; the icon changes to red to indicate that it is recording. Click the icon again to stop recording.
- Start Animation/Pause Animation
- Click the button to start or pause the animation. Use the arrow buttons to jump the first or last frame in the animation.
- Move to First/Previous/Next/Last Step
- These buttons allow you to step through the animation frame-by-frame. If you hold down the Previous or Next button, it will auto-repeat. If you want to skip frames, use the Increment By feature in the Animation Settings; hold Ctrl to temporarily override this behavior.
- Slider
- Drag the slider on the toolbar to view a particular point during the analysis; use the arrow keys to move frame-by-frame through the animation.
- Current Step
- Displays the current time or frame. You can also enter a value to go to the nearest time/frame.
Note: The animation toolbar has Previous and Next buttons with an auto-repeat feature,
allowing you to step through the animation frame-by-frame by holding down the
button. In addition, the Animation Settings include an option to Reverse Playback.
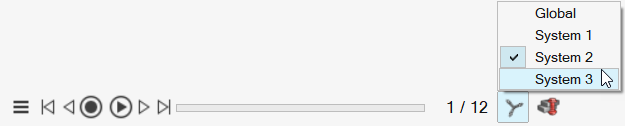
Tip: If a model has multiple systems, you can
choose among a model's systems using the System button in the
Animation toolbar.