
Show Analysis Results
Review the results of a casting analysis.
Results must be available in the Run History before viewing.
-
Click Show Analysis Results on the Run icon.

-
In the Analysis Explorer, select a Run,
Stage, and Result Type.

- Optional: Enable the various Show options to determine what is visible for the analysis.
- Optional: Enable the various Callouts options to show analysis results at a point of interest on your model. The callout values apply to the currently selected run.
-
Analyze the run.
- To turn on Animation, click
 . Change the speed of the animation by clicking the
  icon and using the Speed
slider.
icon and using the Speed
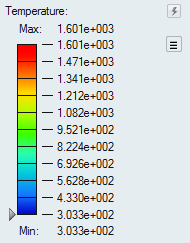
slider. - To see what areas on your model are under the greatest stress, adjust
the results slider.Tip: Restore the result slider's default values by clicking
 .
.
Note: Click to
record a video of the simulation. Click the button again to stop the
recording. Browse to Documents/Altair/captures to
review the video.
to
record a video of the simulation. Click the button again to stop the
recording. Browse to Documents/Altair/captures to
review the video. 
- To turn on Animation, click
-
Click
 under
Infoto review simulation settings for the run,
including information on components, process, stages, mesh, and the model.
under
Infoto review simulation settings for the run,
including information on components, process, stages, mesh, and the model.
-
Click
 under Info to view the
Clamping Force window.
under Info to view the
Clamping Force window.
- Separation Force: This is the force pushing the mold apart during high-pressure casting. You cannot directly edit this field.
- Safety Factor: This factor multiplied by the separation force yields the Clamping Force result. Changing this field will also change the Clamping Force field.
- Intensification Pressure: This is the maximum pressure applied during the molding process.
- Wedgelock Angle: This is the angle of the mold's wedgelock component. If you mold has no wedgelock, the field will show a default value of 0.
- Slider Area: This is the surface area of the mold's sliding components. If the mold has no slider, the field will show a default value of 0.
- Clamping Force: This is the force needed to keep the mold closed during casting.
Note: You must enable Compute Clamping Force in the High Pressure Process Setup window to access this data. -
Click
 under
Info to visualize the results as vectors.
Note: Vector visualization is only available for velocity and displacement results.
under
Info to visualize the results as vectors.
Note: Vector visualization is only available for velocity and displacement results. -
Click
 under Info to view
displacement results from a selected point of reference. Click on the model to
define the point of origin, then define the X and Y directions.
Note: The icon is not available in the Filling
stage.
under Info to view
displacement results from a selected point of reference. Click on the model to
define the point of origin, then define the X and Y directions.
Note: The icon is not available in the Filling
stage.