Altair Drive Desktop provides a version control system which enables you to create a
new version, track changes and collaborate with other team members.
Click Open MyFiles on the Home
tab.
Your mounted files location is displayed in Windows
Explorer.
Right-click the input file, select Altair One > Create Version.
Figure 1. Create Version
To view the initial version and called start is created in the default
main branch, right-click the result file, select Altair One > Version Tree.
Figure 2. View Version Tree
The Version dialog box is displayed. Figure 3. Version Dialog box
Modify the file contents and save the changes.
An asterisk (*) symbol next to the current version indicates it has
uncommitted changes. It is also called the work-in-progress version. Figure 4. Current Version
To create a new version, choose one of the following:
Right-click main and select New
Version
Click New Version from the toolbar above.
Figure 5. Create New Verison
In the New Version dialog box, provide:
For Version Name, enter a specific name for the version.
For Description, enter a description about the changes you made
to the file.
Figure 6. Enter Version Details
Click OK.
A new version file is created.Figure 7. New Version File
Click to view or hide the properties such as name,
description, author, and timestamp of the version.
Click to edit the description of the file version.
The other actions you can perform using the version control are:
Restore will discard all changes made after a
selected version.
Note: A warning message appears
about losing the changes made from the current version to the
selected previous version.
Downloadthe selected version to your local
folder.
New Branch create a new branch to manage specific
updates independently.
Make Current to switch to the selected version as the
current version. If you make a version current, the latest you can edit
it and view the previous versions.
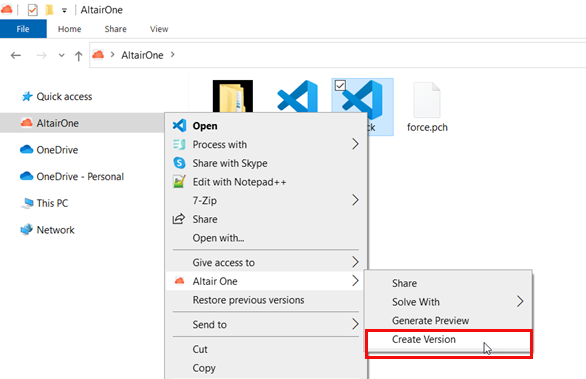
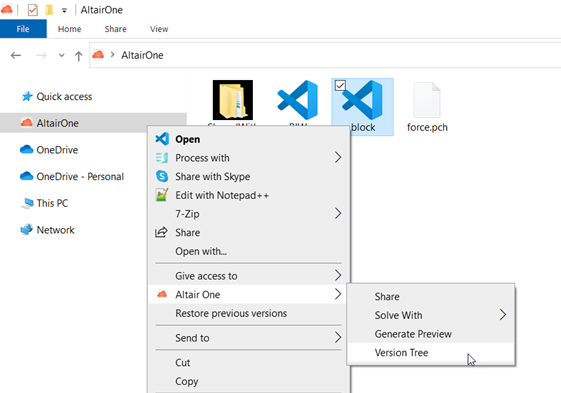 Figure 2. View Version Tree
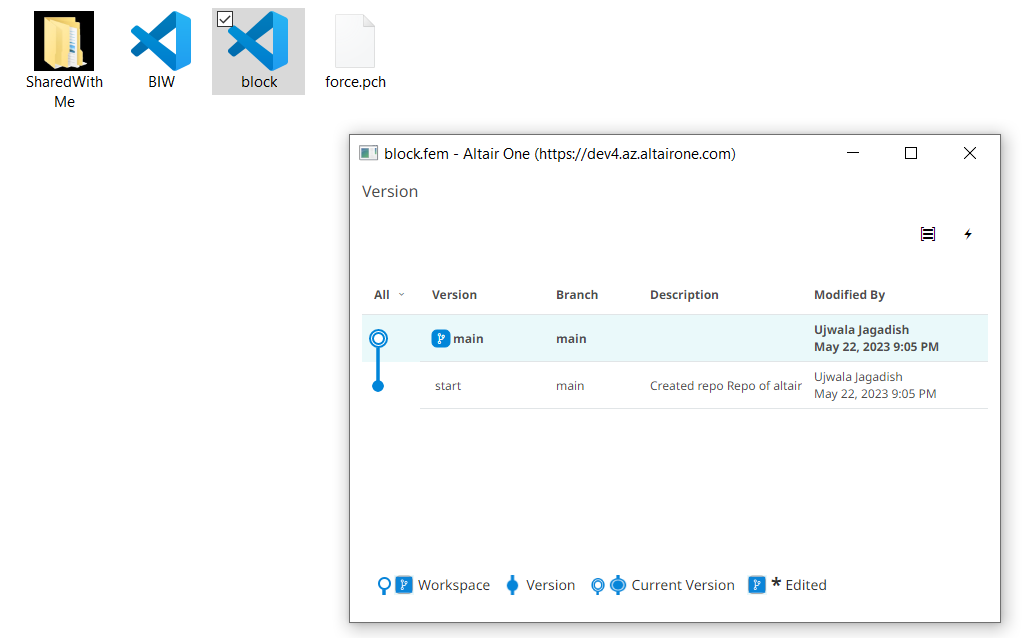
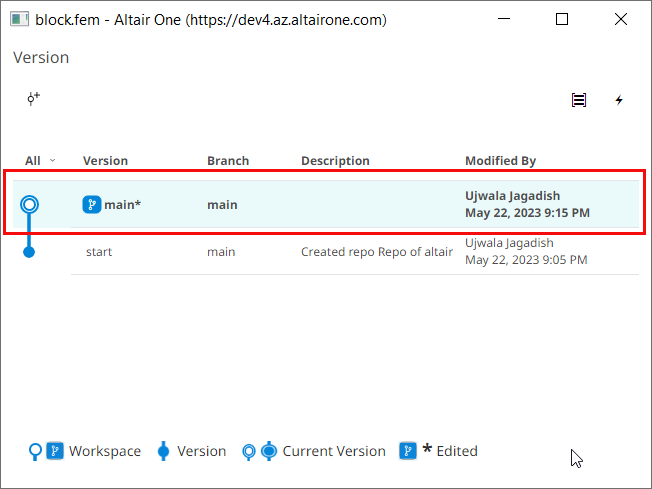

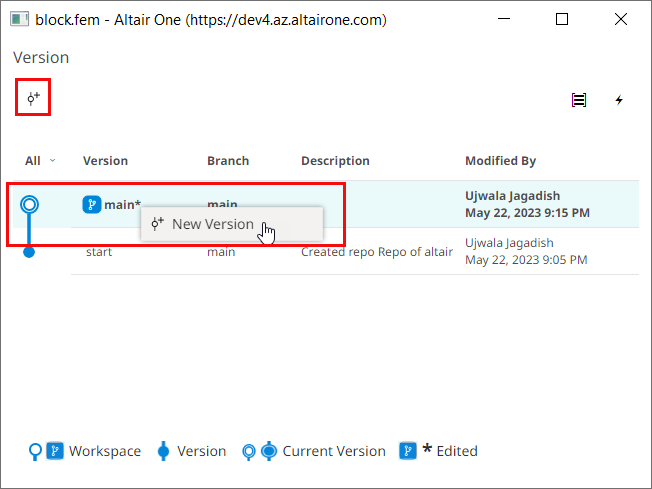 Figure 5. Create New Verison
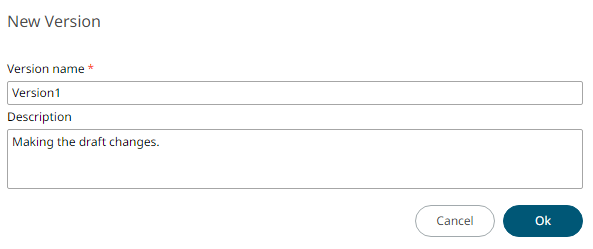
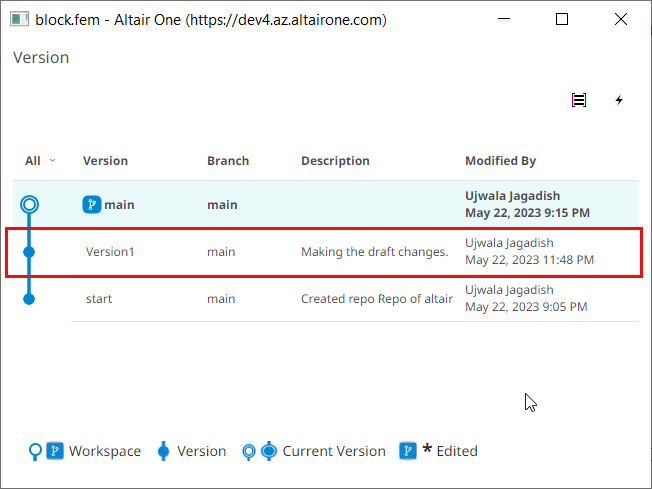 Figure 7. New Version File
 to view or hide the properties such as name,
description, author, and timestamp of the version.
Click
to view or hide the properties such as name,
description, author, and timestamp of the version.
Click to edit the description of the file version.
 will discard all changes made after a
selected version.Note: A warning message appears about losing the changes made from the current version to the selected previous version.
will discard all changes made after a
selected version.Note: A warning message appears about losing the changes made from the current version to the selected previous version. the selected version to your local
folder.
the selected version to your local
folder. create a new branch to manage specific
updates independently.
create a new branch to manage specific
updates independently. to switch to the selected version as the
current version. If you make a version current, the latest you can edit
it and view the previous versions.
to switch to the selected version as the
current version. If you make a version current, the latest you can edit
it and view the previous versions.