
Installation via the Graphical User Interface
Start the Installer Graphical User Interface for your platform as shown below. The GUI installer uses the X-Windows technology for the Graphical User Interface. If you are running on a remote UNIX system in X-windows, be sure your DISPLAY environment variable is set properly.
-
Change the working directory to the staging directory
where you downloaded the tar files and extracted them, and run the GUI install
script install.sh.
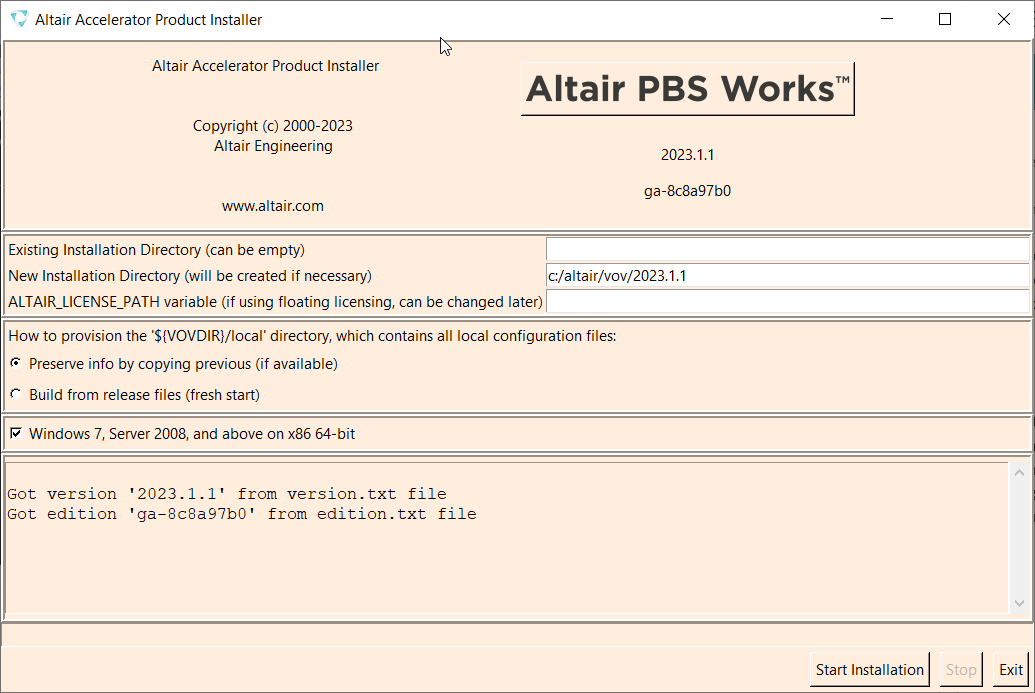
The installation dialog appears. Since this is an update to an existing release, the Existing Installation Directory and New Installation Directory fields should be the same value, and that value should be the location of the current installation. The value of the ALTAIR_LICENSE_PATH variable field will be obtained from the current installation and does not need to be changed.
- Use the first section to tell the installer where to install the Altair Accelerator software and where it will find the Altair Accelerator license server.
- Use the second section to setup the new release so that locally changed files are placed into the new release. Because this is an update of an existing release, you want the install to do nothing with regard to your local directory. You should choose Preserve info by copying previous. This tells the installer to copy the "local" directory file in the current release to itself, which is effectively to do nothing.
-
In the Platforms section, indicate which platform you are adding during this
install. Clear all the other platforms that have already been installed.
This directs the installer to place the binary executables for these machine types into the installed directory structure. The files will be placed within subdirectories named for the platform. The installed files for each platform will come from the staging area where you have downloaded and extracted them.
If you are installing on a UNIX system, you could select the Windows platform here if the Windows file (win64.tar) was extracted into the staging area. The Window binaries will be installed on the UNIX machine as files within the win64 platform subdirectory.
The intention of platform selection is to provide executable files in the file system on this machine, for the added platform in the network. This enables the remote machine to access the executables of their type by way of NFS, without needing to do an install of files on any other machines.
-
Click Start installation to start the installation. It
normally takes a few minutes to run, depending mostly on the speed of your
disk.
During the install, the program will write messages into the bottom section of the dialog, which is a scrollable region. The messages are also written to a log file on disk in the new installation directory, named install<timestamp>.log.
- When the installation is done, click Exit.
- You can review the install log for errors and warnings. The last few sentences of the log file remind you to do something if you are installing Accelerator. This subject is explained in For Accelerator Installation Only.