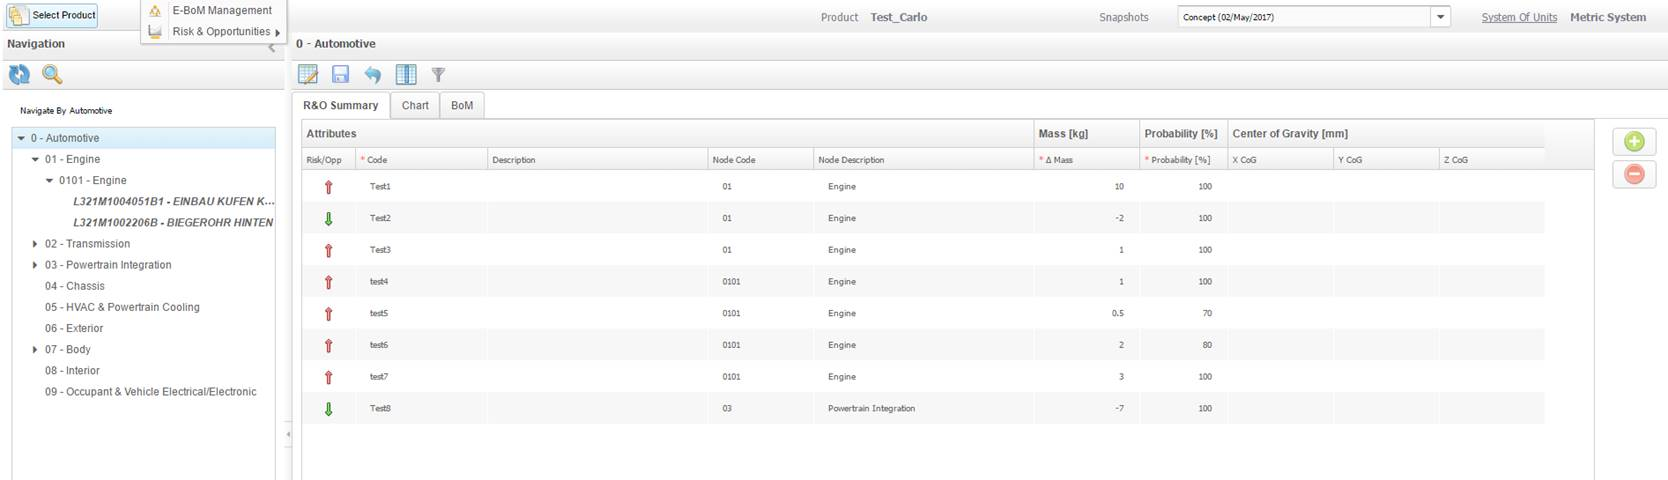
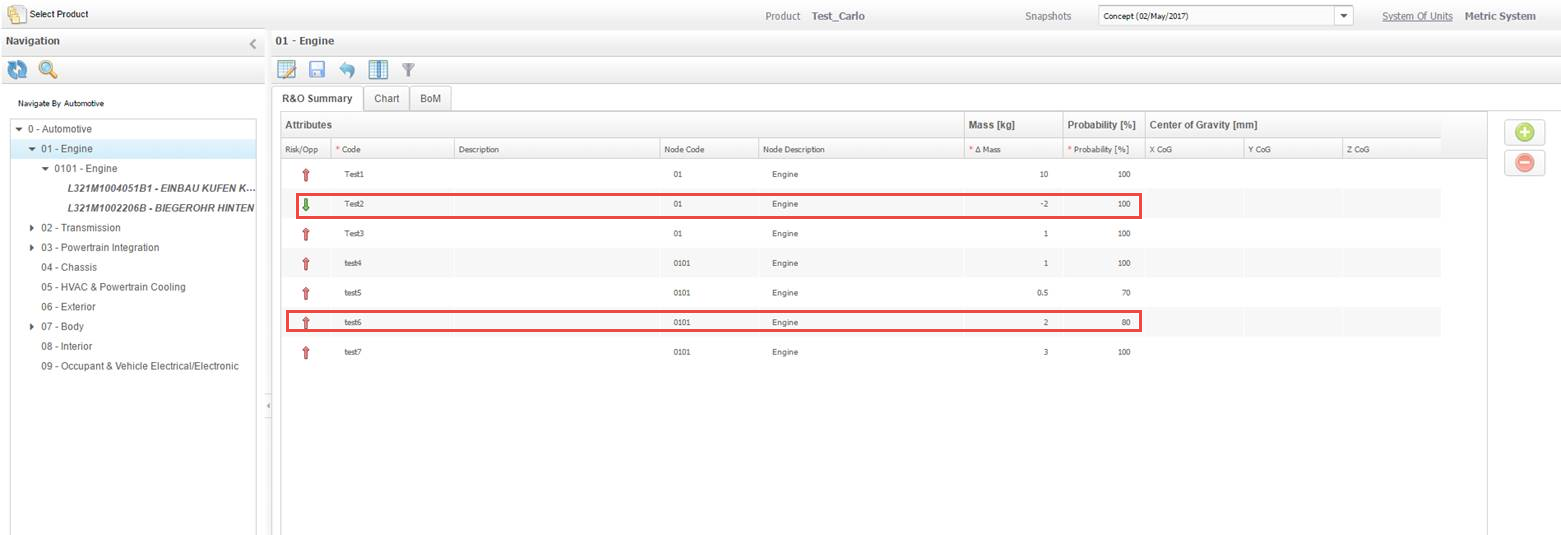
Risks and Opportunities allow you to add or edit a new Risk and/or Opportunity to
systems/sub-systems.
To add or edit a new Risk or Opportunity:
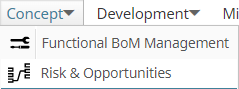
Navigate to Concept → Risk & Opportunities.
Click on Enable Changes.
User can add and delete risk and opportunities at any level.
Note: If the given value in weight is positive, it is considered as Risk
and if it is negative, it is considered as opportunity.
Click Save to save the additions.
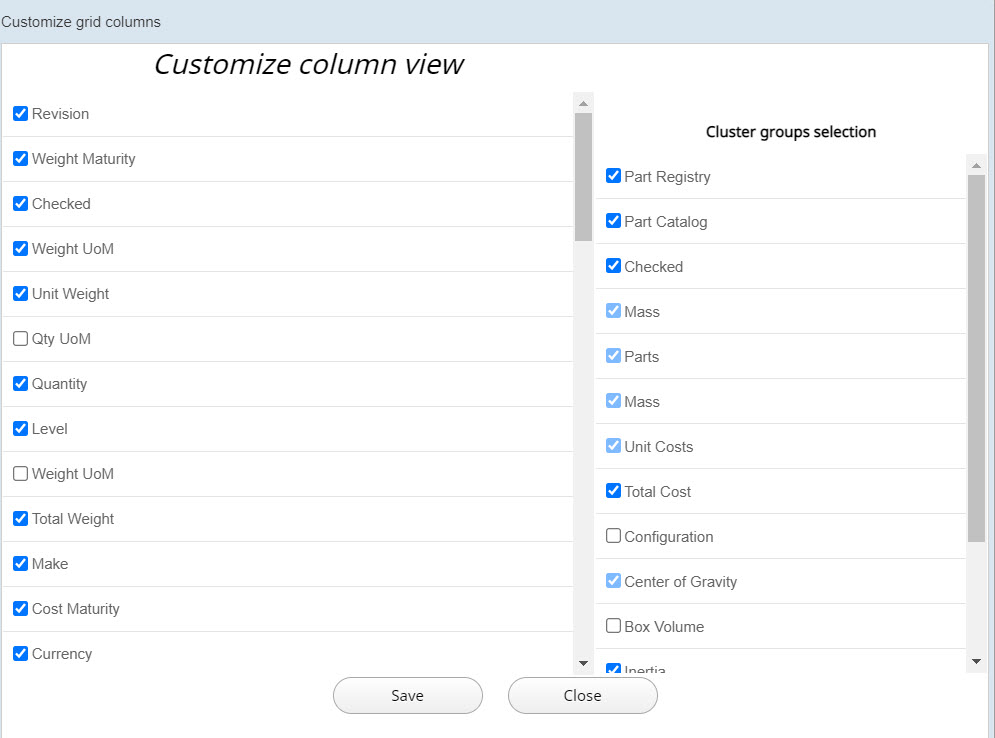
Click the
icon to customize the columns view.
In the Customize Grid View dialog box, select the column
or cluster check boxes that you want to include in the table.
The list of check boxes on the left are the individual columns that can be
added or removed from the table. The check boxes in the Cluster groups selection selection list are the categories of columns. If you select any cluster from
this list, all columns that belong to this cluster are selected automatically.
Click Save and Close to save the
changes that you have made.
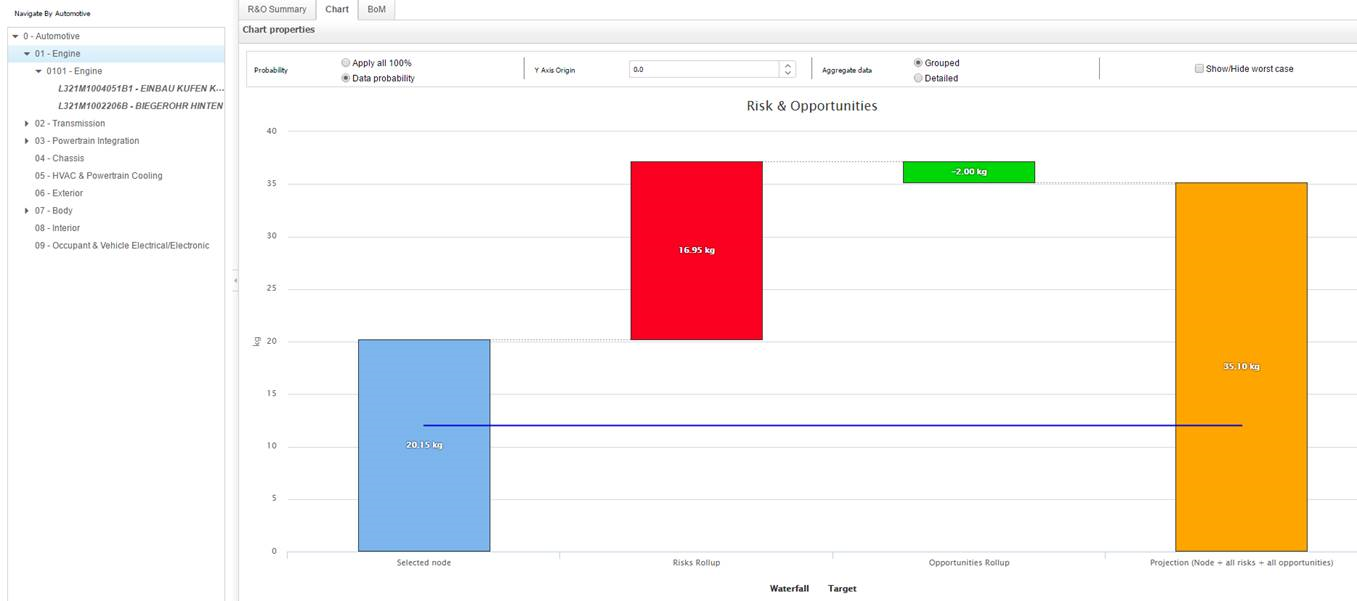
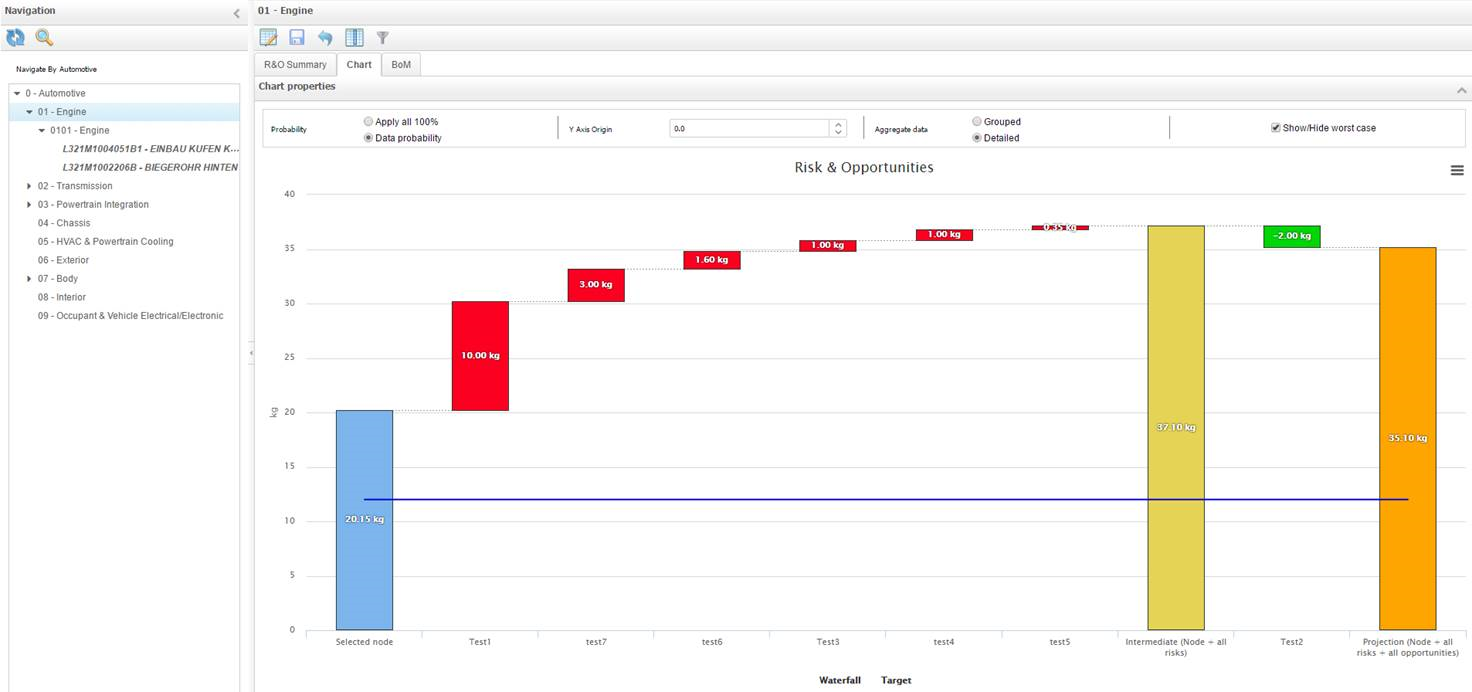
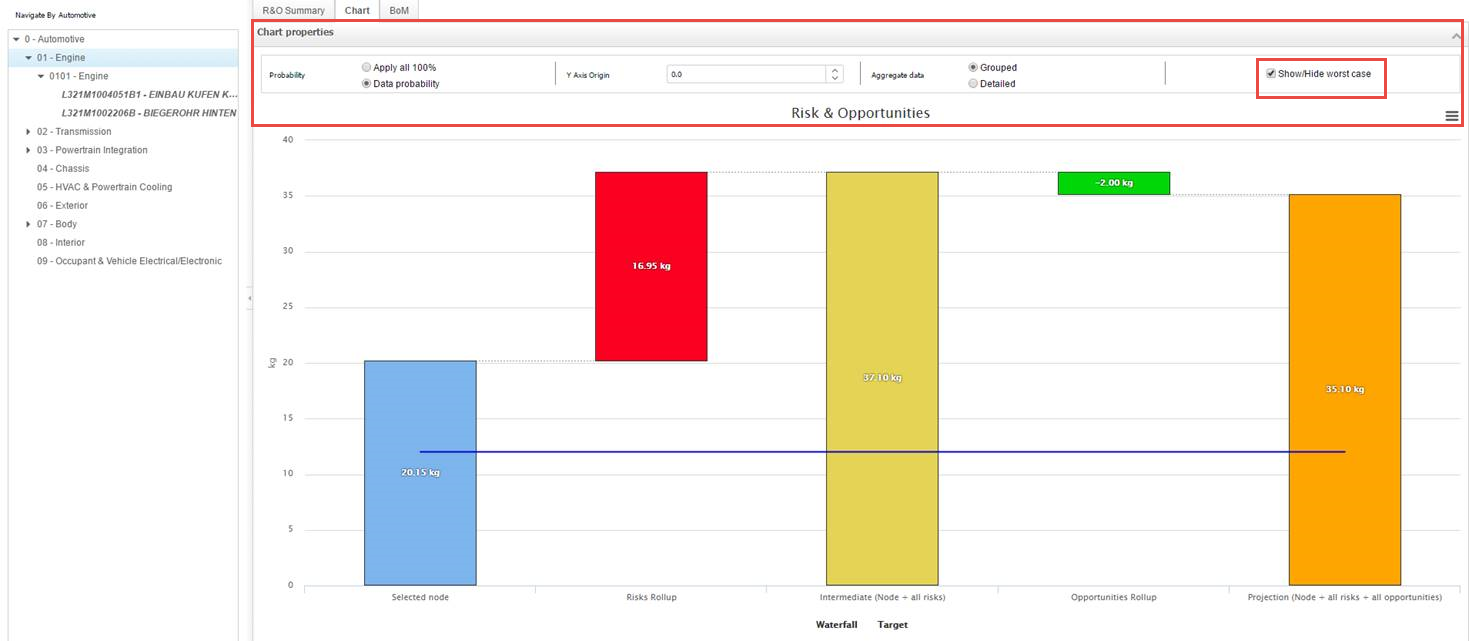
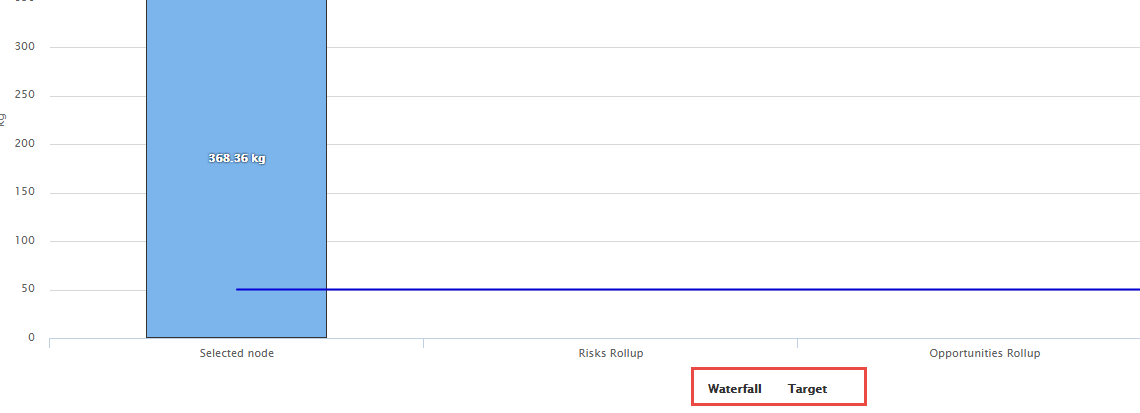
Select the Chart tabbed page to view the graphical representation of
Risk and Opportunities.
Edit the Chart Properties using the following options in
the Chart tab:
Select the Detailed option to view a detailed
chart.
Select the Show/Hide worst case check box to view the
intermediate node of all risks in the chart.
User can also toggle between waterfall and toggle using the option available
at the bottom of the chart.

 icon to customize the columns view.