Send Data to SmartWorks IoT
You need to create a connection between SmartWorks IoT and the object to send the data. This connection can be created from an API. The platform offers access through a REST API to all the resources. It's protected by Oauth protocol allowing you to define fine grained access control according to your use case.
Data must be sent via HTTP or MQTT to SmartWorks IoT. For this project we are using MQTT connection.
MQTT Is the standard for IoT messaging. It allows for messaging between device to cloud and cloud to device. More information on MQTT can be found here:
Client connections are always handled by a MQTT broker, which is responsible for receiving and filtering the messages, determining who is subscribed to each message and sending them. To configure the MQTT broker connection, the Host, Username and Password are the required parameters.
Follow the steps below to connect your device via MQTT.
-
Follow the first step in the file to import the libraries. Click the arrow icon
next to the line
import modules.smartworks_sdk as swxto execute the code to import the files.Note: If you are using Jupyter online, you will need to restart Kernell.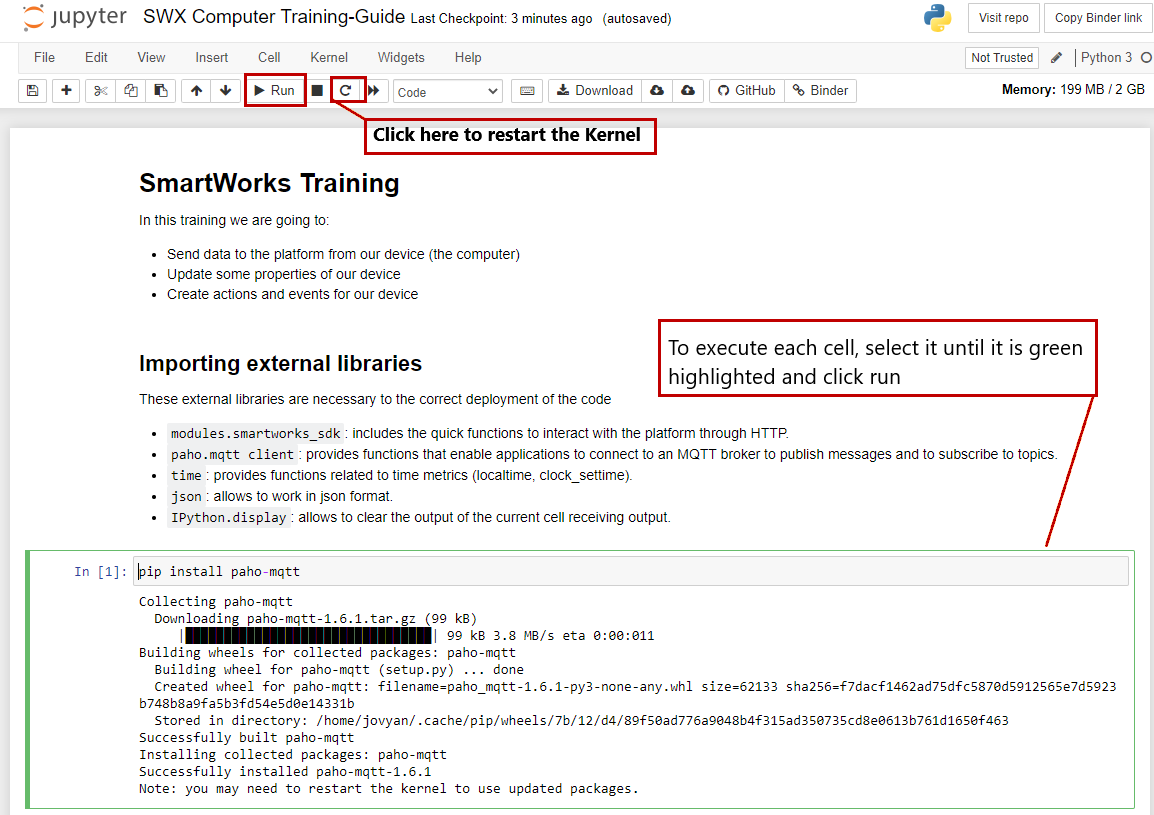
Figure 1. -
Connect your device via HTTP:
-
Execute the code and add the required information as instructed.
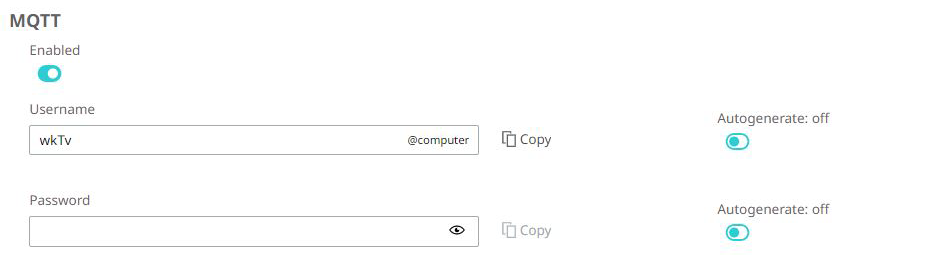
Figure 2. - Required:
In AnythingDB, click your Thing and get the Thing ID and Secret ID to
authenticate and authorize your entity.

Figure 3. -
Check the data received in the Raw History panel as shown below.
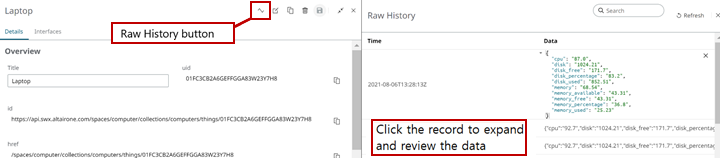
Figure 4.
-
Execute the code and add the required information as instructed.
-
Connect a Device via MQTT:
MQTT Is the standard for IoT messaging. It allows for messaging between device to cloud and cloud to device. Read More information on MQTT: https://mqtt.org/
Client connections are always handled by a MQTT broker, which is responsible for receiving and filtering the messages, determining who is subscribed to each message and sending them. To configure the MQTT broker connection; Host, Username and Password are the required parameters.
-
Check the data received in the Raw History panel as shown below.
Figure 5.
-
Check the data received in the Raw History panel as shown below.