
Tutorial: Basic Surfacing 1
Tutorial Level: Beginner Learn basic surfacing techniques such as creating primitives and NURBS curves and then modifying them by editing points and using tools like Blend, Loft, Offset, and Trim.
In this lesson you will learn about:
- Creating free-form circles
- Edit Points mode
- Blend curves
- Loft
- NURBS curves
- Offset (surface and curve)
- Trim
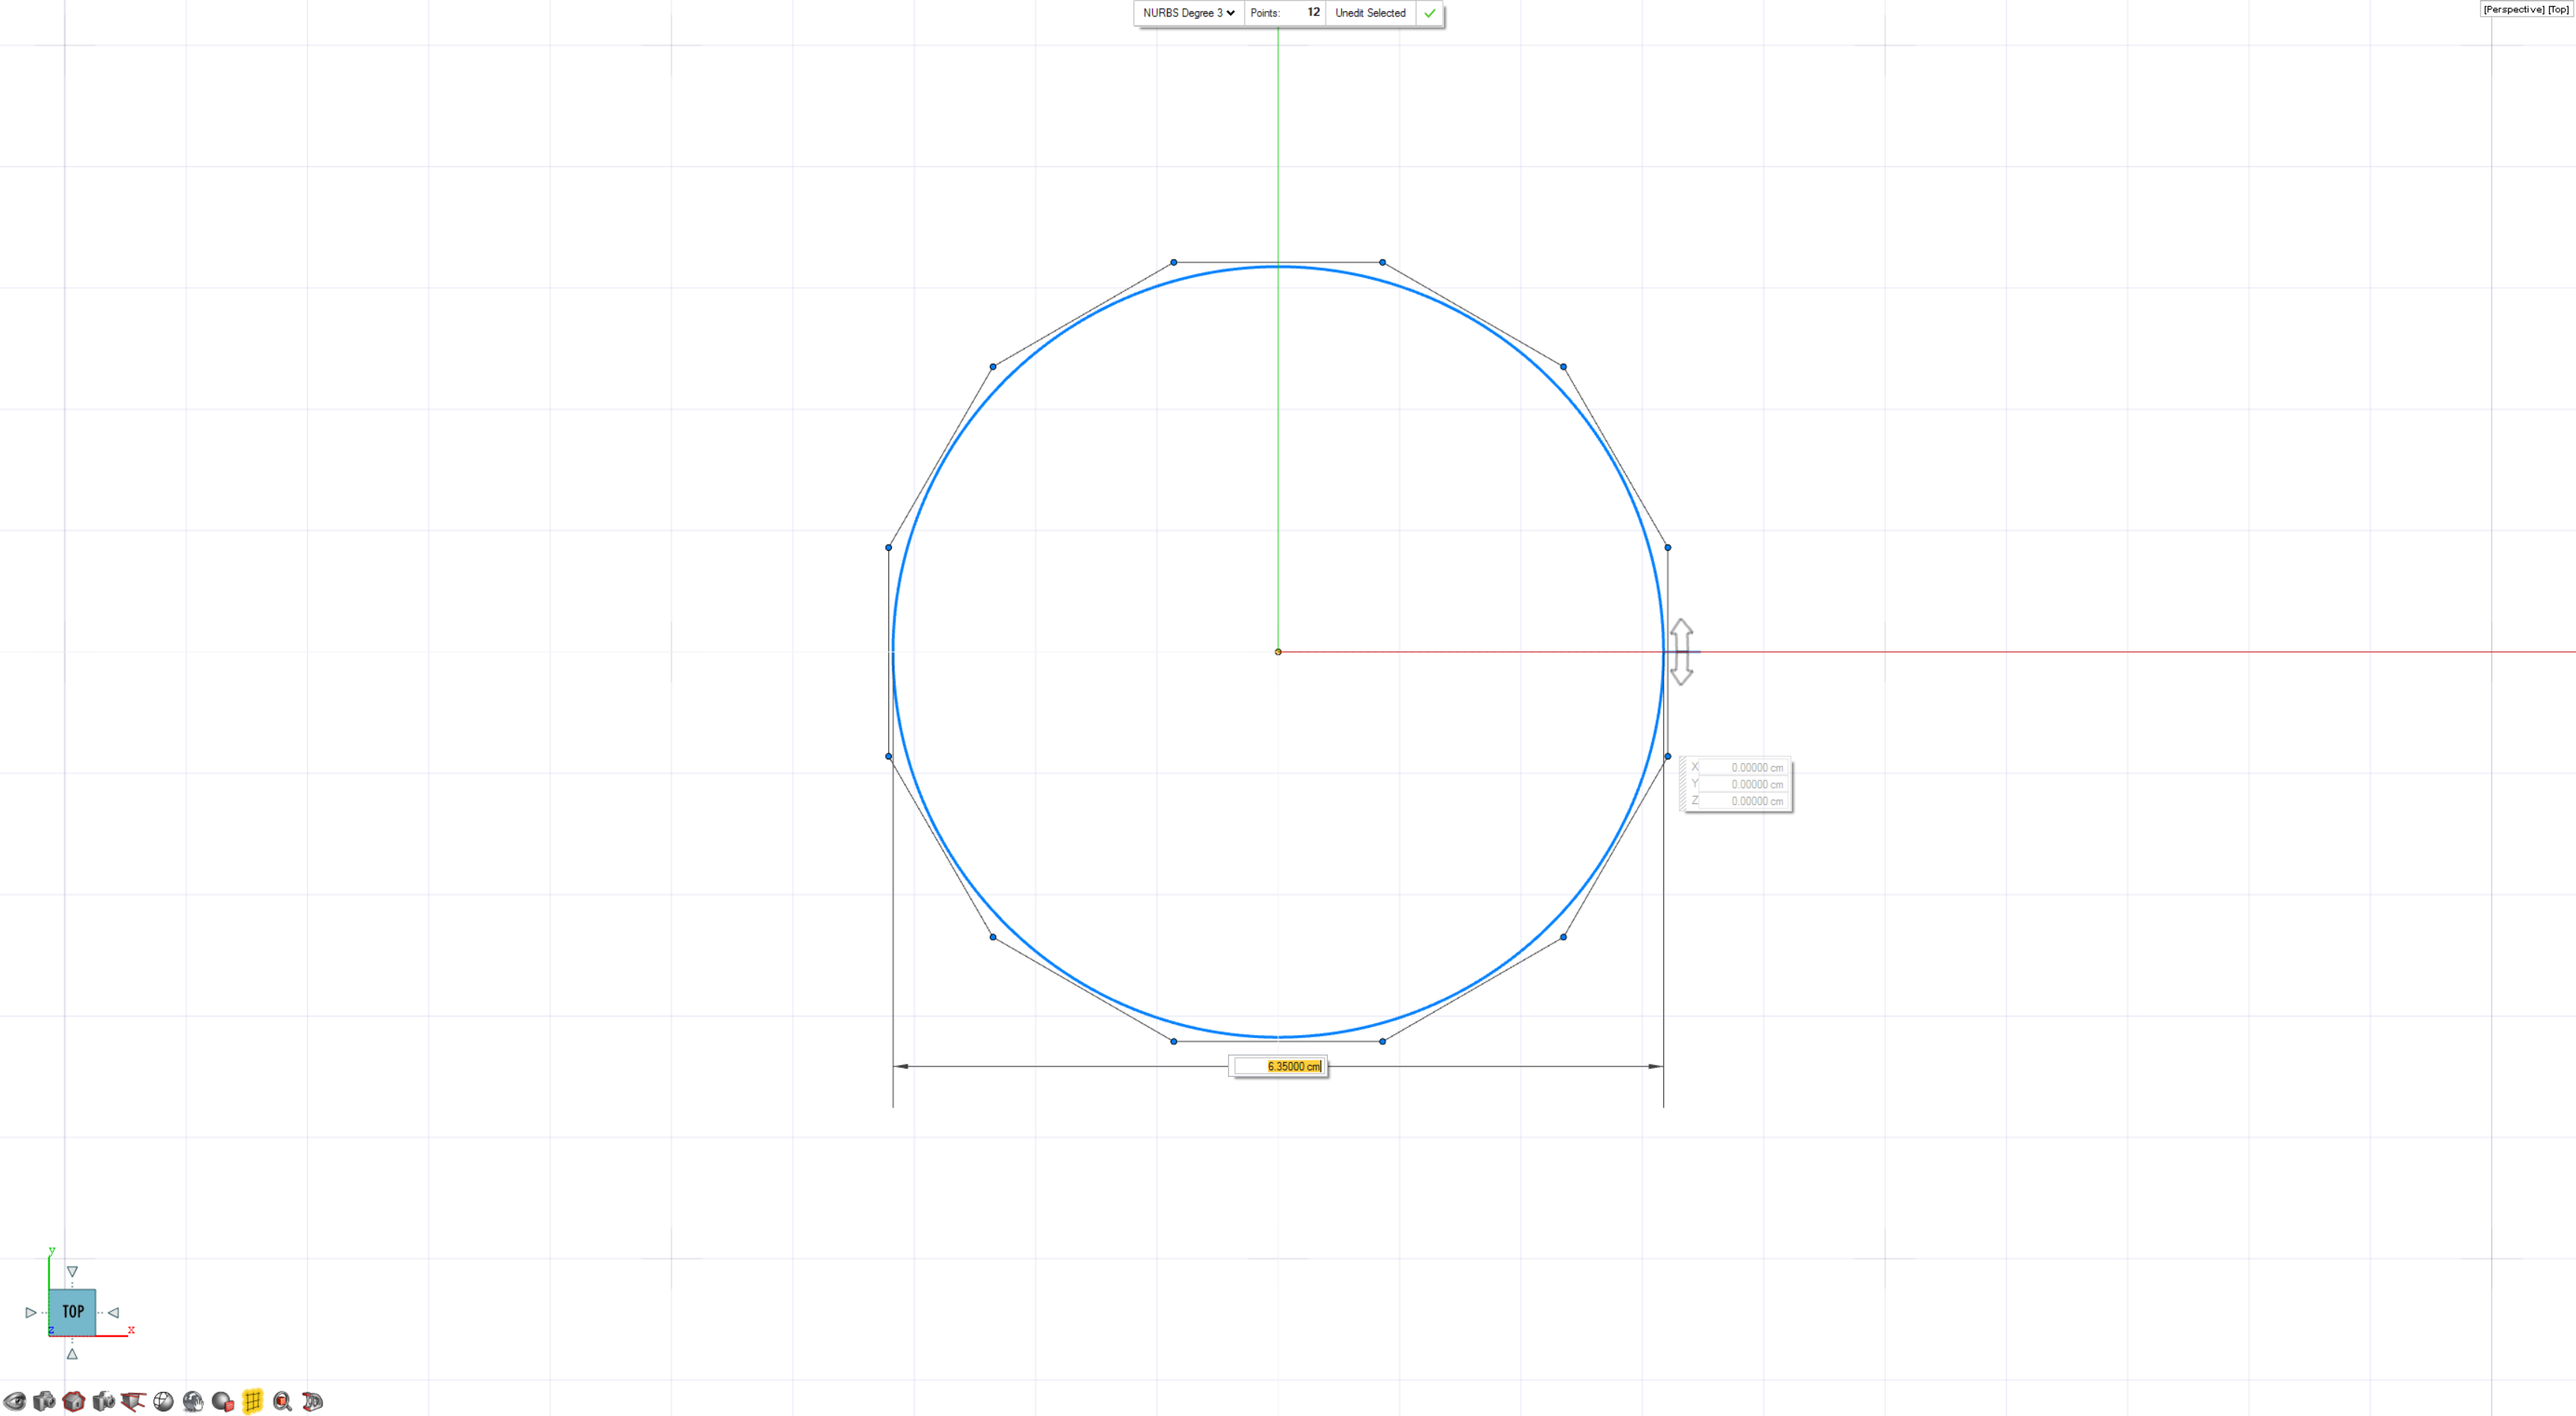
Create Free-Form Circles
-
On the Curves tab, select the Freeform
Circle/Arc tool.

- Draw a circle with a diameter of 6.35 cm or 2.5 in.
- In the guide bar, change the curve type to NURBS Degree 3.
-
Open the Move tool. Press Alt to
switch to Scale mode, and scale all points by 0.5 along
Y.
- Box select all points.
-
Open the Move tool. Press Alt to
switch to Scale mode, and scale all points by 0.5 along
Y.
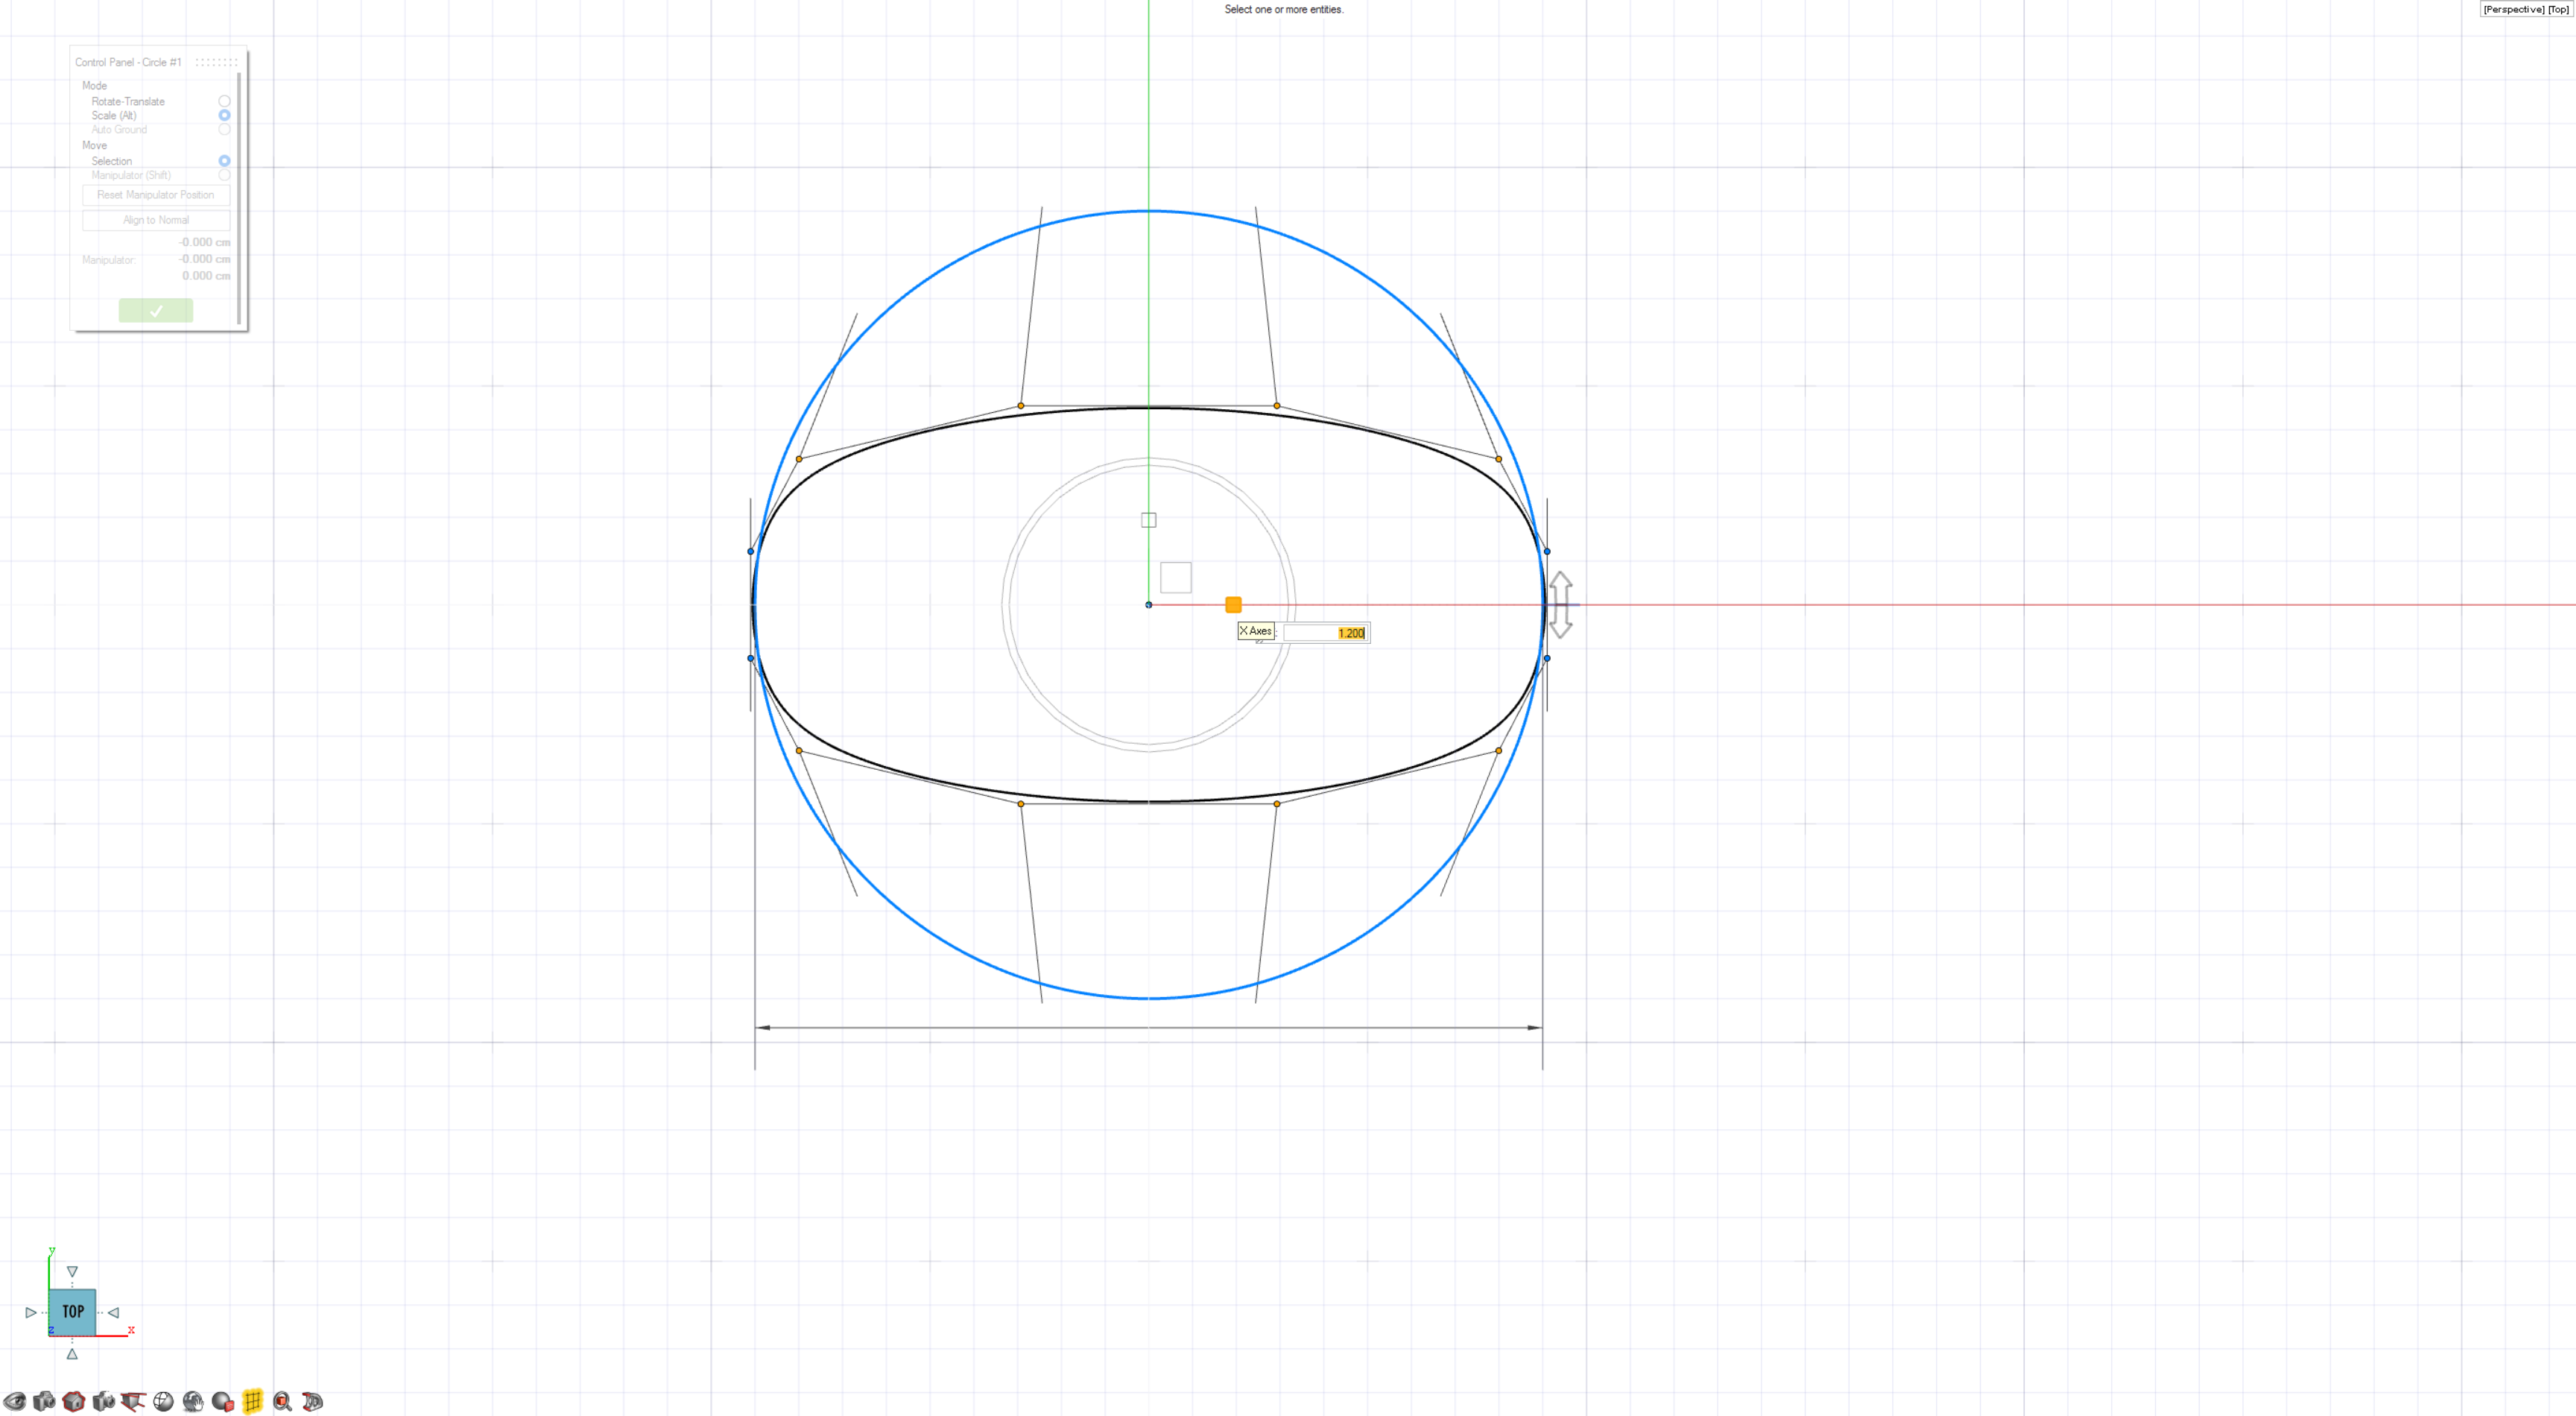
- While holding down Shift, box select the outer 4 points to deselect them.
-
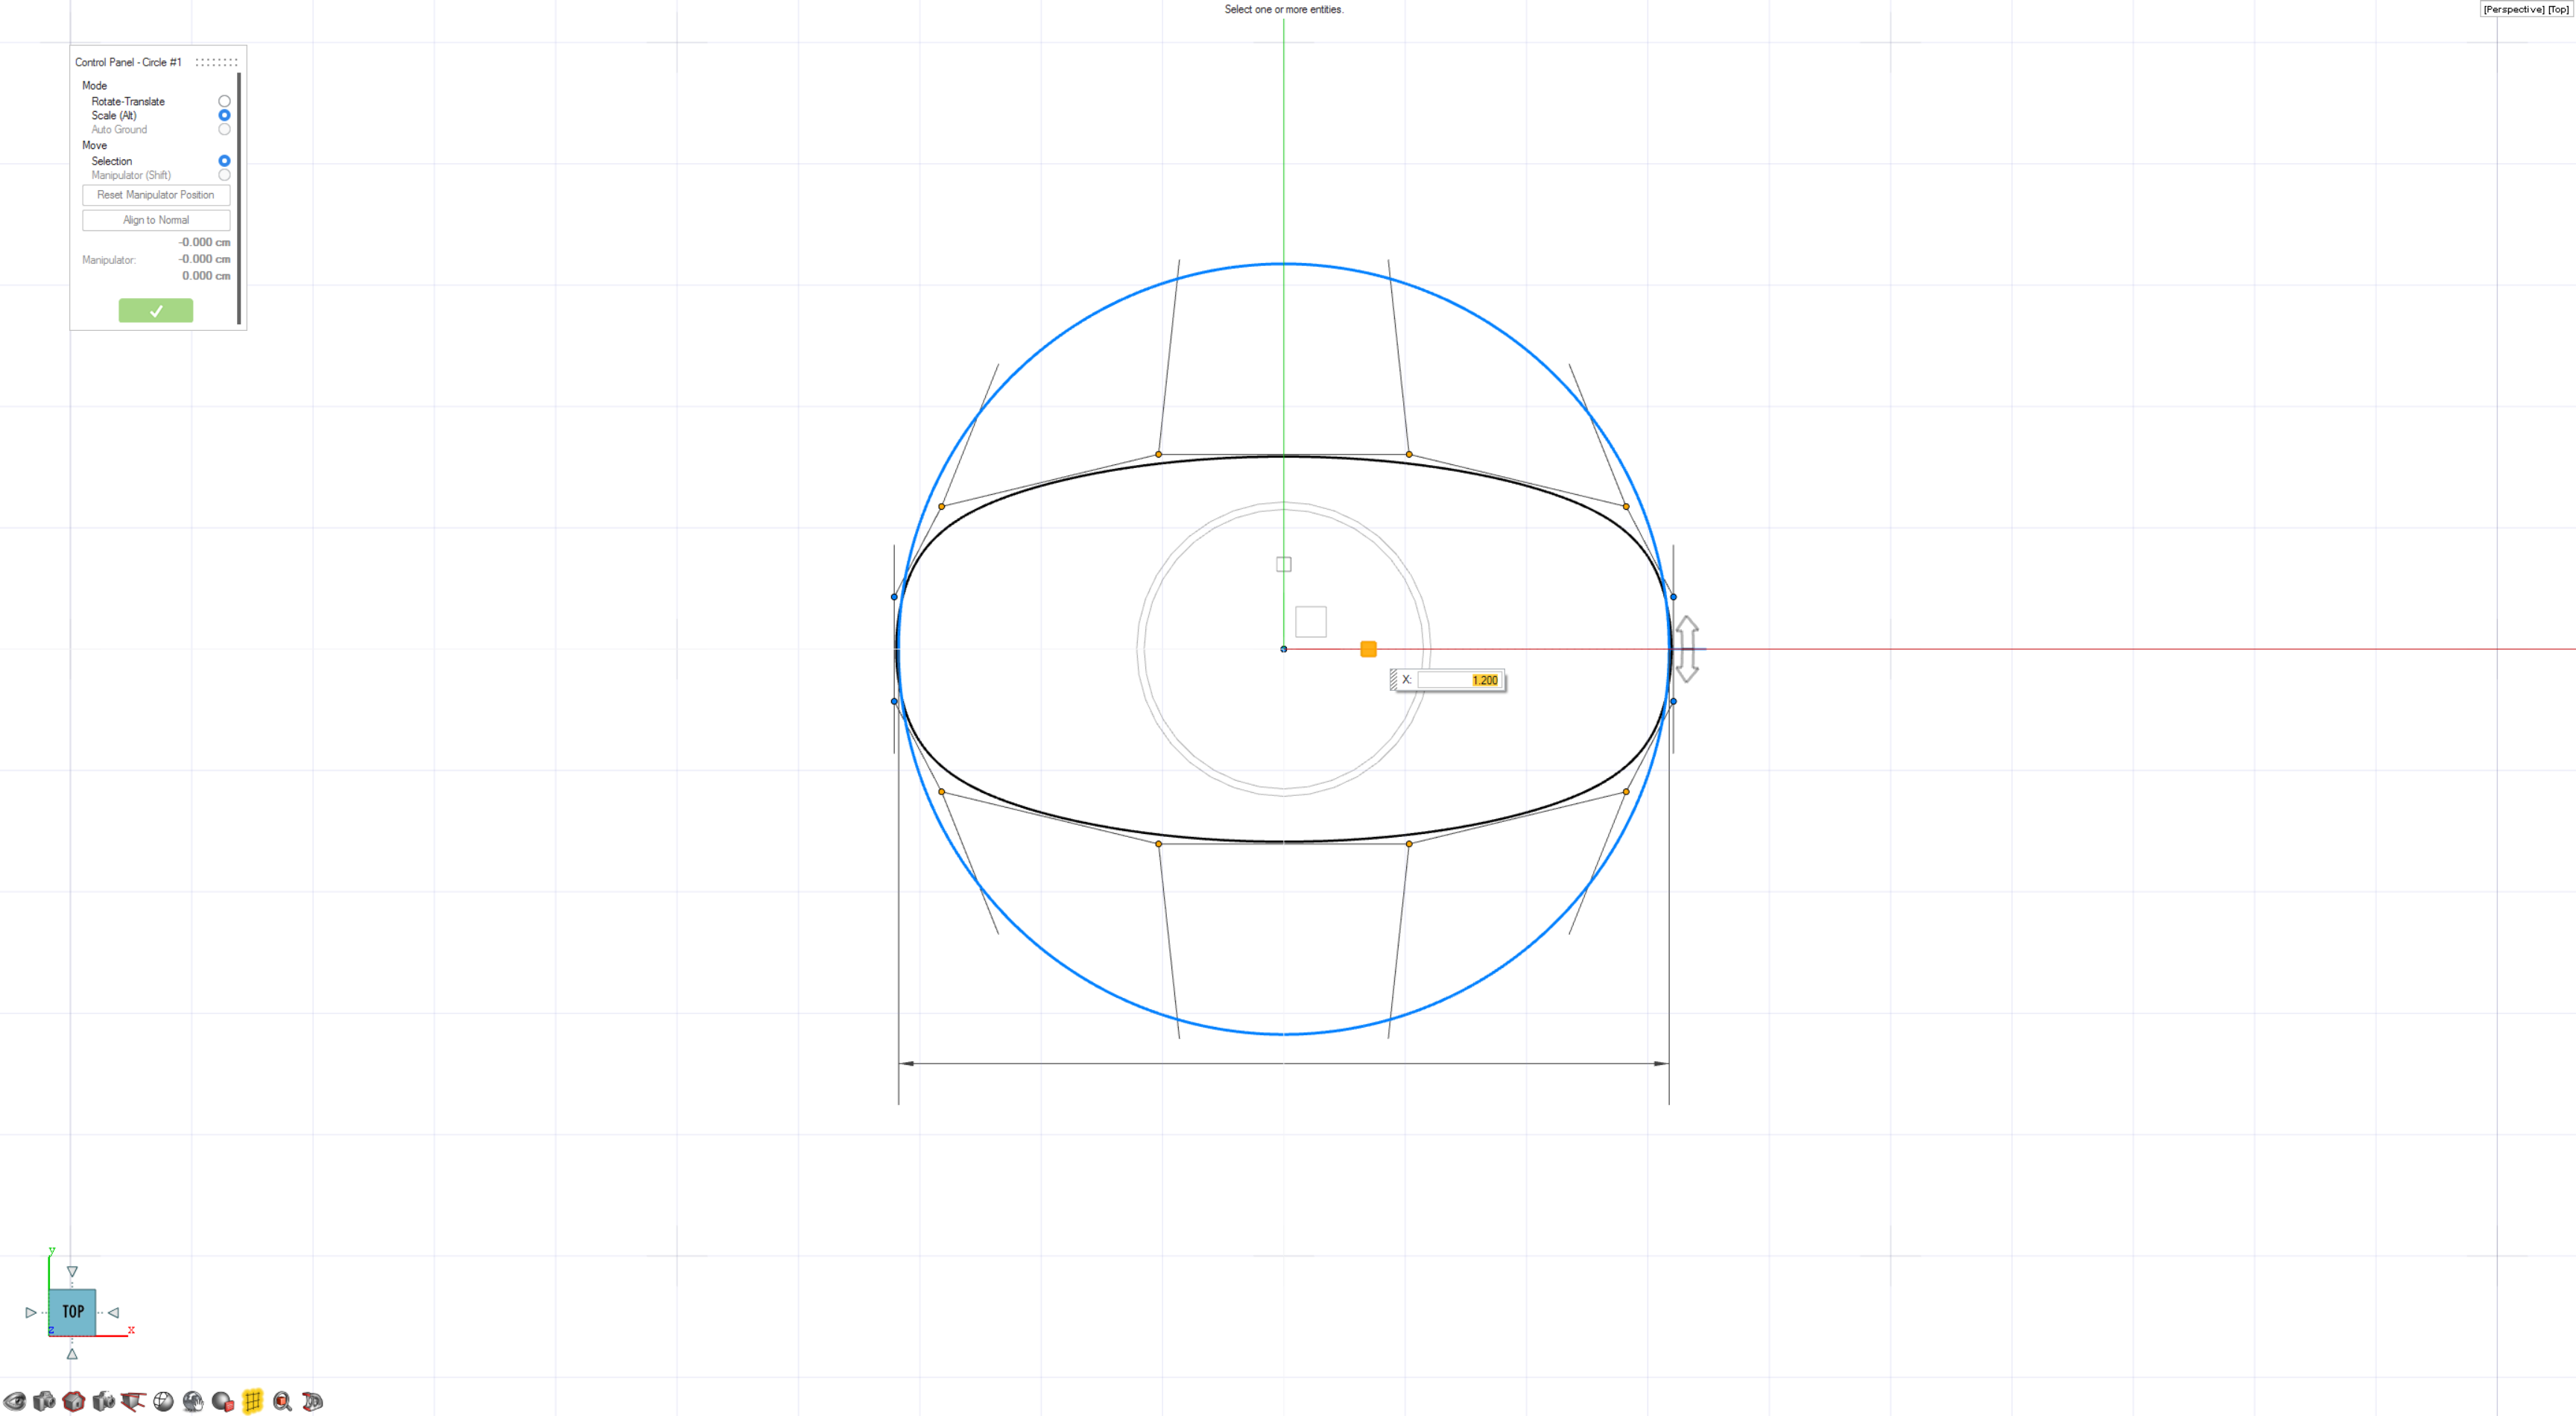
Scale the remaining 10 points by 1.2 along
X.
-
Right-click and mouse through the check mark to exit, or double-right-click.
Note: If you scale points, you have to right-click swipe to close twice: once for the Move tool and once for the main tool (Freeform Circle/Arc in this case).
-
In the view controls at the bottom left of the application, click the
Home
 icon to return to the home view.
-
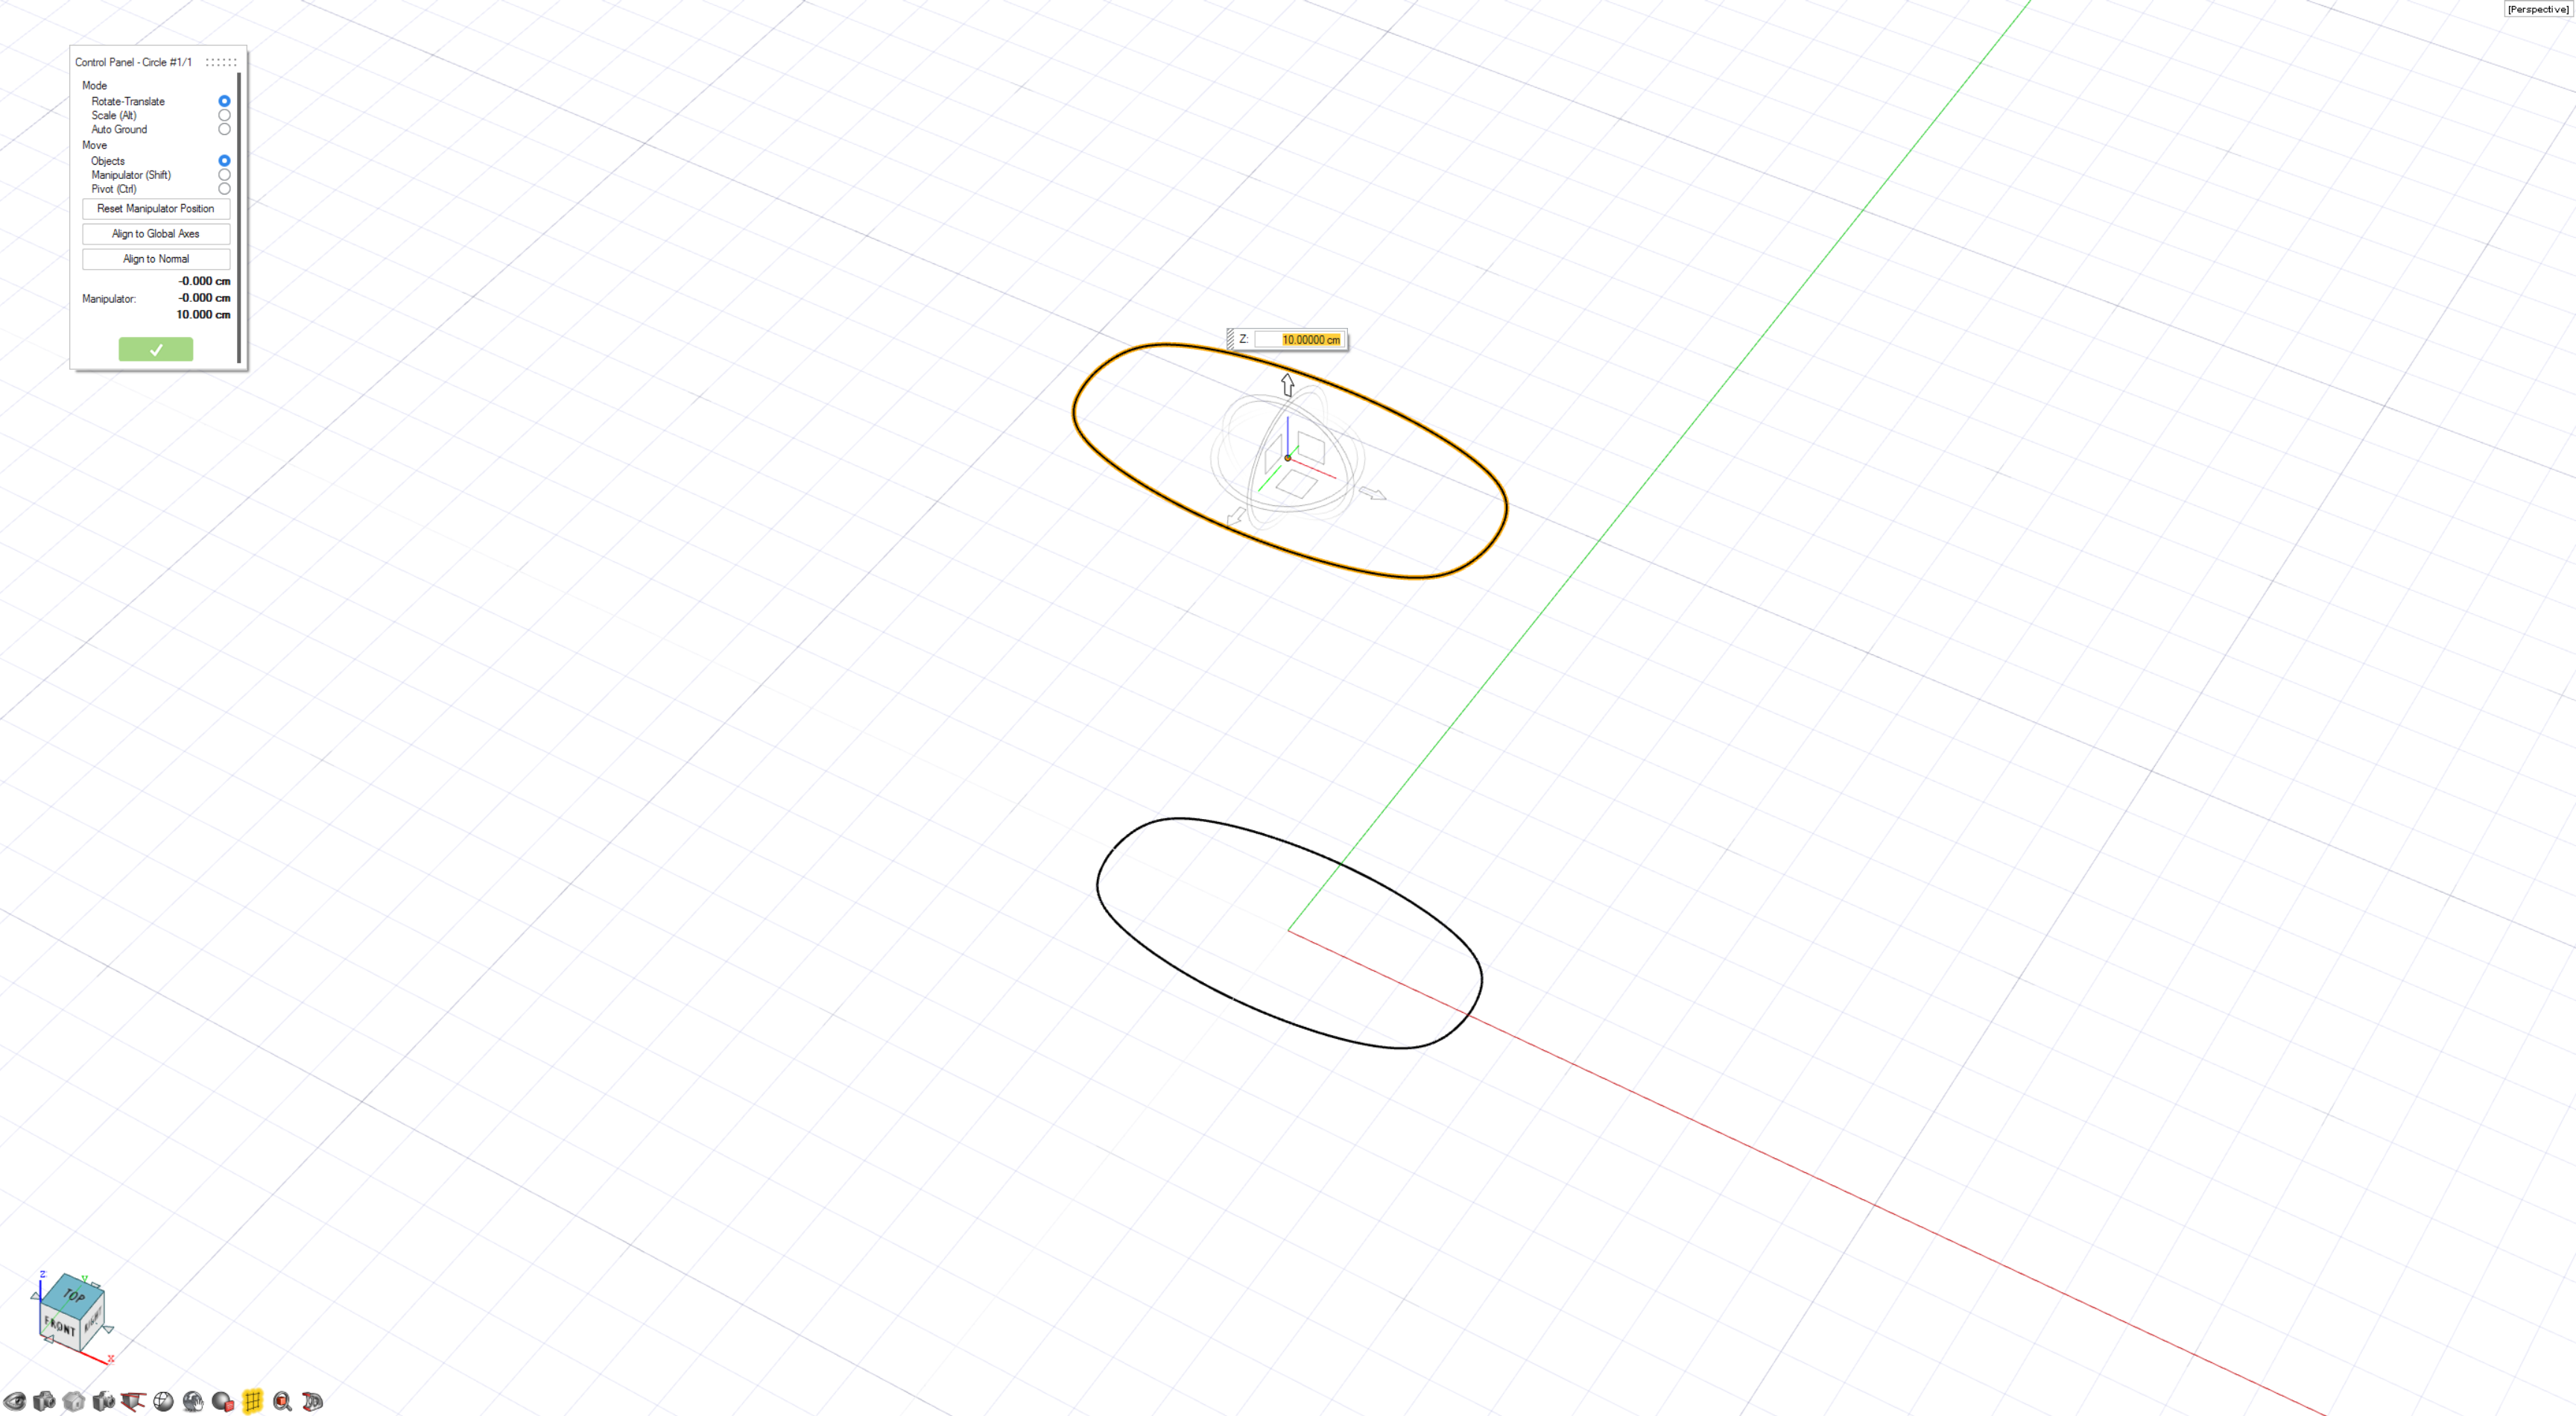
Copy and paste the circle and move it vertically 10
cm.
Note: Inspire Studio has two copy modes:- Press the standard shortcut Ctrl+C to copy. When copying primitives, you only need to press Ctrl+C because primitives are always copied with history.
- Or press Ctrl+Shift+C to copy with construction history.
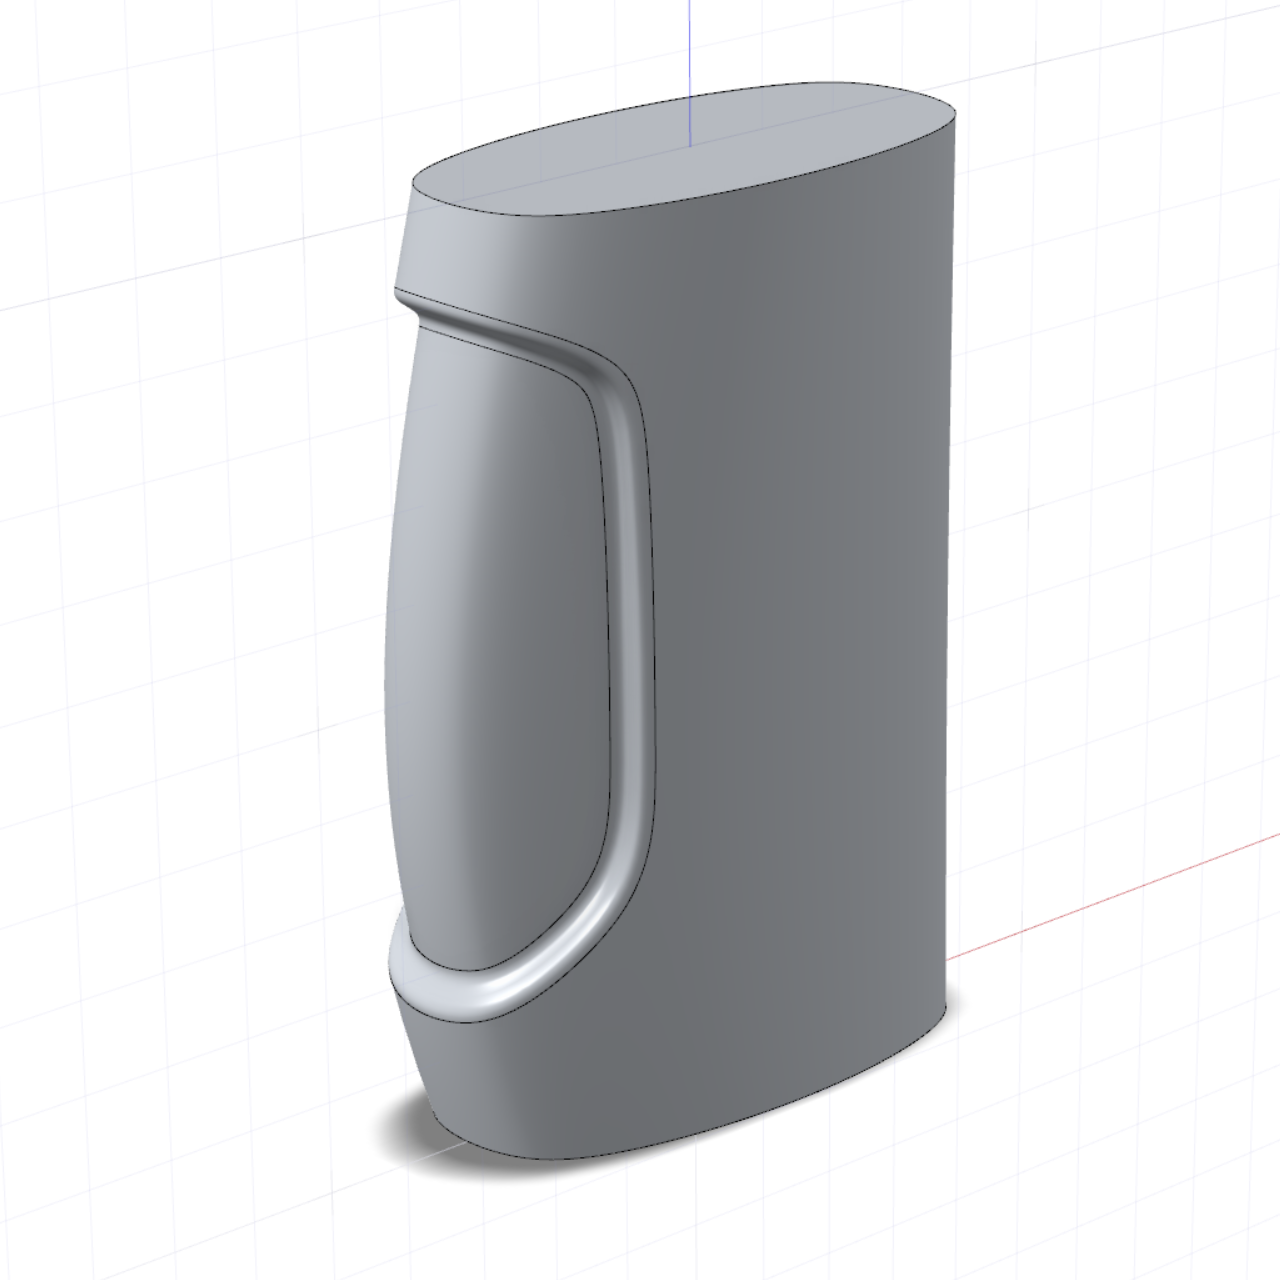
Draw the Outer Curve Using Blend
-
Switch to the Front view by clicking the face of the
View Cube in the view controls at the bottom left of the application.
-
At the bottom right of the application, turn off any grid snaps to facilitate a
more precise blend snap.
Grid #1

Grid #2

Grid #3

Grid #4
 Note: You can also turn off the grid completely by clicking Grid On/Off
 in the view controls. However, if grid snaps
are still on, the grid will be temporarily drawn to assist snapping.
in the view controls. However, if grid snaps
are still on, the grid will be temporarily drawn to assist snapping. -
On the Curves tab, select the
Blend tool.

- Move the mouse over the top circle until it is prehighlighted.
- Drag to the left until you notice the blend point no longer moves with your mouse.
- Repeat this step on the bottom circle.
-
Right-click and mouse through the check mark to exit, or double-right-click.
Note: By default, a curvature constraint is added to the blend points. Double-click the blend to enter editing mode. Select the blend points and change the continuity to Position. Use the 3D tangent handles to shape the curve as shown.
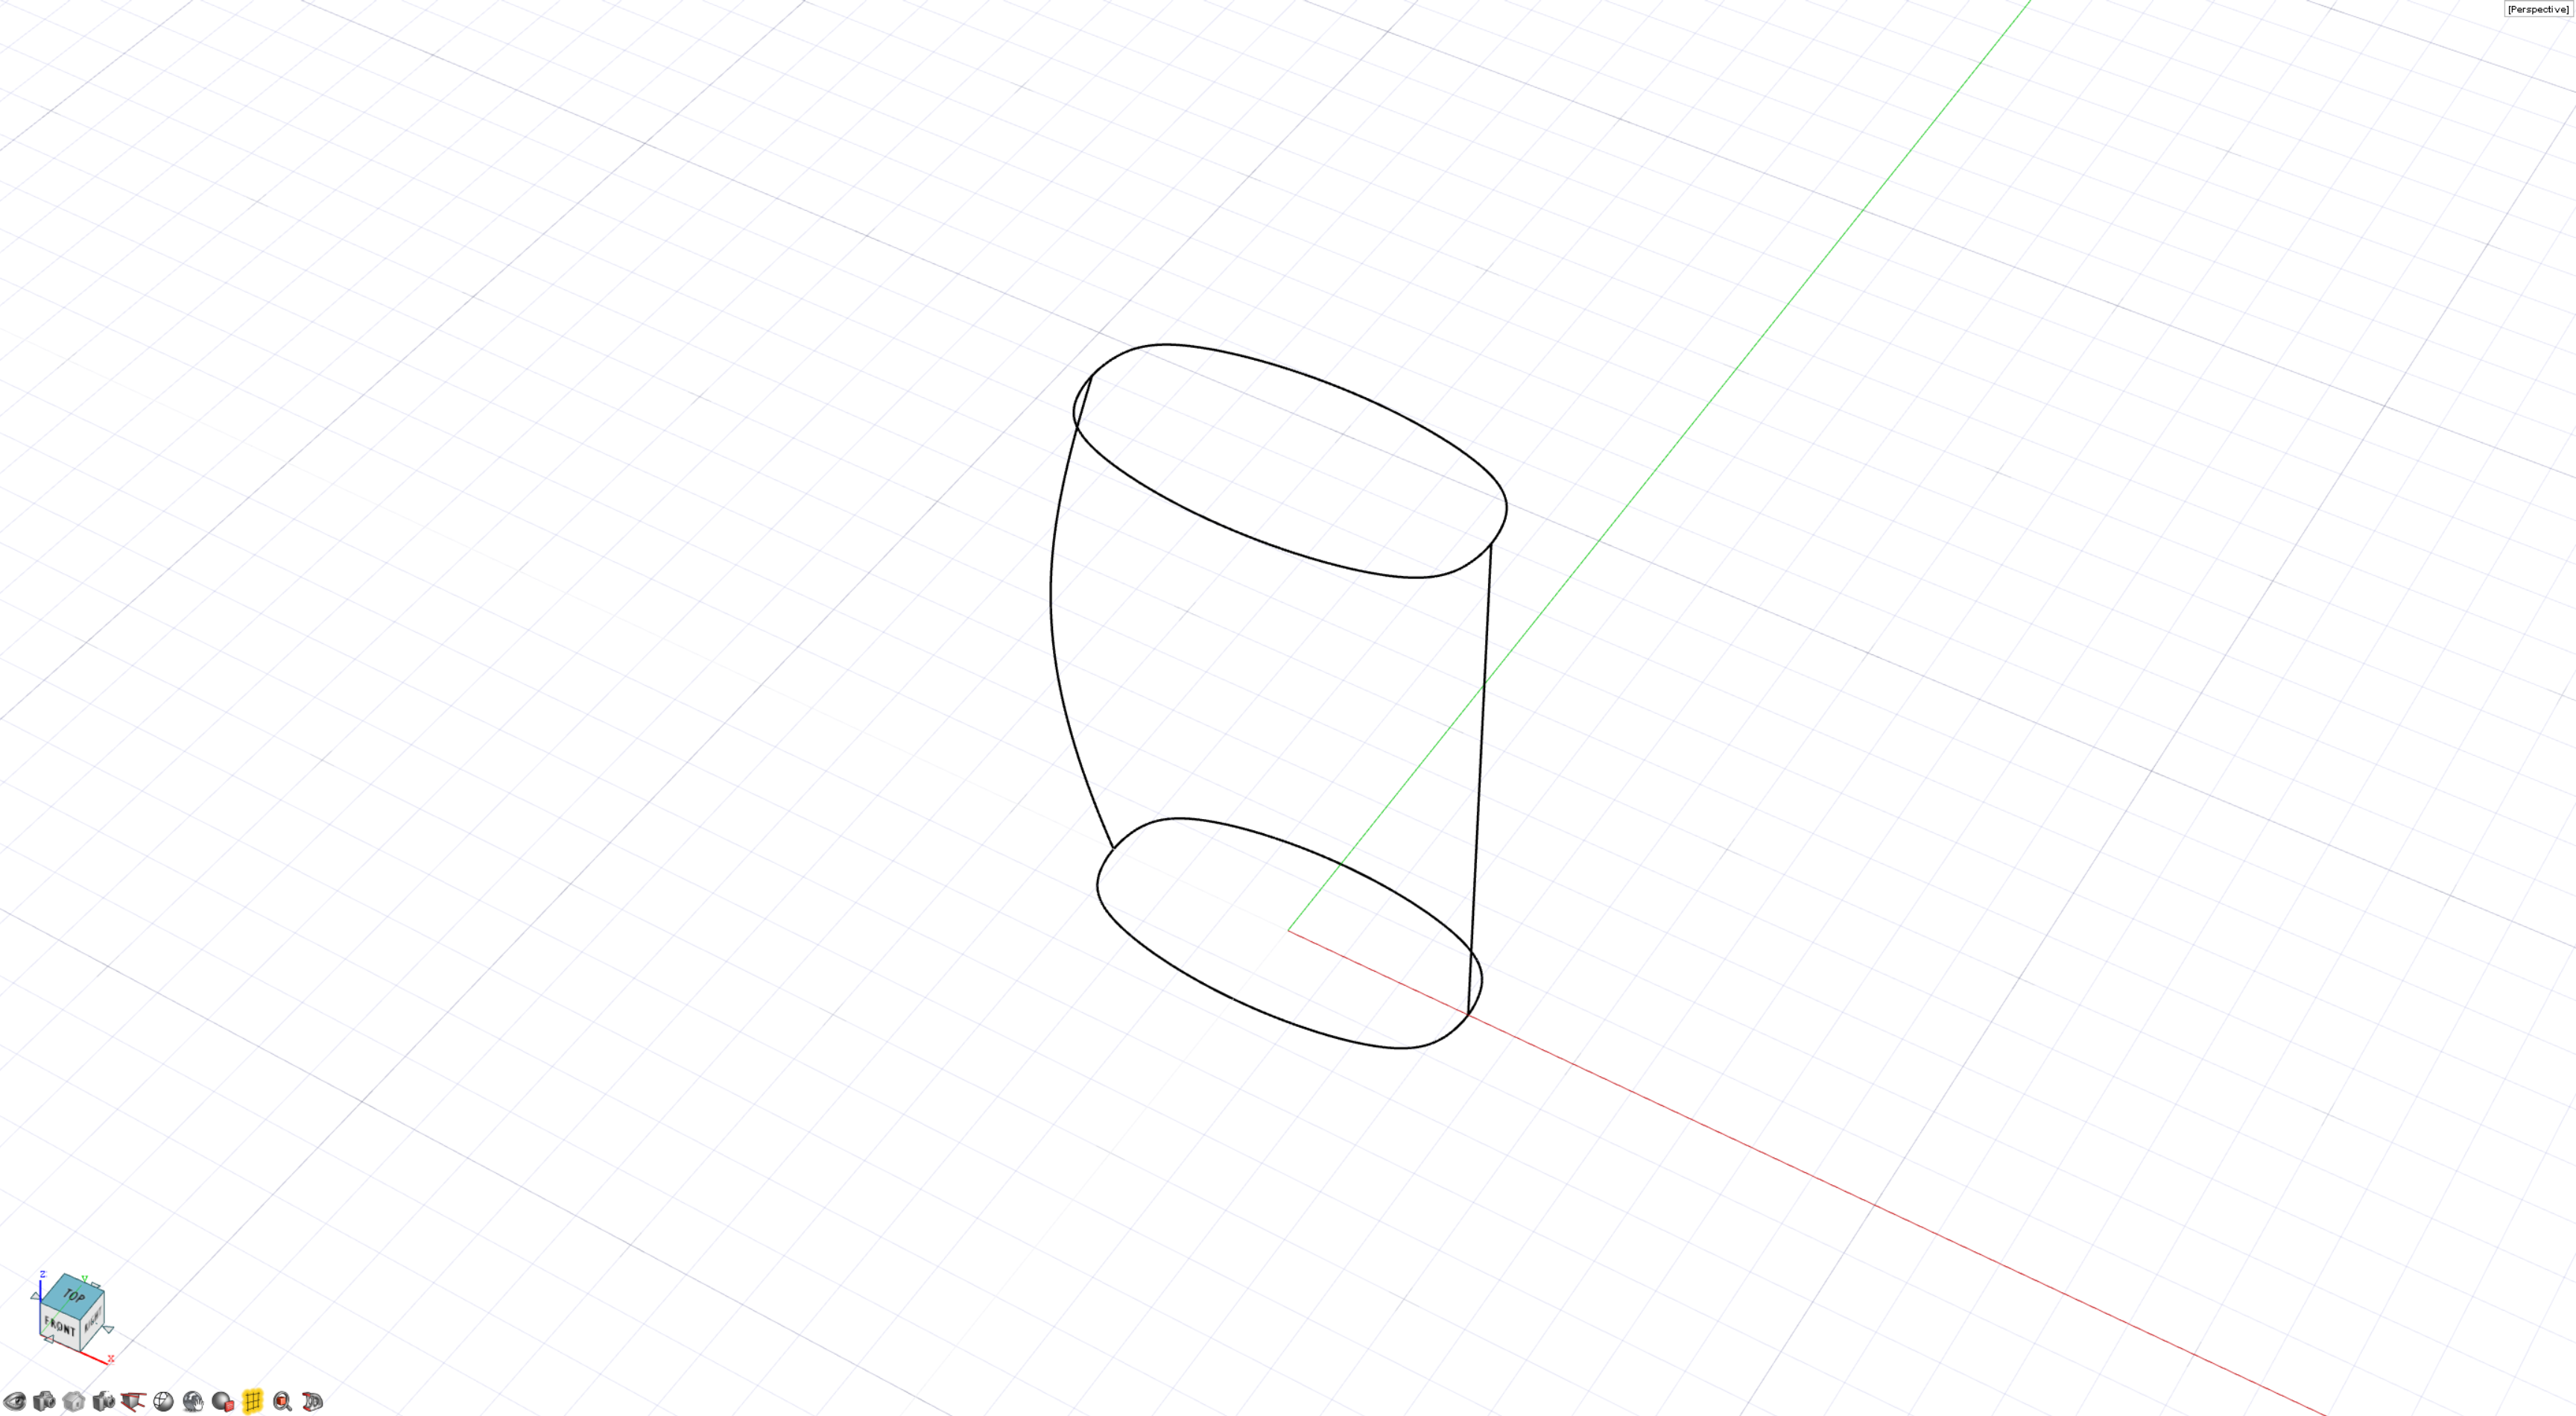
-
Repeat this process to create the right side curve, but don't edit the 3D
tangent direction.
Tip: Right-click in the modeling view and select Repeat last command or press Ctrl+ Spacebar to open the most recently used tool.
-
Turn on the grid clicking Grid On/Off
in the view controls.
-
Click the Home
icon to return to the home view.
-
Save the file.
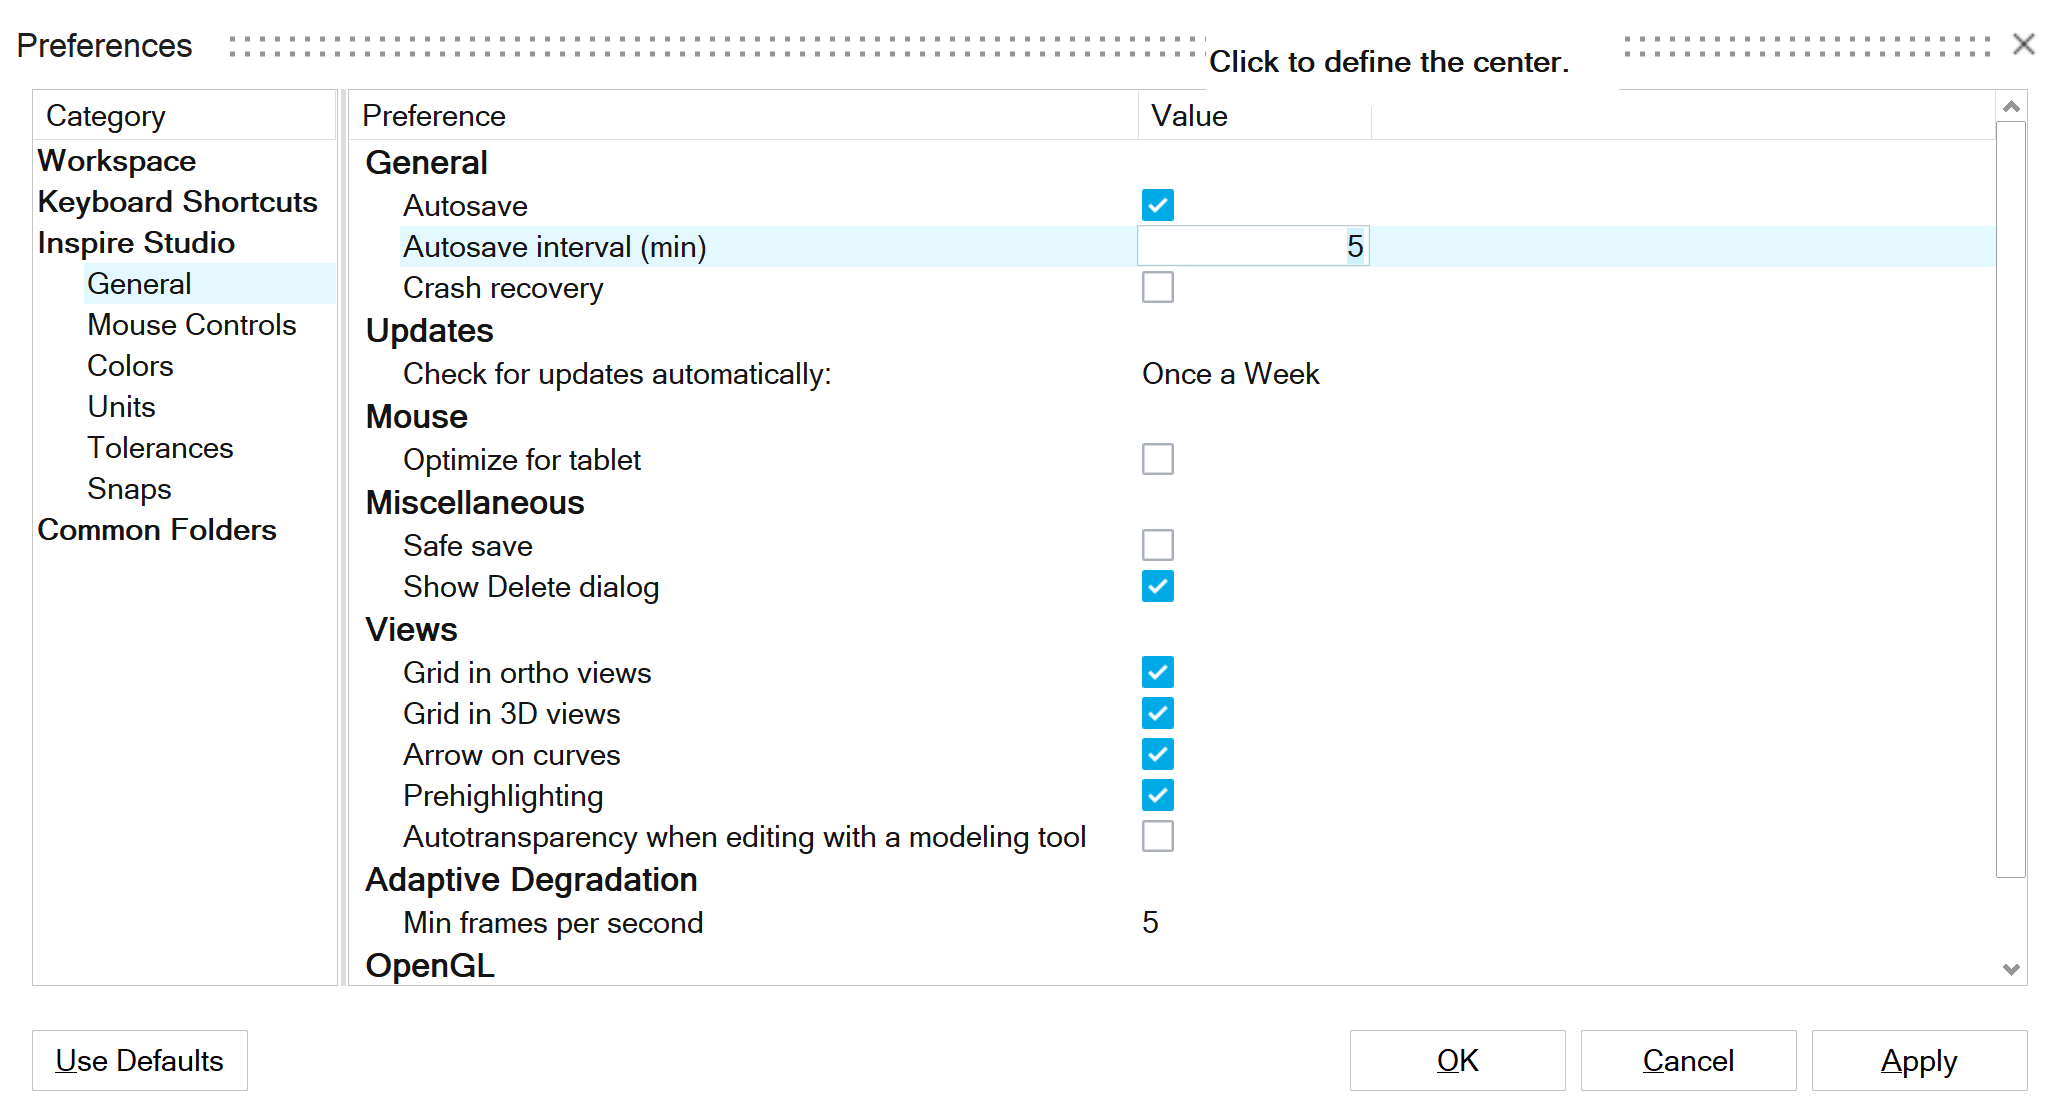
Note: Inspire Studio has autosave. It notifies you when a file has not been saved for 5 minutes. You can change the defaults from .
Create the Main Surface Using Loft
-
Open the Loft tool:
- On the Surfaces tab, select the
Loft tool.

- Or hold down Alt and right-click to open the tool belt and select the Loft tool from there.
- On the Surfaces tab, select the
Loft tool.
- You are prompted to select two or more profiles. Select the two circles and right-click to confirm.
- Now you are prompted to select one or more rails, which is optional. In this tutorial, we will select the two blend curves as rails. Right-click to confirm.
- In the Control Panel, turn on Caps.
-
Right-click and mouse through the check mark to exit, or double-right-click.
Create Trim Curves
- Switch to the Front view.
-
On the Curves tab, select the
NURBS tool.

-
Draw a curve as shown below.
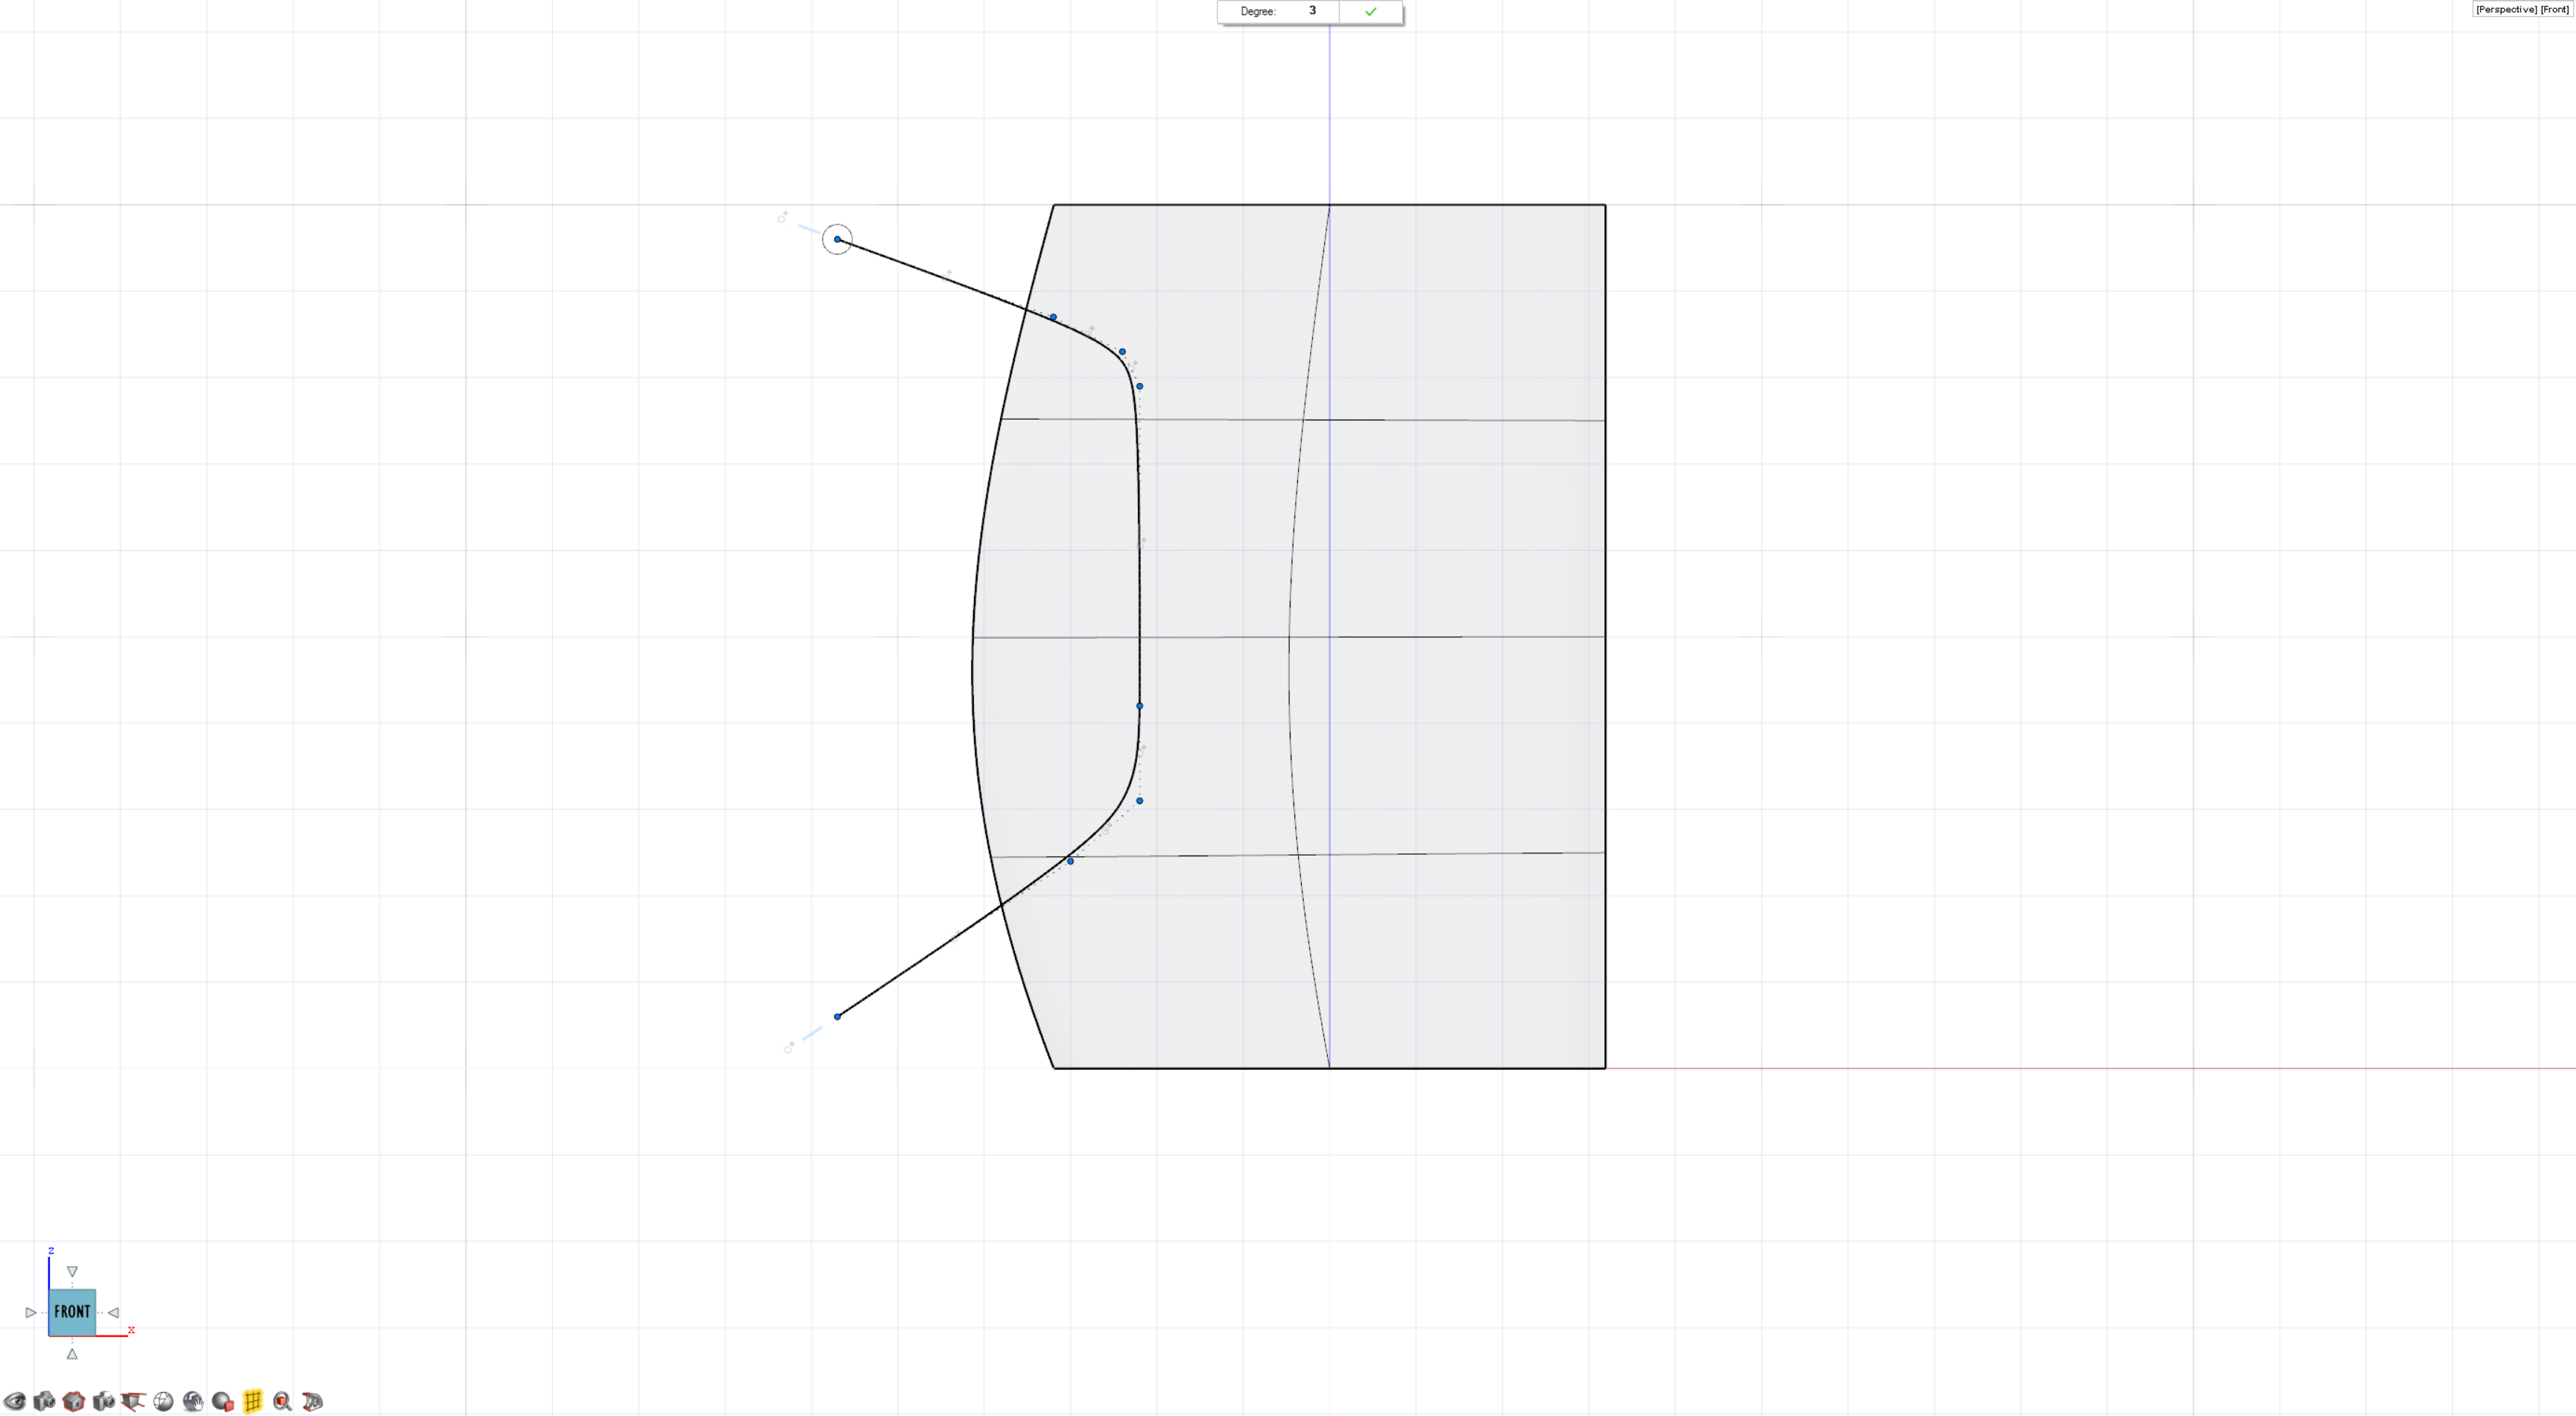
Tip: Hold down Alt while pressing 1, 2, 3, or 4 to turn snapping on or off for grids 1, 2, 3, or 4. -
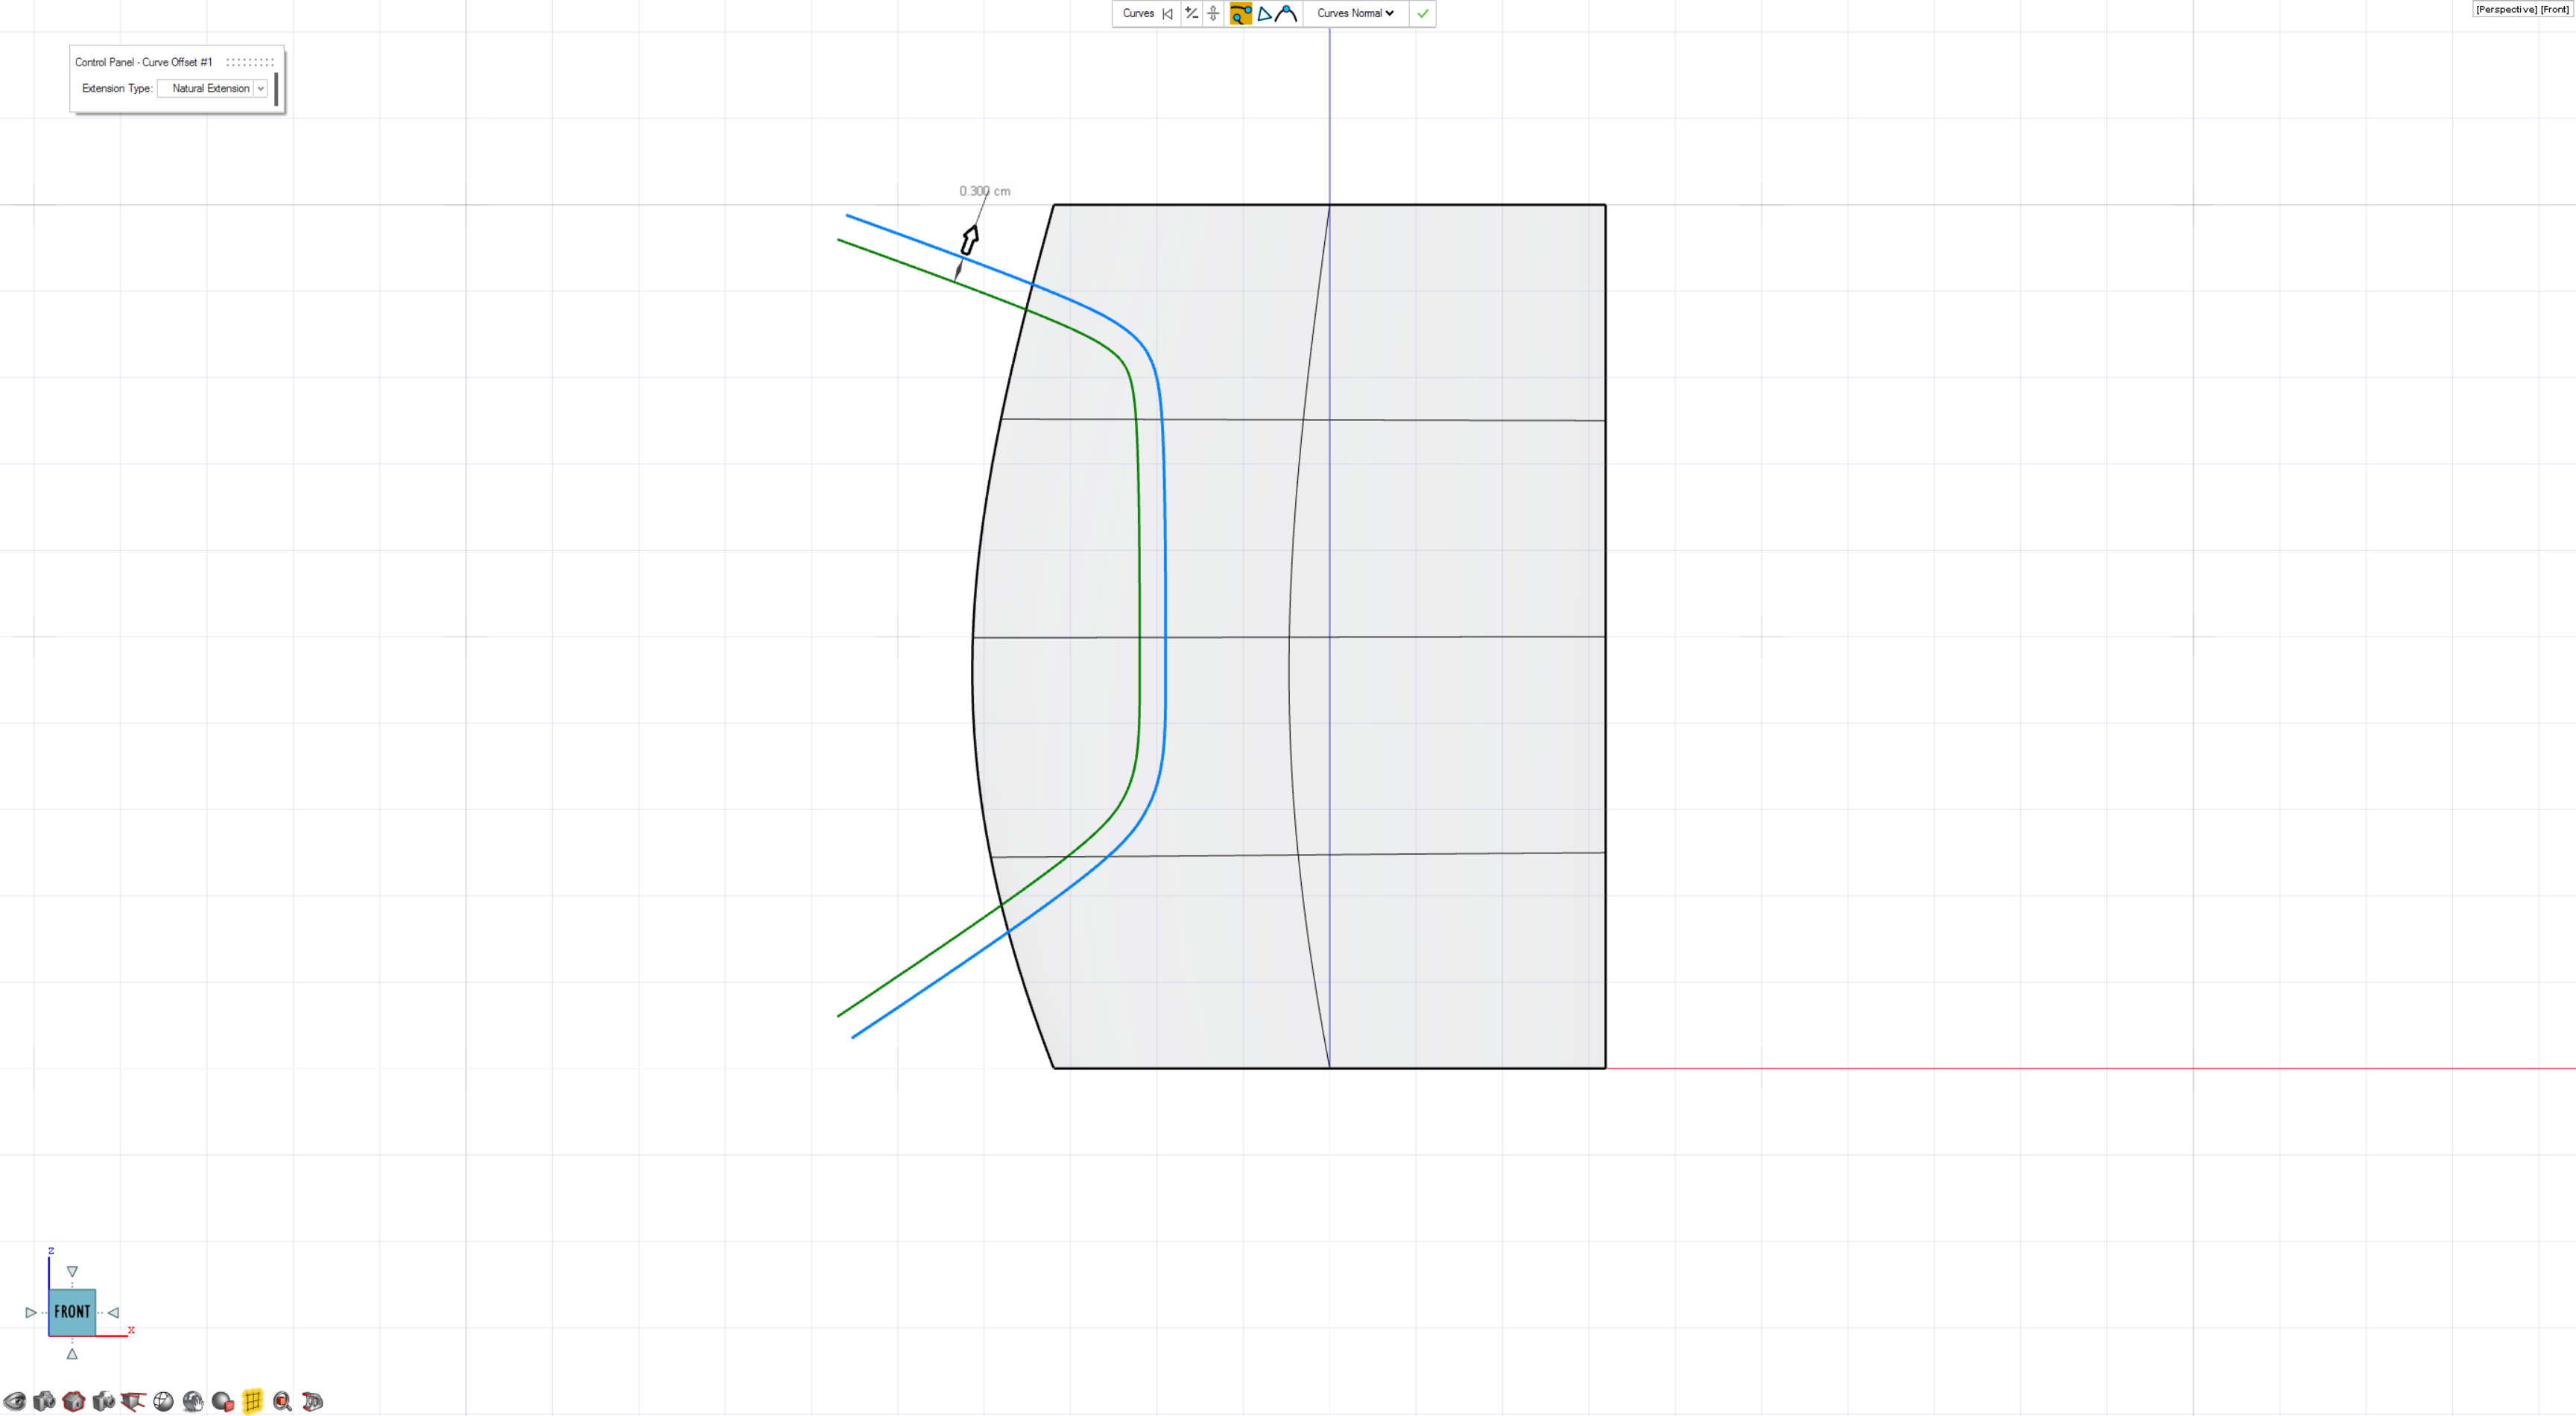
On the Curves tab, select the
Offset tool. The Offset tool on the Curves tab is for
curves.

- Select the NURBS curve.
- Offset the curve by 0.3 cm.
-
Right-click and mouse through the check mark to exit, or double-right-click.
Surface Offset
-
On the Modify tab, select the
Offset tool. The Offset tool on the Modify tab is for
surfaces.

- Select the loft created previously.
- Offset the surface inside by 0.3 cm.
- In the guide bar, click Invert Offset to toggle the offset direction.
- Click the green check mark to complete this step.
- Save the file.
Trim and Loft
-
On the Modify tab, select the
Trim tool.
-
Trim the inner surface (loft) with the outer curve (offset):
-
Trim the inner surface (offset) with the inner curve (NURBS):
- Select the inner surface (offset) and the inner curve (NURBS).
- In the guide bar, select Force Surface Result and Keep Exterior.
-
Using the Loft tool, select the two trim edges. Apply
Curvature G2 continuity as shown.