
Cube
Create and edit a cube or a rectangular solid.
Create a Cube or a Rectangular Solid
Create a cube or a rectangular solid.
- On the ribbon, click the Surfaces tab.
-
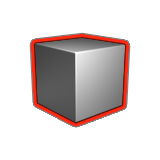
Click the Cube icon.
-
Create the base face:
To create this Do this Plane by corners Drag to define the first corner and the opposite corner. Plane by center and corner Hold down Ctrl while dragging to define the center and a corner. Square Hold down Shift while dragging to define the first corner and the opposite corner. -
Move the cursor to define the height, and then click.
Note: Hold down Ctrl while clicking to create a symmetric cube.
- Right-click and mouse through the check mark to exit, or double-right-click.
Edit a Cube or a Rectangular Solid
-
Double-click the cube to enter edit mode.
To Do this Change the length - Drag the arrow along the length.
- Click the text box along the length, and then type a value.
Change the width - Drag arrow along the width.
- Click the text box along the width, and then type a value.
Change the length and the width simultaneously Drag the arrow at the corner of the base. Change the height - Drag the arrow along the height.
- Click the text box along the height, and then type a value.
Lock the edges Hover over the edges of the cube, and then click the Lock/Unlock icon. Note: Use both Ctrl and Shift to create a symmetric, equal sided cube. - Right-click and mouse through the check mark to exit, or double-right-click.