Creating Value-Based Filters
Value-based filters provide a simple-to-use alternative to the traditional formula-based filters. A value-based filter allows you to specify a value (or values) for a particular field. Any field that contains a value that matches those specified in the filter will then be selected and displayed, while fields that contain values that don't match those in the filter will not be selected (i.e., they will not be displayed in the table).
Once defined, a value-based filter may be used as part of a compound filter.
Note that when you are creating several similar filters you can save time by using the first definition as the starting point for subsequent definitions. Refer to Duplicating Filters for details.
Creating value-based filters
-
Go to Table Design.
-
Select Add from the Table Design ribbon, and then select Filter, then Value Based Filter. The Value Based Filter Properties window displays.
-
Enter a name for the new filter in the Filter Name field, and then select the green check icon
 to accept.
 -
From the Field drop-down list, select the field for which you'd like to specify values to be selected by the filter.
-
Add values to the Values list. There are many ways to interact with the Values grid to add, edit, and delete values.
-
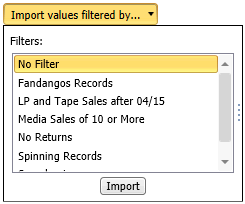
Click on Import values filtered by... button to display a list of filters and the Import button.
-

You can then select No Filter from the list of filters and then click Import to automatically populate the values list with all the values of the field. Or, you can select a filter then click Add rows to automatically populate the list with a subset of the field values.
-
Select a row then click on the Remove selected rows button to delete a row.
-
Note:
s-
Wildcard values
-
If the data type of the selected field is Character or Memo, the values specified for matching may include wildcard characters “*” and/or “?”. For example, if one specified a value of “F*” for the City field, this will match all City values which start with a “F”, such as “Ferrum”, “Fitchburg”, and “Fitzwilliam”. The Add current field values… button does not insert wildcard values into the list. Such values may only be entered into the value list by typing or pasting.
-
Invalid values
-
When the selected field has a data type of Numeric or Date/Time, it’s possible to have invalid values in the grid. A value is invalid if it cannot be converted into the data type of the selected field. For instance, the value “Philadelphia” would be invalid if the selected field type was Numeric. Ordinarily, the grid logic prevents one from typing an invalid value into a Value cell, but if the field selection is changed after some values have been entered into the grid, the existing values might become invalid in light of the new field type.
The grid highlights invalid values by showing them in red, and an error message is generated if there are any invalid values still present in the list upon pressing OK. As a convenience, the Clean Values List button explicitly discards from the list any invalid values.
-
-
-
Set Row Selection options.
The default option for row selection by a value-based filter is Include rows where the field values matches one of the selected values. This means that the value list specifies the values for the rows which are to be included.
The alternative option is Include rows where the field value does not match any of the selected values. This means that the value list specifies the values for which rows are to be excluded.
The Include rows where the field value is null or empty option presents a choice on how the filter is to deal with null (for any field type) and empty values (for Character and Memo types only). This choice is completely independent of the specified list of values (it is impossible to specify an empty string as a value). When this option is not checked, rows for which the field value is null (or empty) do not pass the filter. When this option is checked, such rows do pass the filter.
-
Click the Advanced tab to set how many rows will be displayed after the filter is applied.
-
When you have finished configuring the filter, select Accept. Otherwise, select Cancel.
Note:
s-
Values may be directly edited in the cells in the Value column. After adding a value, click anywhere outside the cell to add the value.
-
One or more values that were previously copied to the clipboard may be directly pasted into the grid. Rows are automatically added to the grid to accommodate these new values, and values added this way have their Select checkbox already checked.
-
One or more rows may be highlighted by clicking and/or dragging in the extreme left-most column. All the highlighted rows may then be deleted by clicking the Delete button.
Selecting an active filter
Once you have created a filter, you can use it to filter data in a table.
-
Go to Table View.
-
Select a filter from the Active Filter drop-down:

© 2024 Altair Engineering Inc. All Rights Reserved.