
Tutorial: Plate Die Creation
Tutorial Level: Beginner Learn how to create Plate Die from custom profile shapes.
Open the Tutorial Model
- From the menu bar, select .
-
Browse to your working directory, select L_PlateDie.iep,
and click Open.
The model should appear in the Inspire Extrude window.
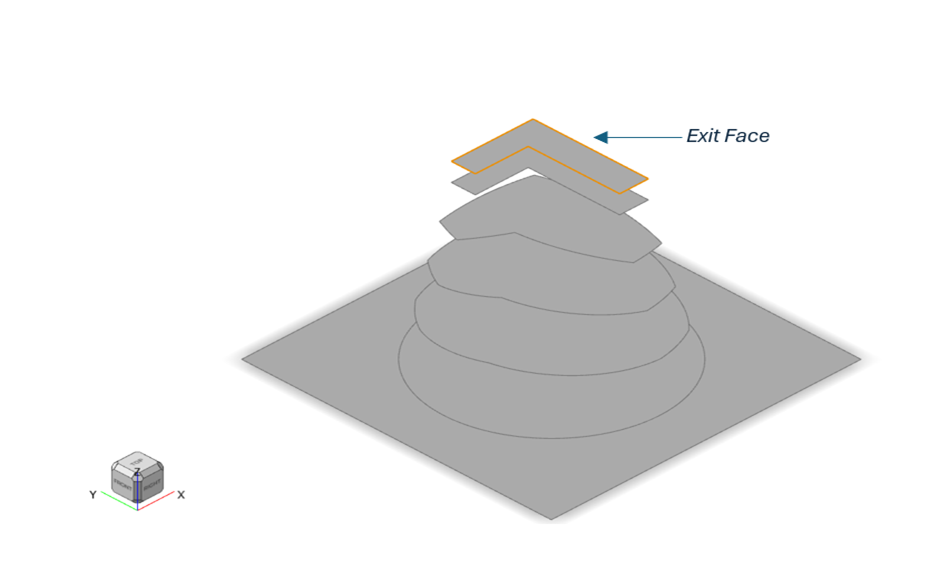
Orient the Bodies
- Click the Plate Die ribbon.
-
Click the Orient icon.
-
On the model, click the exit surface.
Create Loft Bodies
-
Click the Loft icon.

-
Select the start profile and end profile.
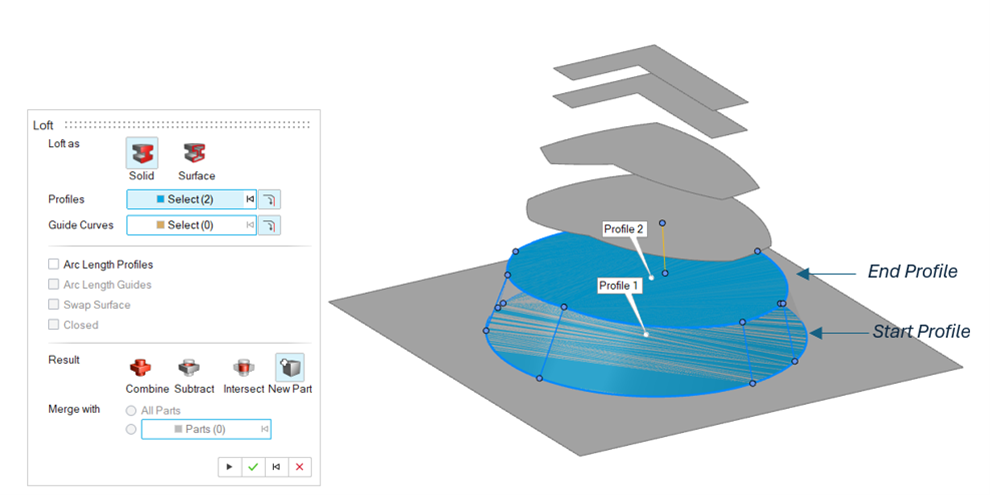
- Select the New Part option.
-
Click the Apply
 icon to create the lofted part.
-
Repeat the steps for all surfaces from inlet, intermediate to exit face.
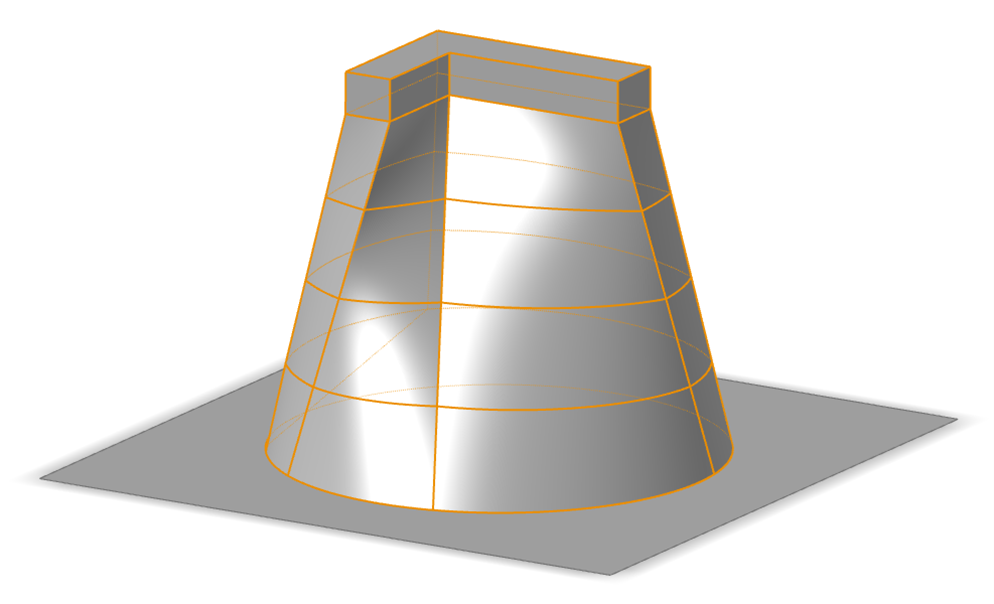
Create Die
-
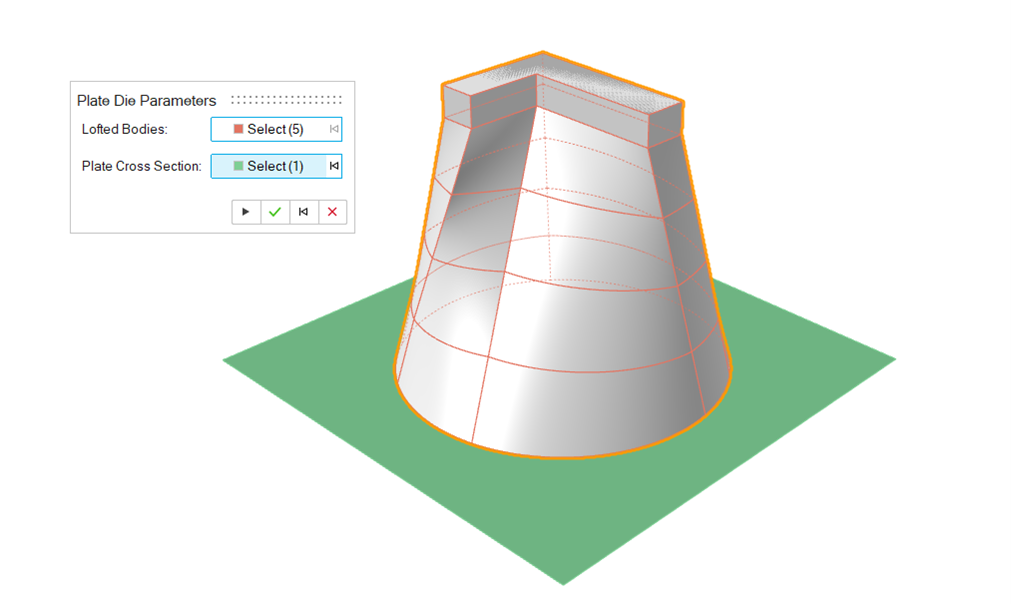
Click the Create Die icon.

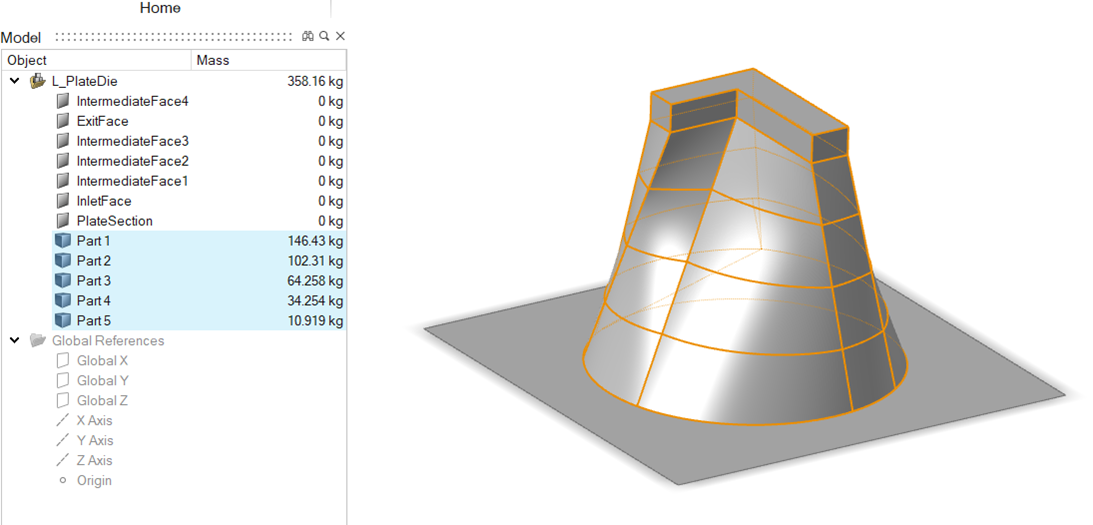
- Select the lofted bodies (flow volume bodies) created previously.
-
Select the Plate Cross Section face.
-
Click the Apply
icon to create the die.
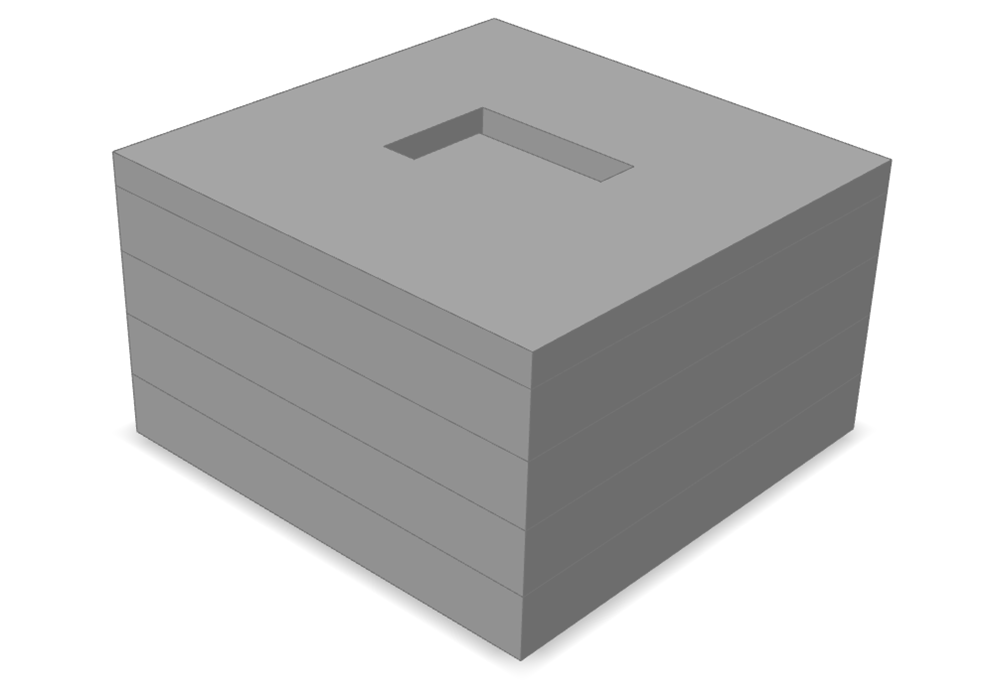
Note: The number of plates generated will be equal to the number of the lofted bodies (or the flow volume bodies) selected.