Depuis la version 2026, Flux 3D et Flux PEEC ne sont plus disponibles.
Veuillez utiliser SimLab pour créer un nouveau projet 3D ou pour importer un projet Flux 3D existant.
Veuillez utiliser SimLab pour créer un nouveau projet PEEC (pas possible d'importer un projet Flux PEEC existant).
/!\ La documentation est en cours de mise à jour – des références au 3D peuvent subsister.
GUI Mode
In order to install Altair Flux & FluxMotor Version 2026, follow these instructions:
- Close all the applications in use
-
Download the Altair
Flux & FluxMotor
2026 installer: hwFluxFluxMotor2026_win64.exe
from the Altair One site: https://altairone.com/
And save it locally
- Run the executable file hwFluxFluxMotor2026_win64.exe
-
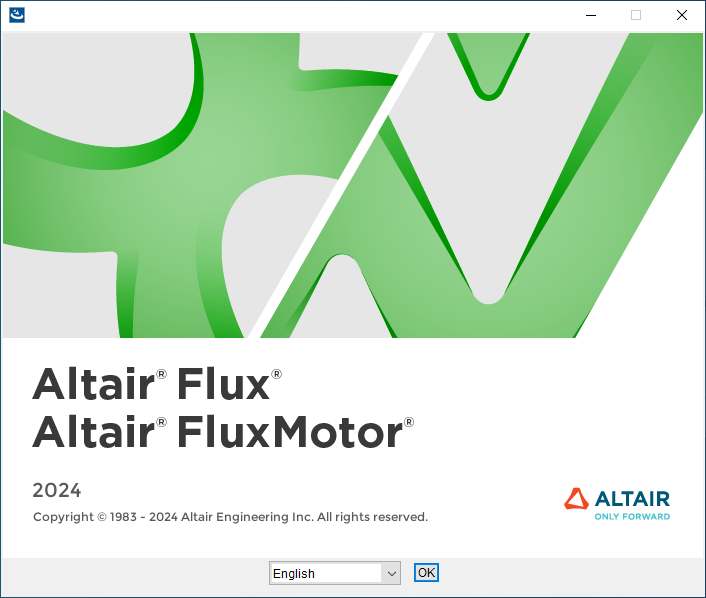
- Select a language
- Click on the OK button
-
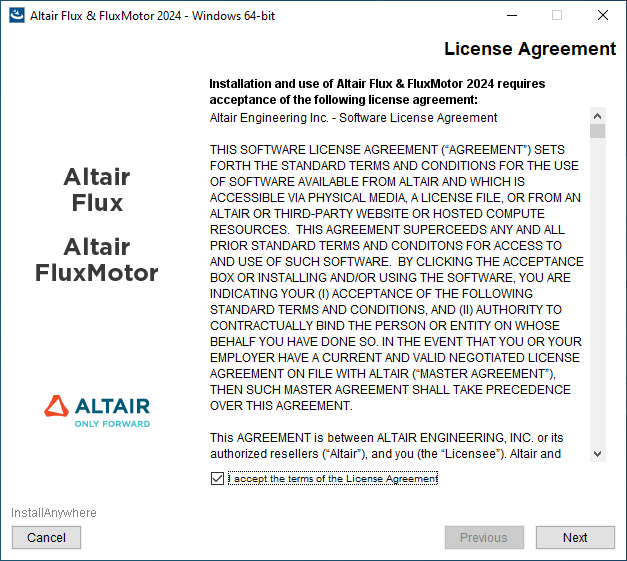
In the Altair
Flux & FluxMotor
2026 – Windows 64-bit window
(License Agreement panel):
- Read through the license agreement and if you accept the terms of the License Agreement, then check the I accept the terms of the License Agreement box
- Click on the Next button to start with the Altair Flux & FluxMotor 2026 installation
-
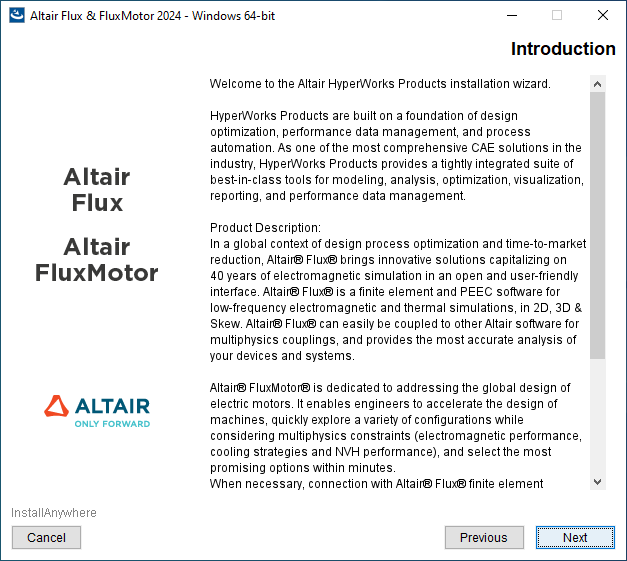
In the next Altair
Flux & FluxMotor
2026 – Windows 64-bit window
(Introduction panel):
- Read the introduction and click on the Next button to continue with the Altair Flux & FluxMotor 2026 installation
-
In the next Altair
Flux & FluxMotor
2026 – Windows 64-bit window
(Choose Install Folder panel):
- Choose an installation directory:
- By default:
- with a user account: the installation directory is C:\Users\<username>\Altair\2026
- with an administrator account: the installation directory is C:\Program Files\Altair\2026
- You can specify another installation directory, however, make sure that the full directory path does not include any special characters, then click on the Choose button
- By default:
- Click on the Next button to continue with the Altair Flux & FluxMotor 2026 installation
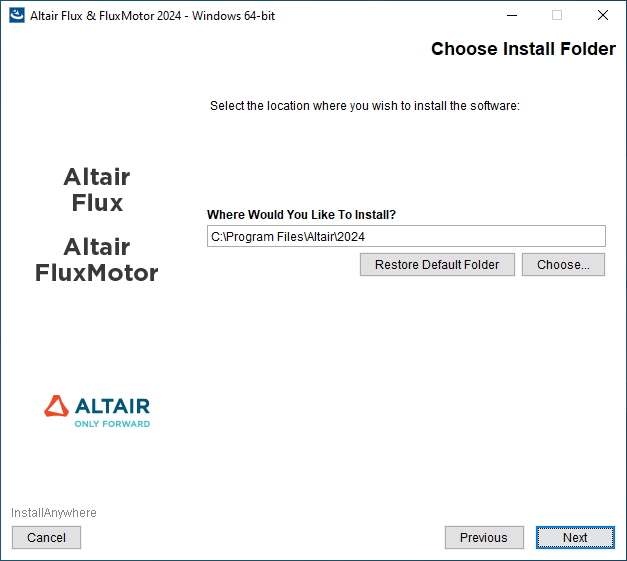
- Choose an installation directory:
-
In the next Altair
Flux & FluxMotor
2026 – Windows 64-bit window
(Change Shortcut Folder (Local) panel):
- Specify the folder name that will contain the start menu shortcuts.
- Specify the suffix string to be added to the shortcuts (Optional).
- Select one of the following options:
- Yes if you want to add the Altair Flux & FluxMotor shortcuts on the desktop
- No if you do not want to add the Altair Flux & FluxMotor shortcuts on the desktop
- Click on the Next button to continue with the Altair Flux & FluxMotor 2026 installation
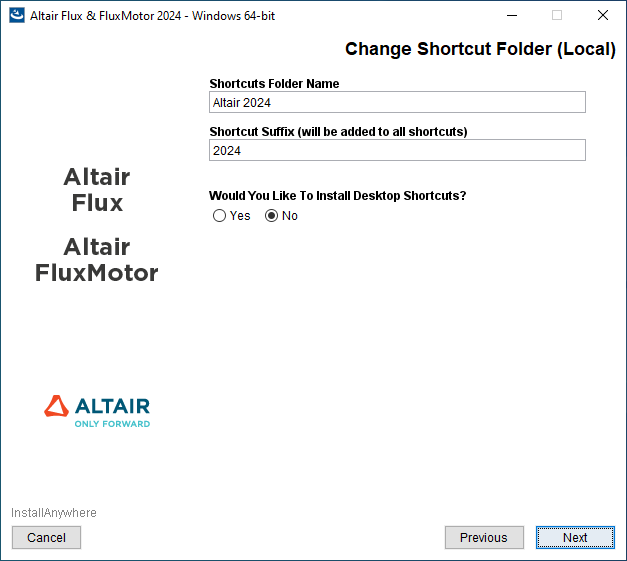
-
In the next Altair
Flux & FluxMotor
2026 – Windows 64-bit window
(Altair License Management System panel):
- Enter the license location:
- If you have a network license, then enter
port@hostname
where port is the TCP/IP port number used by the license server and hostname is the name of the license server computer
- If you have a local license (standalone license), then enter the full pathname of the license file
- If you have a network license, then enter
port@hostname
- Click on the Next button to continue with the Altair Flux & FluxMotor 2026 installation
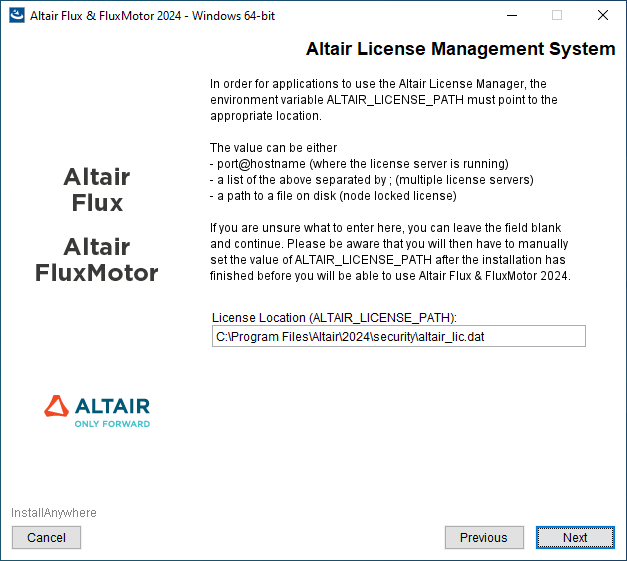
Remarque : This window is only displayed if the license has not yet been configured. - Enter the license location:
-
In the next Altair
Flux & FluxMotor
2026 – Windows 64-bit window
(Pre-Installation Summary panel):
- Review the installation details and click on the Install button to start the Altair Flux & FluxMotor 2026 installation
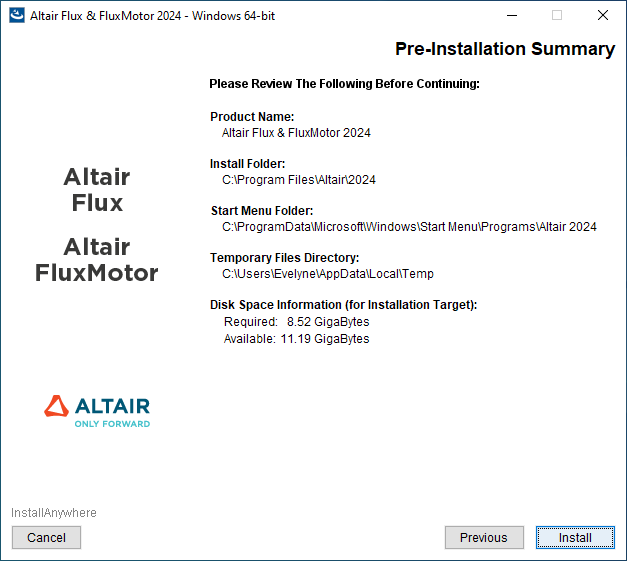
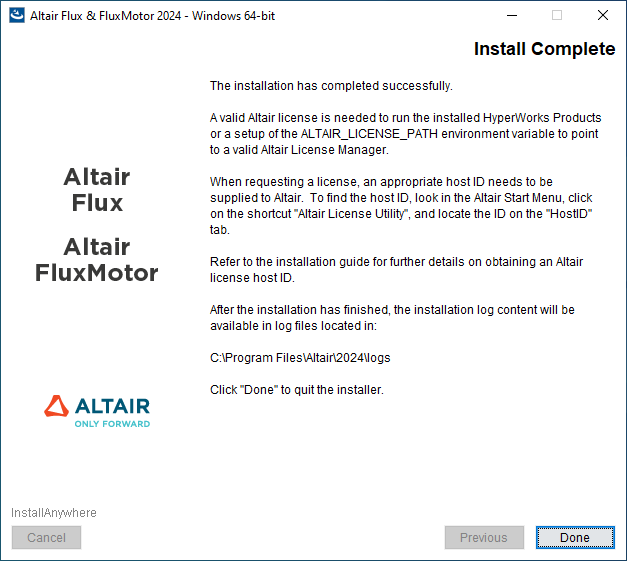
-
In the last Altair
Flux & FluxMotor
2026 – Windows 64-bit window
(Install Complete panel):
- Click on the Done button to complete the Altair Flux & FluxMotor 2026 installation and exit the installer
