Using the BoM Management module of Altair Weight Analytics Solution:
You can continuously edit your WIP BoM and predict its W&B at any point in time
during PLC. This is one of the most common activity done by weight engineers on a daily
basis. This includes:
Adding or deleting parts on the fly.
Editing weight and CoG
Accessing to several attributes. For example, MoI, weight maturity, material,
functional code and so on.
You can navigate the entire breakdown of the BoM down to the leaf using your company’s
functional view. The capability to switch from the EBoM view to your company’s functional
view is called Multidimensional Functional View Approach. This is a key WA differentiator. While the Engineering BoM and the Manufacturing
BoM are evolutionary, i.e. the information stored grows along the development process, the
connections defined through functional groups maintain their validity and enable an
ongoing synchronization and comparison among them.
The tasks that can be completed in the BoM Management page are:
Export an Excel report that shows all the products defined in a BoM.
Recalculate the weight roll up if there is any change in any of the parts in a BoM.
View the BoM in either an Engineering Bill of Materials (EBoM) view or in a pre-defined
functional view.
Add new parts to the BoM.
Remove parts from the BoM.
Replace a part with a new part.
Change the attributes of the systems and parts available in the BoM.
Search for parts that exist in the BoM.
Engineering Bill of Materials - This is the hierarchical structure of the parts in a
product snapshot. When viewing the product BoM in Engineering view you can edit, delete, replace
and manage the parts in the BoM.
Functional View - This is an organization of the parts in the BoM that groups and
displays the hierarchical structure of the parts from various point of views depending on the
purpose of the product, for example, if the product is an automotive product the BoM will be
organized as per the systems of a automobile, similarly if the product is a helicopter the
systems will be organized as per the structure that is appropriate to a helicopter. When viewing
a product in its functional view, it is not possible to manage the parts or the structure of the
BoM.
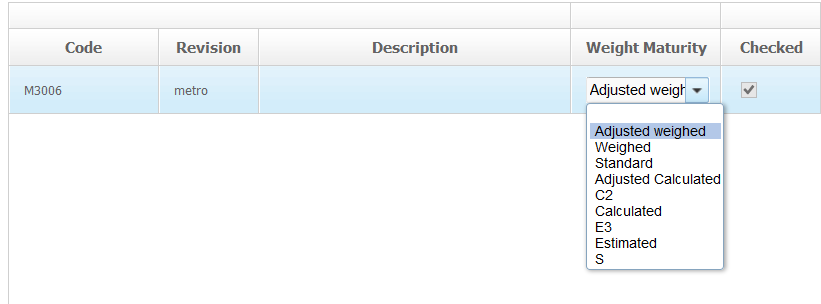
In the BoM every part is assigned a Weight Maturity. The maturity can be any of the following states:
Adjusted weighed
Weighed
Adjusted Calculated
Calculated
Estimated
BoM Management
Note: The part management options are available only when working with the
Engineering BoM.
There are two ways in which parts can be added to a BoM in WA.
Existing Part - If one part is used in multiple systems and
sub-systems this option of adding parts is useful. For example, if a Bolt
called M29 is used in multiple locations in a product, it
means that this part will exist in multiple systems in the BoM.
New Part - If the part that you want to add is a completely new part
that does not exist in the BoM yet, then this option should be used. Once
added this new part can be replicated in multiple systems using the existing
part option.
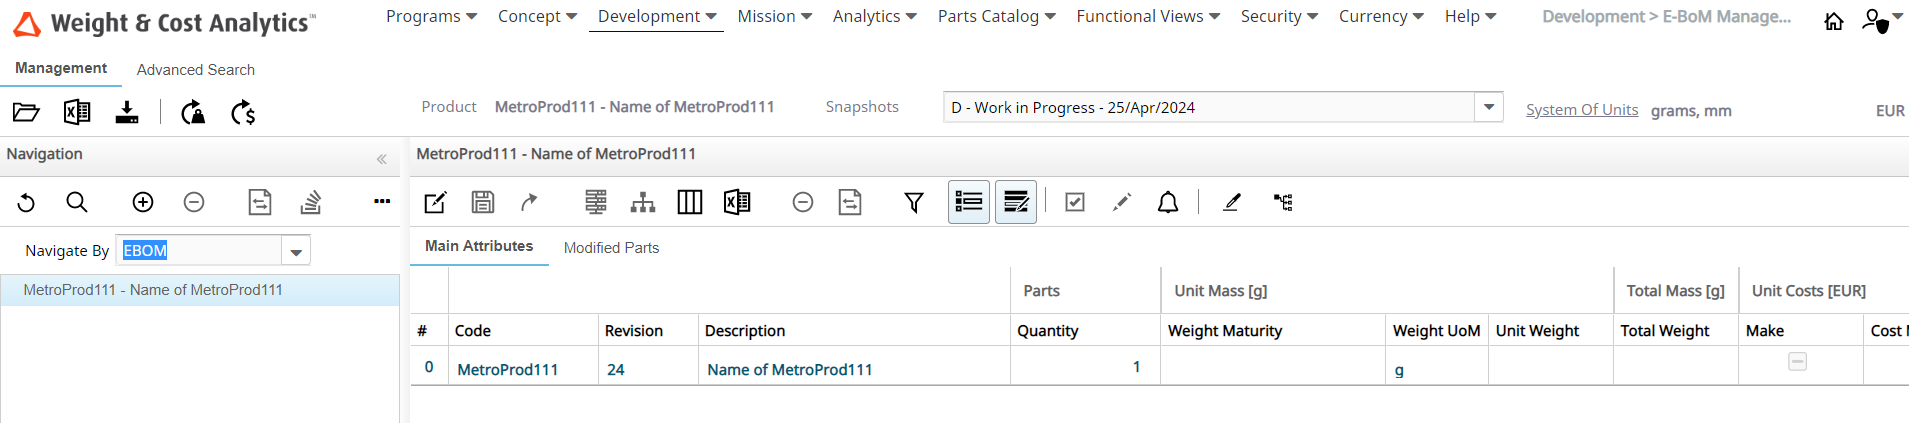
Navigate to the BoM Management Page
Click Development > BoM Management from the WA main menu.
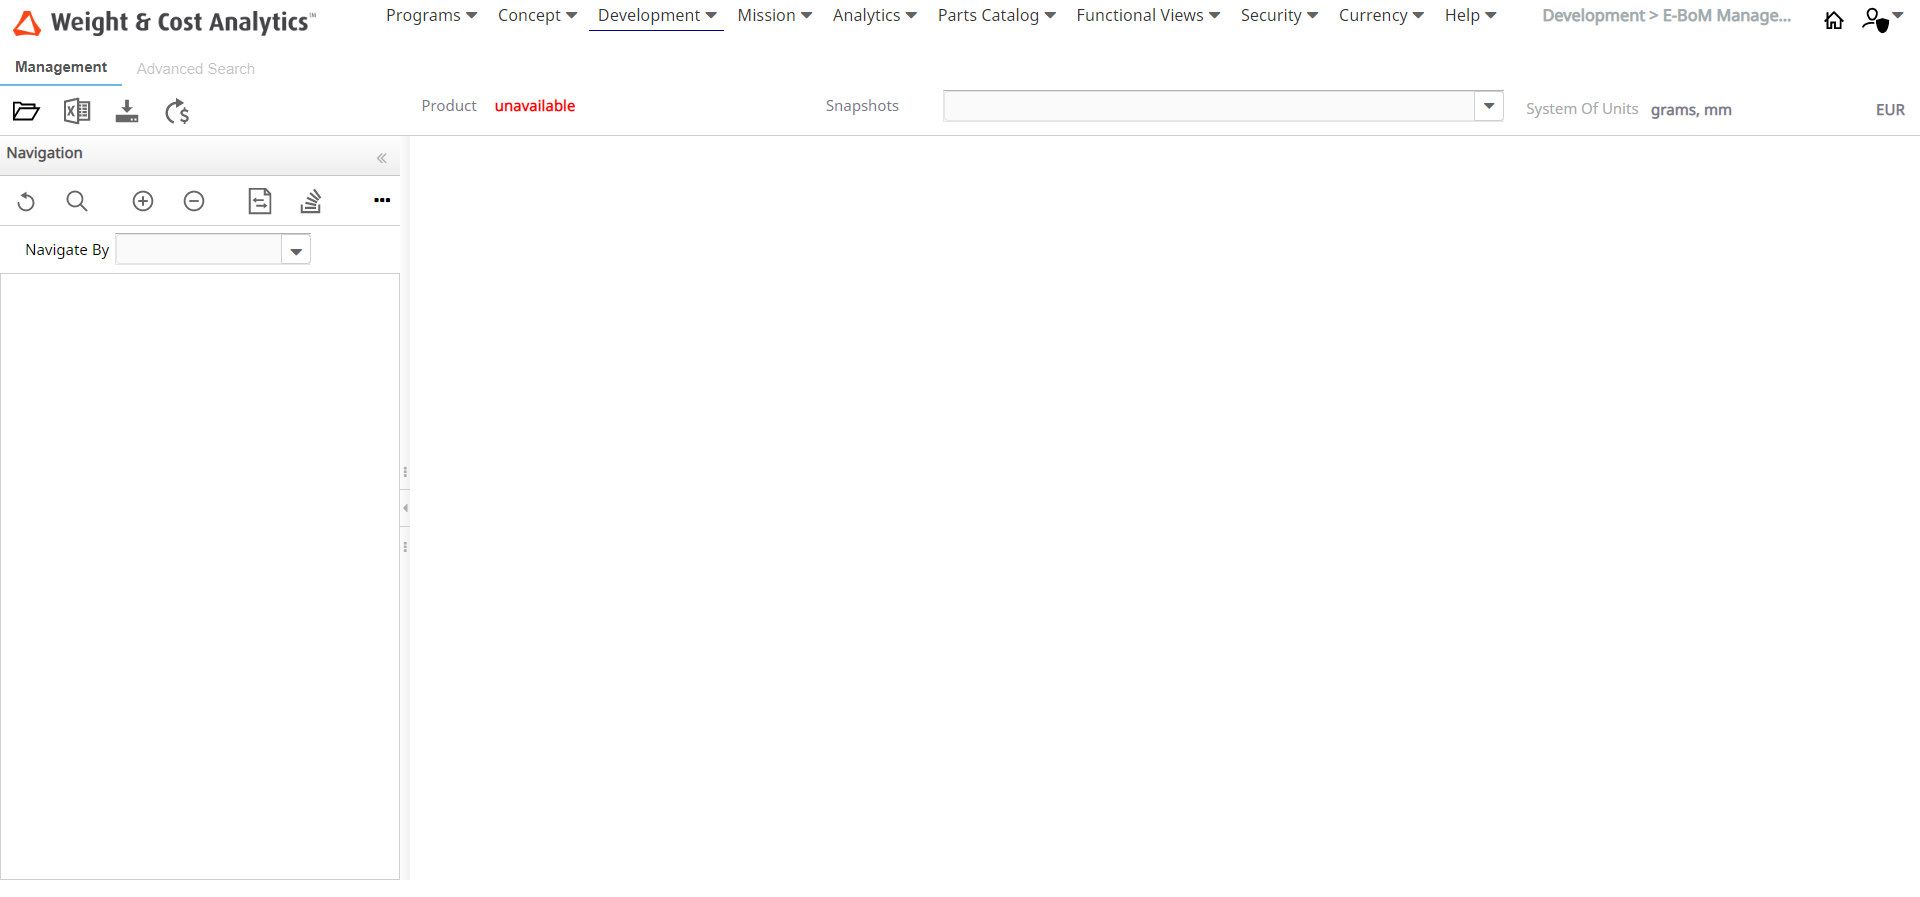
The BoM Management page is displayed.
In case no product was selected in the Programs > Management page, then this page will be mostly blank as shown in the
preceding image.
If no product was previously selected, click Select Product.
The Product Selection dialog appears.
From the program tree displayed in the Product Selection dialog, select the product which has concepts
defined in it.
The BoMs Snapshots defined for the selected product are displayed in the
Snapshots dropdown list.
Click the required Snapshot from the dropdown list.
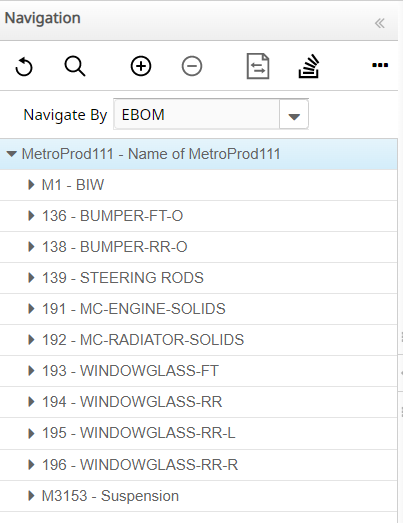
The structure associated with the Snapshot is shown in the Navigation area.
To switch between the part navigation structure click the required BoM view
type from the Navigate By dropdown list.
Add Part
Perform the following steps to add a part:
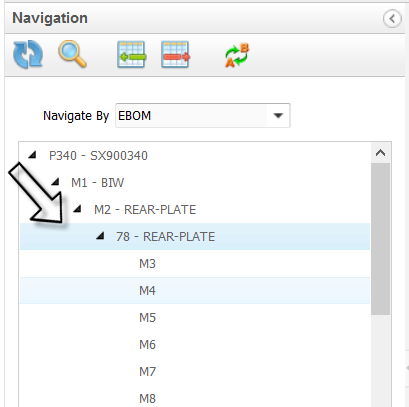
In the navigation area, drill down to the system into which you want to add a
new part.
Click the system name into which you want to add the part.
Click Add Item.
A dialog titled Add Part appears.
Note:
The Add Part dialog box consists of two tabs
corresponding to the two methods of adding parts to a BoM.
Existing Part
New Part
Add Existing Part
Select the Existing Part tab.
In the Part Number field, enter the part number or the first
few letters of the part number and click the Search Parts button.
The part list will be filtered and matching part names will be
listed in the window.
Click the part number that you want to add.
Click Add Existing Part.
The chosen part is added to the selected location in the BoM and
WA will display a message confirming the
addition of the part.
You can use the enable changes option to modify the attributes of the
part.
Add a New Part
Click the Add Item icon.
A dialog titled Add Part is displayed.
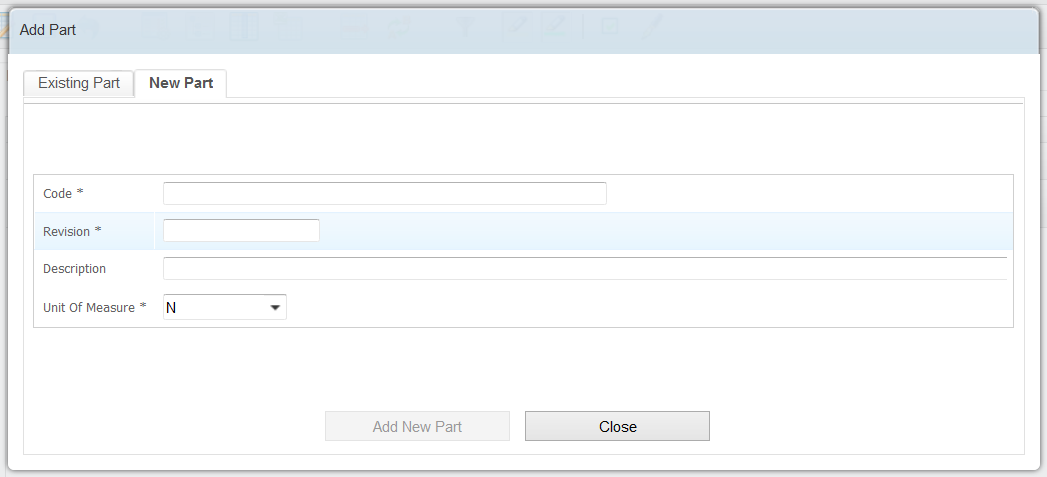
Click the New Part tab.
Enter a code name for the new part in the Code field.
Enter a revision for the part in the Revision field.
Enter a description for the part in the Description field.
Click the required unit of measure from the Unit Of Measure dropdown list.
Click Add New Part.
The part is added to the selected location in the BoM and WA will display a message confirming the addition
of the part.
You can use the enable changes option to modify the attributes of the
part.
Remove Part
Perform the following tasks to remove part:
Click the part that you want to delete from the Navigation area.
The Remove PART icon is enabled.
Click Remove PART.
A dialog asking for confirmation will be displayed.
Click OK to confirm the
removal of the part.
The part will be removed from the BoM.
Note: When deleting assemblies
from the EBoM, all the child entities of the chosen assembly will be deleted
from the BoM.
Replace Part
Perform the following steps to replace the part:
To replace a part in the BoM with a new or an existing part, select the part to
be replaced by clicking on it in the click Navigation area.
Click Replace Part.
A dialog titled Replace Part is displayed.
The dialog is similar to the Add Part dialog and consists of two tabs:
Existing Part
New Part
Similar to the process to add a new part or add an existing part select the
part that you want replace the selected part with.
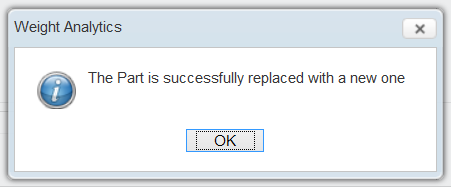
Click Confirm after selection.
A confirmation message is displayed that informs you about the
successful part replacement.
Edit an Existing Part
To edit an existing part:
In the Navigation area, click the part that you want to edit.
The part attributes will be displayed in the Main Attributes tab.
Click the Enable Changes icon.
The attributes of the part become editable.
Edit the attributes of the part in the respective columns of the table.
The edited attributes are automatically highlighted by WA.
Click the Save Changes icon after the modifications are done.
The part is updated with the new data.
Select Multiple Items
The Multiple Item Selection functionality facilitates the selection of multiple parts
so that you can modify the attributes (maturity, for example) of the selected parts with
common attribute values. When you edit multiple parts at the same time, all the selected
parts are updated with the same values.
To select multiple items:
This functionality is available in the BoM Management
section of Weight Analytics.
Note: You cannot have the unit weight defined with
empty maturity or vice versa. When you modify the maturity of parts with
different weights, the weights of all the parts are modified.
Click the Enable multiple selection icon.
Each row in the part list displays check boxes that enable your
selection.
Select the checkboxes for the parts that require modifications.
The Open popup for multiple part changes. icon is enabled.
Click the icon.
The Multiple part modification window is displayed.
Modify the attributes of the selected parts in this window and click Apply changes.
View Modified Parts
WA allows you to view parts that were modified by
specifying a set of dates.
To view the modified parts:
To view the parts that were modified, click the Modified Parts tab.
The contents of the tab are displayed.
Click the Select Date button in the From field.
A date selection widget appears.
Pick a start reference date for searching changes done to the parts.
Click the Select Date button in the To field.
A date selection widget appears.
If nothing selected the end date is
the current one.
Pick a end reference date for searching changes done to the parts.
Click Search Parts.
The search results will display the list of parts that were modified
within the specified date range.
Note: In case if user does not see any modified parts when you expect to
see them, make sure that a product and a snapshot is selected using product
selection options located near the top of the tab.
View Modified Parts on Recalculate Icon
The yellow sign appears
beside the snapshot drop down menu (refer the screen shot below) when some
attributes got changed.
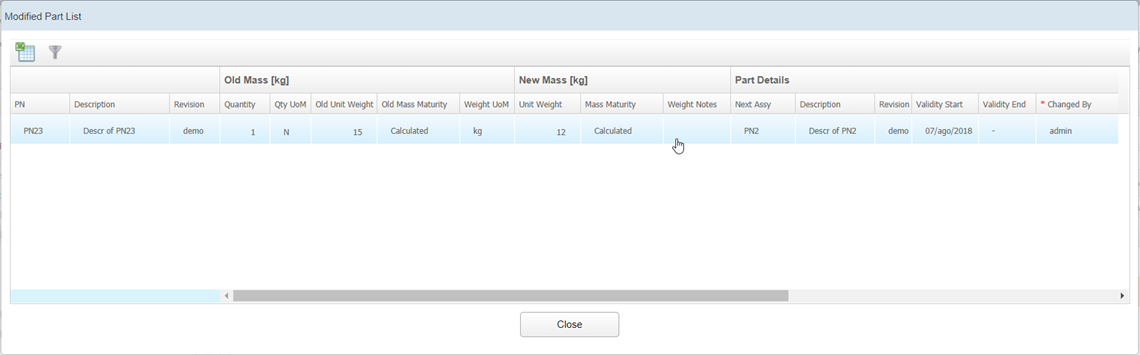
Click on the icon and a pop up is displayed.
This window contains a list of parts with changes on weight value. This will
help the user to understand if there are common parts between snapshots
modified by other users.
After recalculation the parts listed in the popup will assume the new weight
value.
View Part Structure
WA allows you to view the structure of the selected
node. For each child node, the position, quantity, weight maturity, cost maturity, validity,
and so on, are also displayed.
To view the part structure:
Click Development > BoM Management.
Select any row and click the Part Structure icon.
The Part Structure dialog box is displayed.
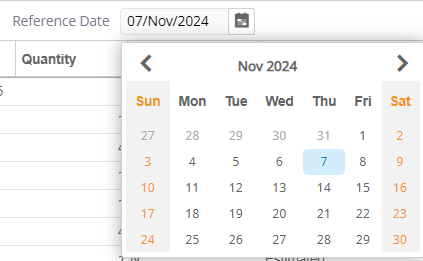
Click the icon to select the required date from the
Reference Date text field.
The Part Structure dialog box displays the displays the structure of the
selected node, and the position, quantity, weight maturity, cost maturity,
validity, and so on for each child node.
Click Close.
Where Used
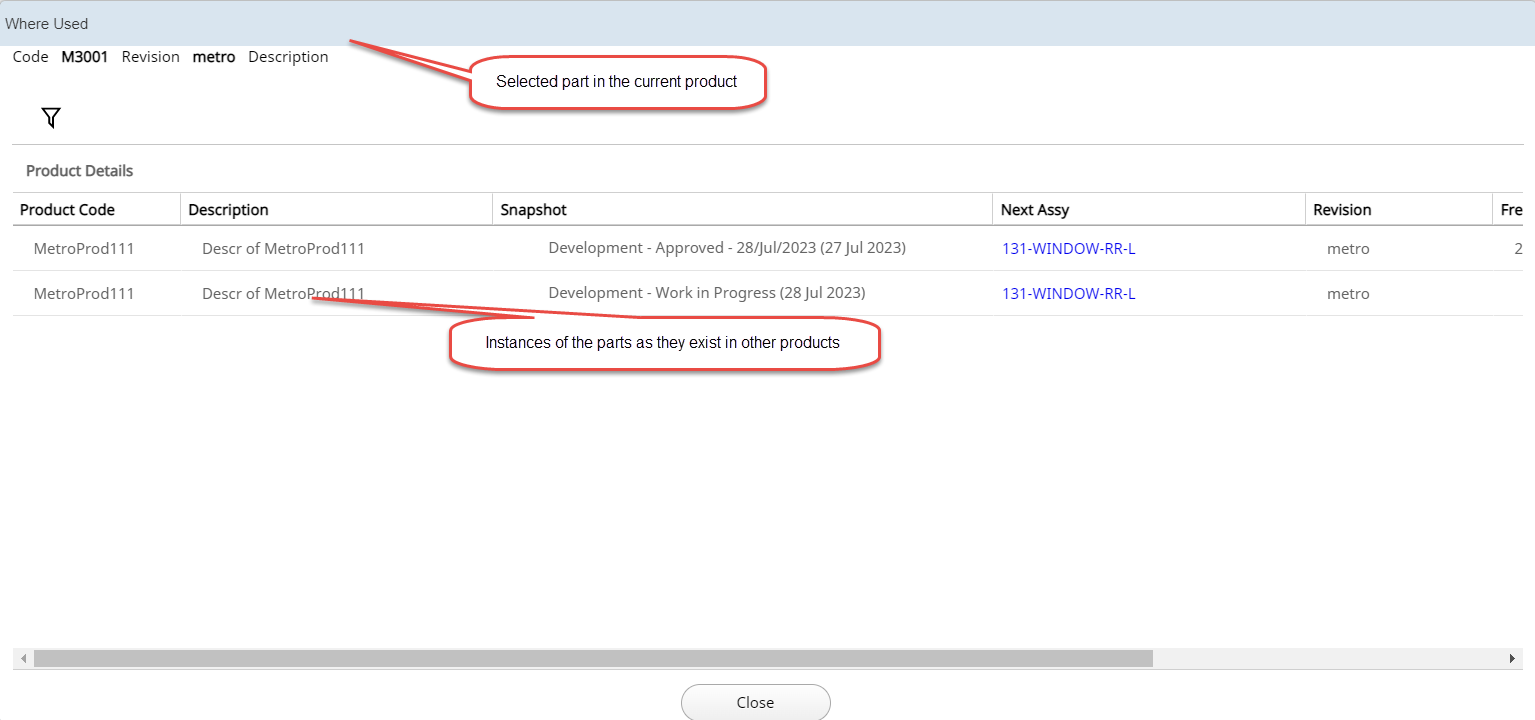
WA allows you to quickly view all products that are
manufactured by an organization in which a specific part pr assembly is used.
For example, if an organization manufactures helicopters in various forms
(commercial, defense, cargo, people carrier, long range, short range) it is likely that
all the types of helicopters may share some common parts.
The Where Used feature of WA displays
the list of products where the selected part is used. This feature can be accessed
using the icon. This feature is available in the following
areas of the software.
Development > BoM Management.
Parts Catalog > Parts Management
This functionality also allows you to copy the values of part attributes
to and from the currently selected part to other instances of this part using the
PUSH and PULL options.
The PUSH and PULL options are displayed according to the current state
of the listed snapshots and the privileges of the logged in user.
Table 1. Push/Pull of Attribute Values
Operation
Description
PULL
Pull the attribute values from the part and snapshot selected
in the Where Used results to the currently
active part.
You can pull the data from another snapshot if you have
permissions to modify the active snapshot and the status of
the snapshot allows modification of the parts.
PUSH
Push the attribute values from the currently active part to
the part and snapshot selected in the Where Used results.
Pushing data from the active part to another snapshot is
allowed only if:
The snapshot is not in an Approved state.
You have write privileges on the product receiving
the data
In the Main Attributes tab or in the list of parts, click the part that
you want to study.
If applicable, the Where Used icon is
enabled.
Click the Where Used icon.
WA will display the results of this check
in a pop up window.
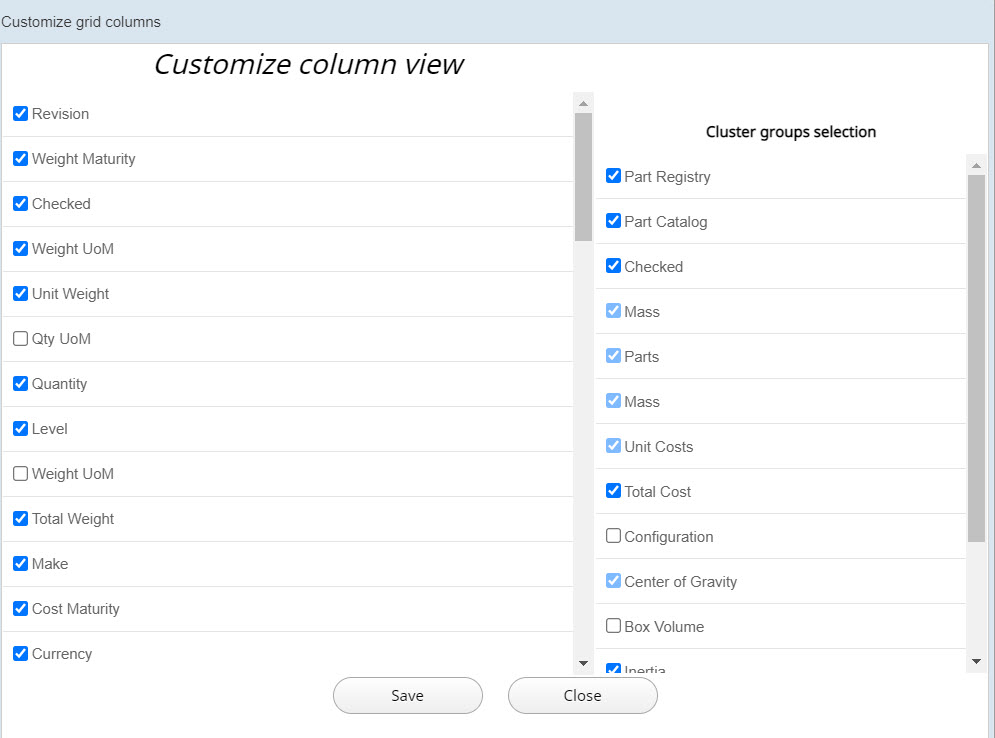
Customize Grid Columns
You can customize the grid columns by adding selected columns to the table and
removing the unselected columns from the table.
To customize the column view:
Click the
icon to customize the columns view.
In the Customize grid columns dialog box, select the
column or cluster checkboxes that you want to include in the table.
The list of check boxes on the left are the individual columns that can be
added or removed from the table. The check boxes in the Cluster groups selection selection list are the categories of columns. If you select any cluster from
this list, all columns that belong to this cluster are selected automatically.
Click Save and Close to save the
changes that you have made.
The selected columns will be added to the table and the unselected
columns will be removed from the table.
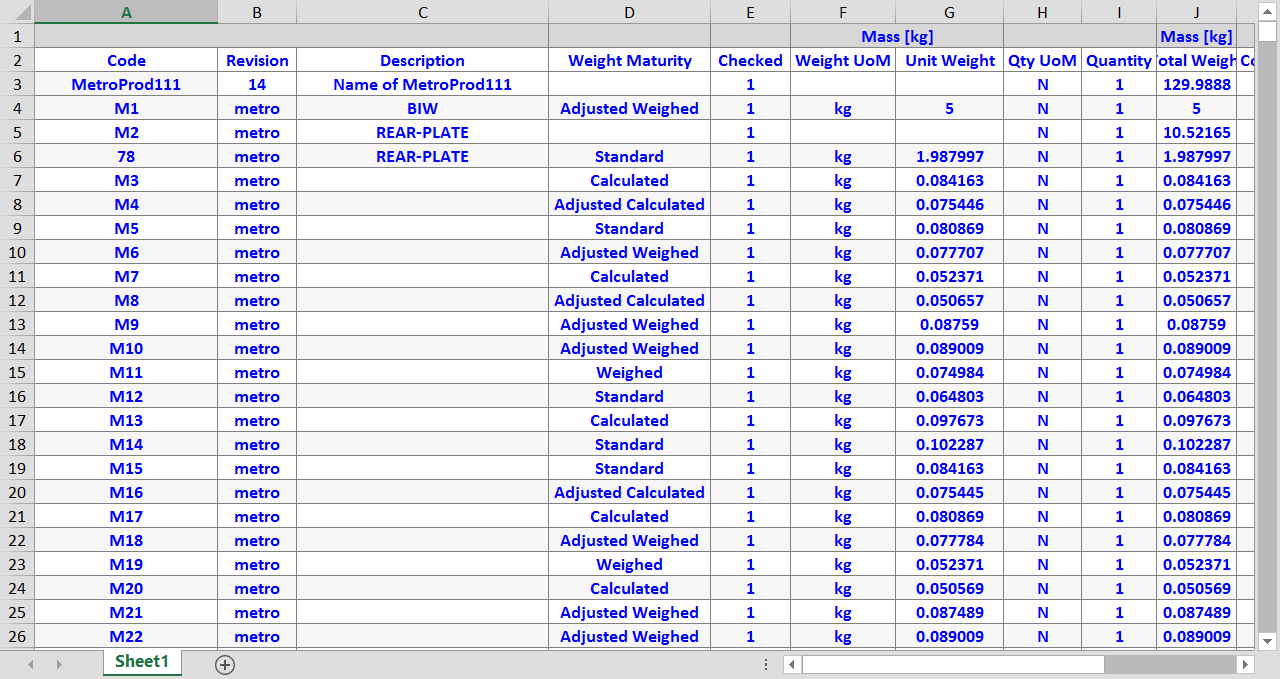
Export BOM Reports
Perform the following steps to export BOM reports:
To export an Excel report of the BOM, click Save as XLSX Report.
While WA compiles the report a status
message indicating the process is shown on the screen.
After completion of the process an XLSX file named
BOMReport-<Product Description>-<Today's
Date>XXXXXX.xlsx is downloaded to your machine. The report lists
all the parts in the BOM and all the information available for each of the
parts.
To export the BOM to the Inspire, click the Inspire Export button.
A context menu showing additional options pops up.
The levels in the pop up menu correspond to the levels in the
BOM.
Click the desired level to which you want to export the BOM.
While WA compiles the report a status
message indicating the process is shown on the screen.
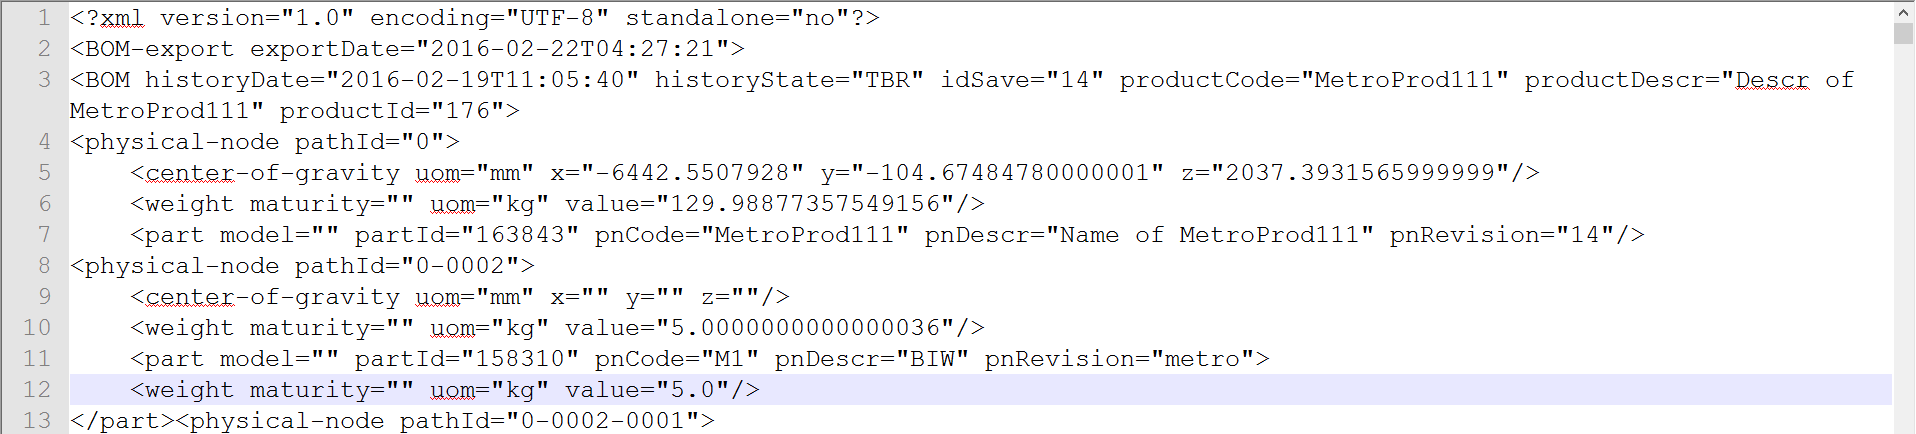
Upon completion of the process a file of the extension
.wbaxml is exported and downloaded to you machine. This
file contains the information about all the parts in the BOM that exist in the
system.
Regulations
Unit Weight & Maturity are coupled
In WA, you cannot enter the unit weight without defining maturity
and vice-versa. These two data entries are coupled.
Maturity: downgrade not allowed
Once maturity is defined, it is not possible to downgrade it anymore. If the user tries to
lower the maturity (for example, from calculated to estimated), the new value will not be shown
by the system since it does not represent the current best weight. However, from the weight
history management tab, it is always possible to disable the existing best weight record and make
a lower-maturity record the new best weight.
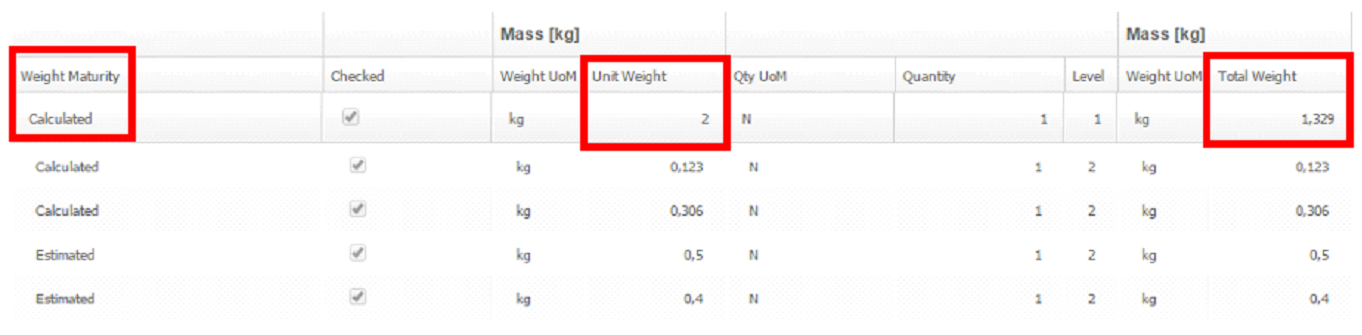
Total Weight Calculation for Assemblies
While for atomic parts the Total Weight is nothing but Unit Weight x Quantity, in case of
assemblies the total weight is normally a roll-up of the weight of the sub parts and
sub-assemblies.
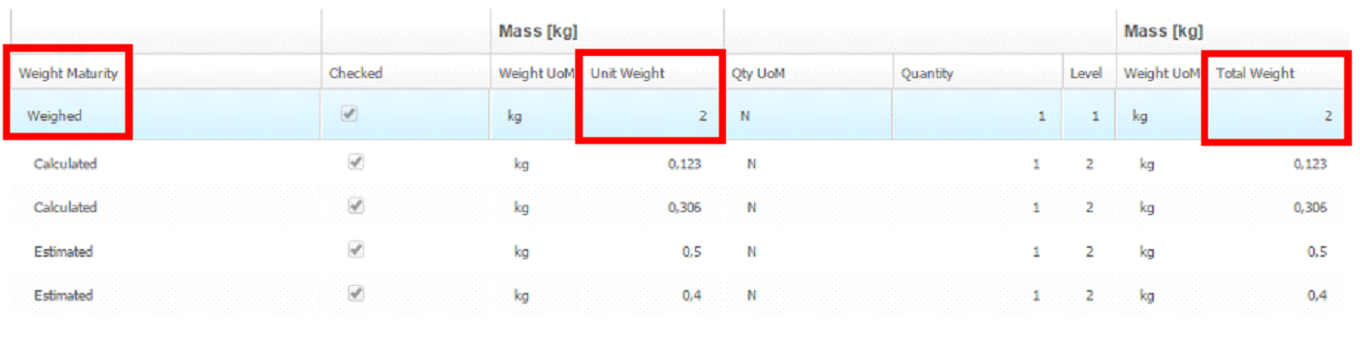
However, in case you get a more accurate weight value for an assembly (for example, weighed
weight from a supplier), you may want to overwrite the rolled-up weight because less precise. In
this case, WA offers the capability to link the total weight
calculation logic to the assembly’s maturity level. For example, as long as the maturity level is
equal or lower than calculated, the assembly total weight comes from roll-up. For higher
maturity levels, rolled-up weight is overwritten by unit weight x quantity. Refer the screenshots
below for the example:
If assembly’s maturity = estimated or calculated Assembly’s Total
weight = roll-up of the W of the sub parts and sub-assemblies.
If assembly’s maturity = weighed Assembly’s Total weight = Unit Weight x
Quantity
In this way the user is able to control the total weight calculation logic simply modifying the
maturity level of the assembly.
The Total Weight Calculation Logic is defined along with customers based on their own
requirements and processes.
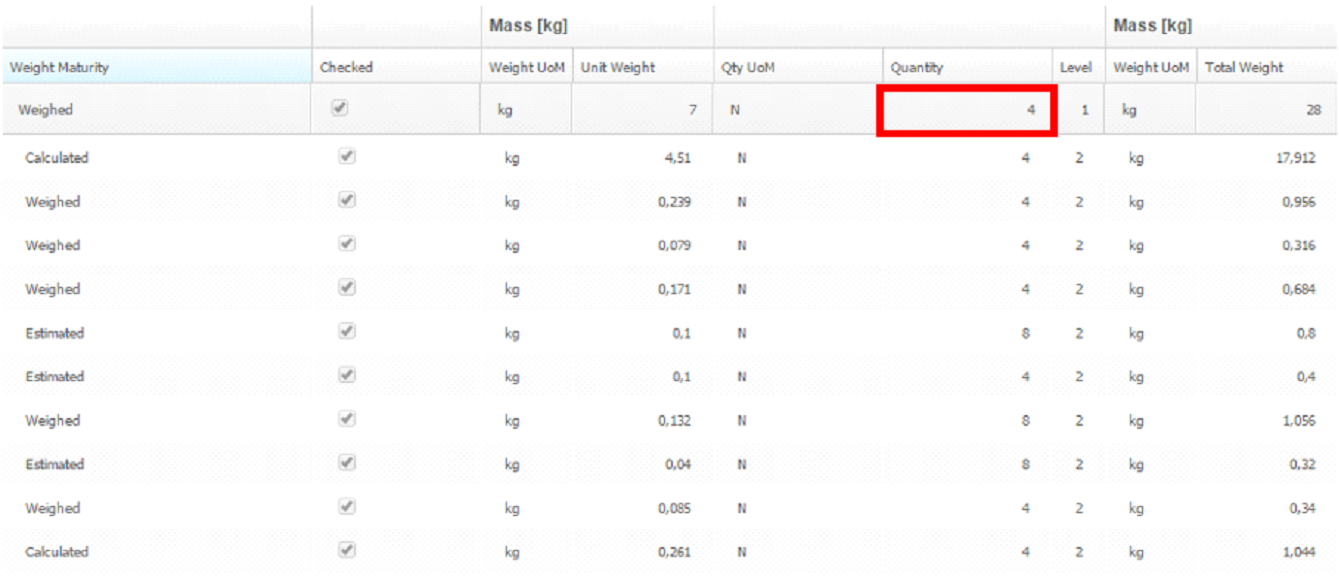
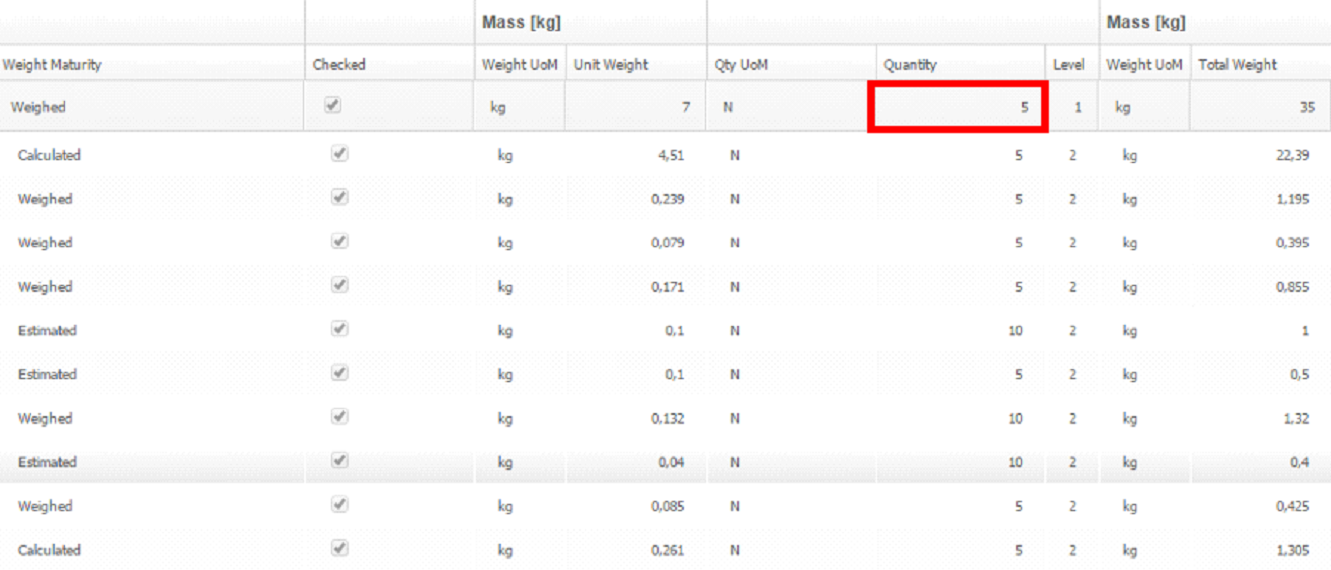
Quantity – Top-down propagation rule
When changing quantity at assembly level, that change propagates to sub parts and
sub-assemblies below. Refer the below screenshots:
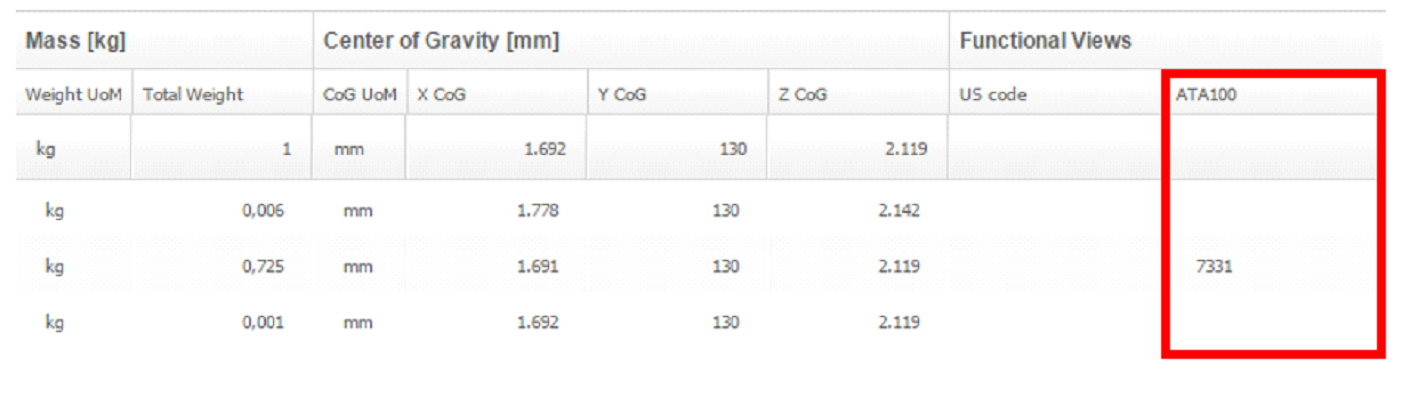
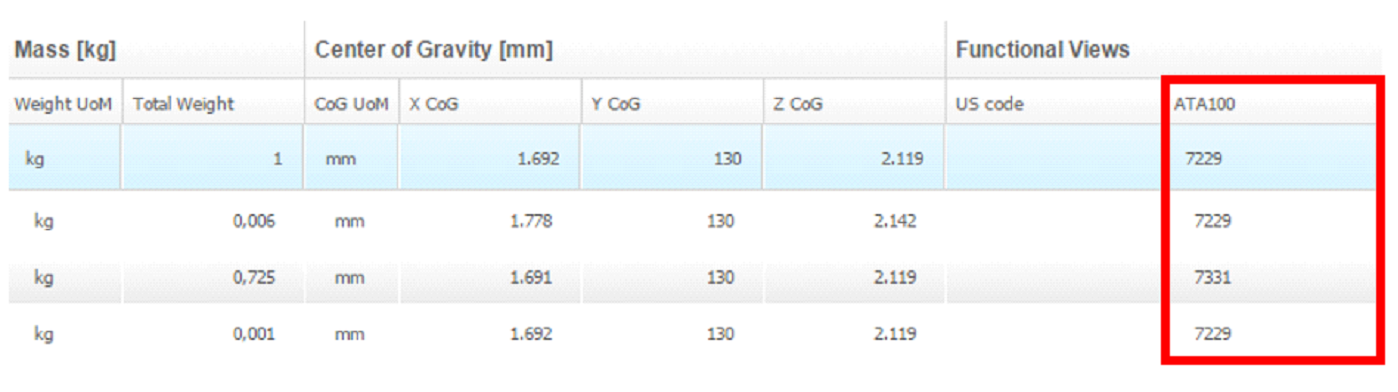
Functional code – Top-down propagation rule
When entering Functional Code at assembly level, that value propagates to all empty fields
below:
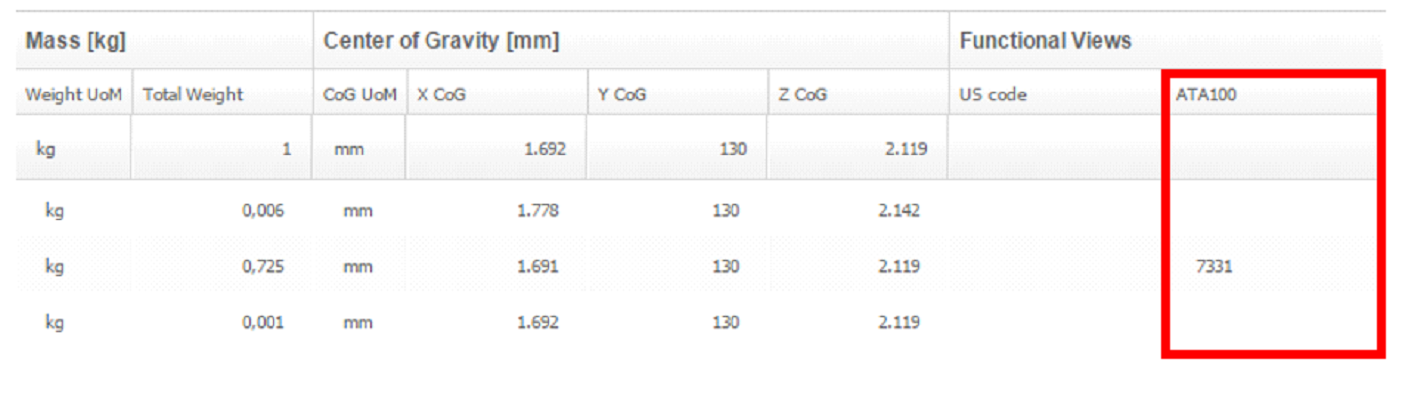
When removing functional code from an assembly, that value gets removed from all the
sub-components where the same code appears. Refer the screenshot below:
If I add a sub-part when the corresponding assembly is already featuring the functional
code, that code does not propagate to the new sub-part.
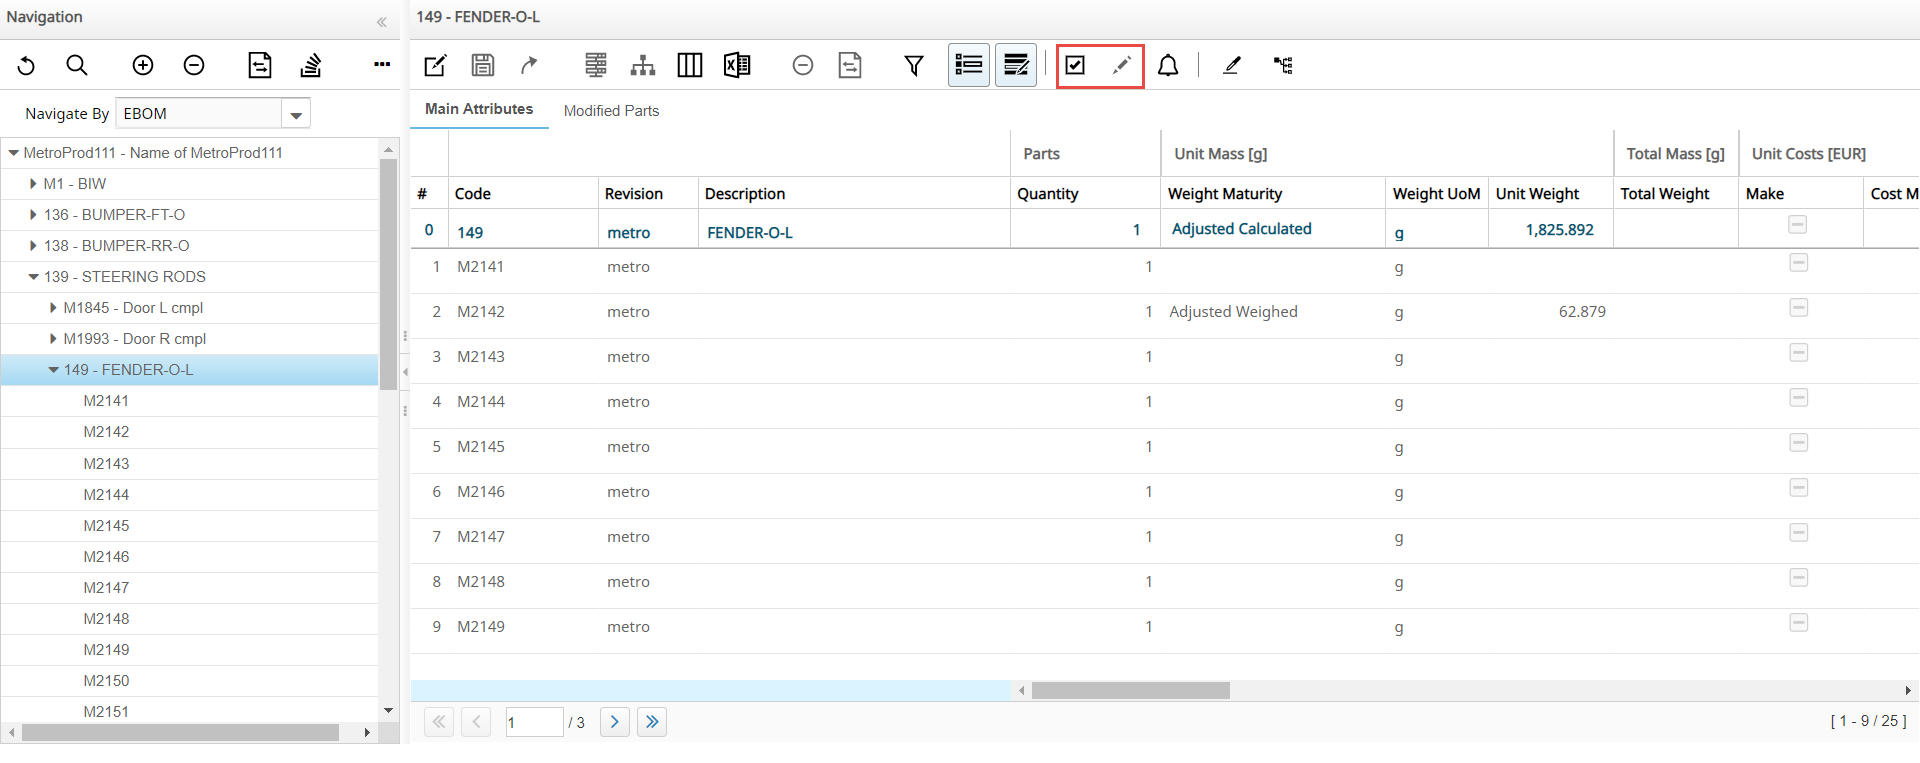
Visualization of Assemblies in Functional BoM
In the functional BoM only the assemblies/parts which directly contribute to the total product
weight are shown. If the assembly’s total weight comes from a roll-up calculation, only the
sub-parts directly contributing to the total product weight will be shown in the functional BoM.
Differently, if roll-up calculation is overwritten by unit weight x quantity (refer, Total
Weight Calculation for Assemblies), then the assembly itself is shown in the functional BoM
and all subparts are ignored.
BoM Recalculation Mechanism
How does it work?
When the user makes a change in the BoM (for example, add or remove parts, edit W, Maturity,
CoG, MoI and so on.), the attributes W, CoG, MoI for the complete product are not calculated
automatically by the system.
Firstly a yellow sign appears beside the snapshot drop down menu (refer the screenshot below).
That sign represents a warning that some attributes changed.
In order to make those changes effective and visible from UI, the user have to click on the
“recalculation button” (see screenshot below), which fires the complete BoM recalculation.
If requested by the customer, it is possible to schedule the regular BoM recalculation in batch
(for example, daily), which will recalculate all bill of materials saved in DB.
Cost Attributes
WA allows you to define the cost attribute values for a
Product using E-BoM Management.
To define cost attribute values:
Click Development > E-BoM Management.
Select a Product having a Development Snapshot.
Check the column visibility by clicking the Customize grid
columns icon.
The following groups must be activated: Unit Costs, and
Total Cost.
Select an assembly or part for which you want to view or edit the cost
attributes.
You can specify the cost attributes as shown in the following example where
the cost attributes list is displayed. The effective list depends on your
WA configuration.
Make: Flag that indicates if the part or assembly is a
Make or Buy part.
Cost Maturity: Indicates the maturity to be selected from a list
(configurable for your requirements).
Actual
Adjusted Calculated
Calculated
AI Estimated
Estimated
Currency: Indicates the currency to be selected from a list of multiple
currencies
Raw Material: Cost Element
Transport: Cost Element
Standard Extra: Cost Element
Amortization Quota: Cost Element
Rejected Materials: Cost Element
Value Added: Cost Element
Material Cost: Cost Element
Manpower: Cost Element
Total Cost: Indicates automatic results calculated by WA and is a non-editable field.
Total Currency: Indicates the currency of the total cost.
Cost Impacts: Flag that is automatically computed by WA indicating if the related part will
contribute to the Vertical roll-up.
Cost Notes: Indicates any additional notes.
To edit the cost attributes, click the Enable Changes icon.
Note: If you enter a cost value in a row, you must
indicate both Maturity and Currency in the same row.
Click the Save Changes icon to save the changes made to the attributes.
WA automatically calculates the Horizontal
roll-up while saving changes and populates (when possible and compliant with
Maturity rules) the Total Cost value in each modified row.
Note: A triangular warning icon appears next to the
Snapshot name.
The red icon
indicates both weight and cost roll-up operations.
The yellow icon
indicates weight roll-up operations only.
The green icon indicates
cost roll-up operations only.
Click the icon to
recalculate the cost roll-up.
WA calculates the Vertical roll-up summing from
the leaves to the root of the E-BoM. Each Cost Attribute and Total Cost is
compliant with the general rules related to the Maturity of Cost values.
The cost and weight icon allows
you to switch between the weight and cost in the Functional View (switching to
cost indicates cost impacting parts or assemblies shown in the tree).
Messaging
WA allows users to exchange conversations using
Conversation IDs, either using the E-BoM or Functional BoM. Messaging functions as
supplementary instructions shared among users who have access to a specific Code, Functional
Node, or Master Node.
To exchange messages:
Note: You must belong to a Department
having visibility to the involved Functional View.
Click Development > E-BoM Management.
From the Navigation tree, select a part or assembly.
Select the related part or assembly from the grid view.
Click the icon to initiate a conversation with the users who
have been granted access to the selected part or assembly.
Important:
A message is generally created and attached to a part or assembly.
Messages that are created are visible to all users having
access to the same variant in which the message was
created.
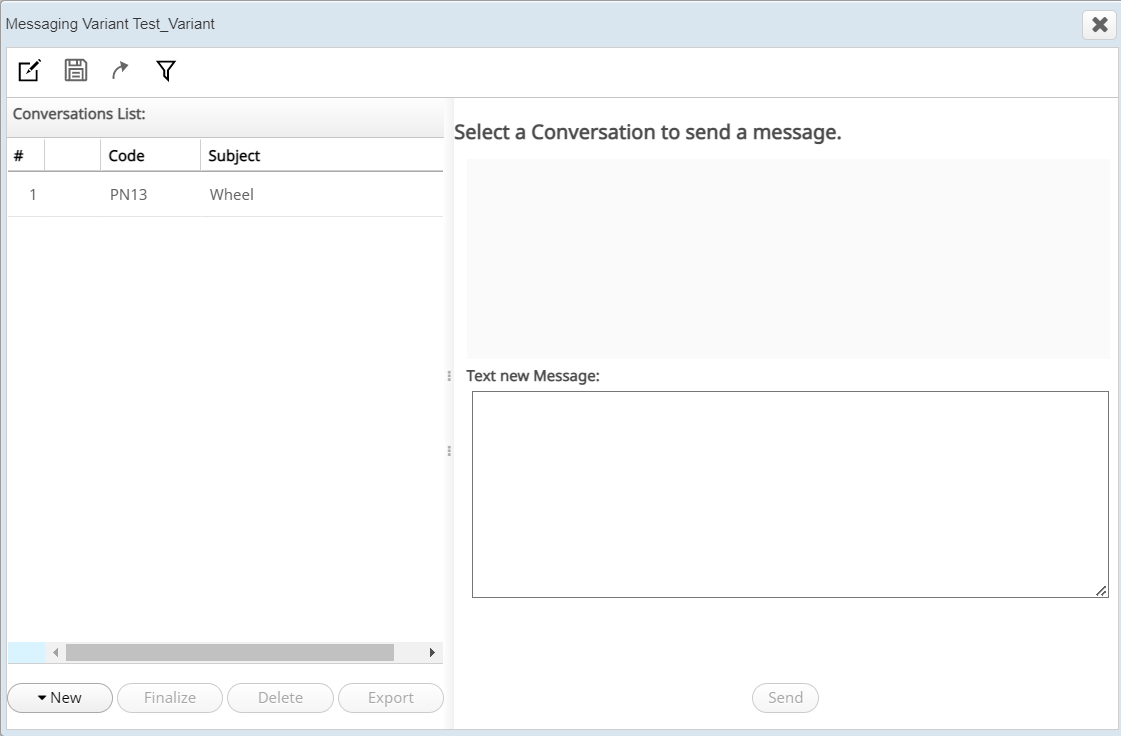
The Messaging dialog box is displayed with the
title containing the variant name.
In the Messaging dialog box, click
New and select one of the following options to start
a new conversation:
Code
The new message will be linked to the part
or assembly selected in the grid view before opening the Messaging
window, and will then be sent to the recipients who have been granted
access to the assembly or part.
Functional Node
You can send a message using
the Functional Node in the following two ways:
(Navigation by E-BoM) Select an assembly or part. If you do not
see the Functional Node in the <variant name> dialog
box:
Return to Development > E-BoM Management.
Click the Enable
Changesicon and then
assign to the chosen assembly or part a Functional Node
from the dropdown list.
Click the Save
Changes icon and then
click the icon to recalculate the
weight roll-up.
Select the chosen assembly or part and open the
Messaging window by clicking the icon.
(Navigation by Functional BoM) Select a Functional BoM from the
Navigate By dropdown list.
Expand the Functional BoM in tree view and then select a
Node.
Click the icon.
Note: If you have previously selected a
Functional BoM from the Navigate By dropdown
list, messaging using the Functional Node option will not be available
when you click New.
Master Node
Select a Master Node or parent node
to link the new message to the Functional parent of the part selected
from grid view.
The Conversations List is populated with the Code, Functional Node, or
Master Node details. By default, the subject of conversation starts with
creation date and time.
In the Conversations List, select the Code, Functional
Node, or Master Node.
In the message text box, type in a message containing any supplementary
instructions and then click Send.
The message will be delivered to the users who have been granted access
to the selected part, assembly, or Functional Node.
Click Finalize to complete the conversation.
A confirmation dialog box is displayed.
Click OK.
The conversations that are finalized are indicated by the icon
and Finalize is disabled. A finalized conversation cannot
store new message anymore. Optionally, you can:
Click Delete to delete the selected
conversation.
Click Export to export the selected conversation
and all related details such as Conversation ID, Subject, Creator, and
so on, into a CSV file.
Click the icon to filter the conversations
based on specific criteria.
Log in to WA as one of the recipients of the
message.
Note:
New message notifications are indicated by the icon.
In the Conversations List, messages that have not been read are
indicated by a green flag that is not displayed once the message
is read.
For the same Code or Functional Node WA allows you to start additional conversations using a different
subject.


 .
A dialog titled Add Part appears.
.
A dialog titled Add Part appears.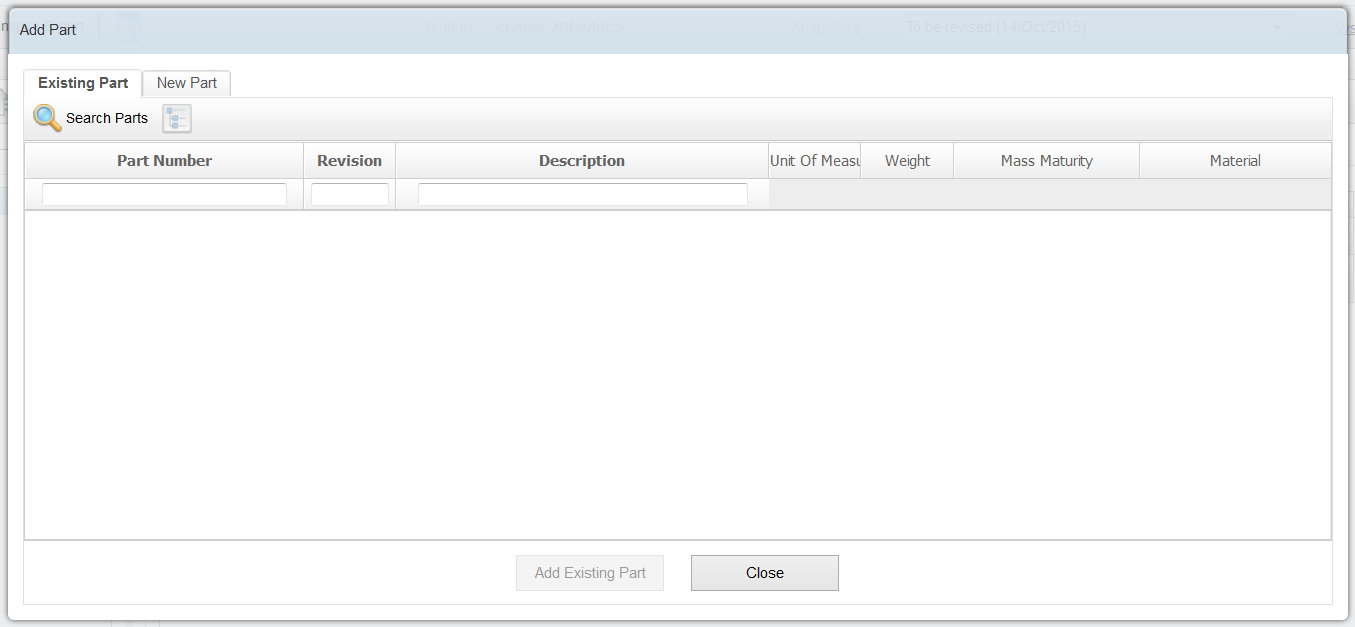 Note:The Add Part dialog box consists of two tabs corresponding to the two methods of adding parts to a BoM.
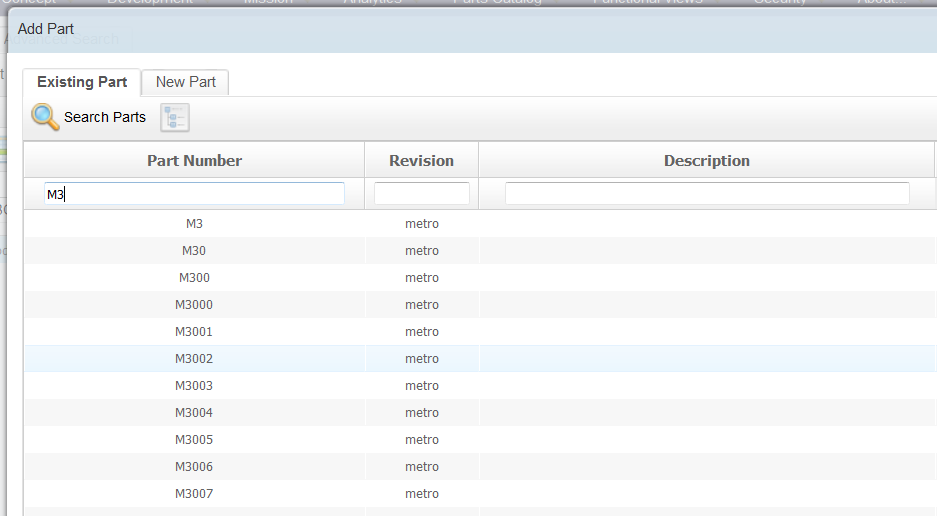 The part list will be filtered and matching part names will be listed in the window.
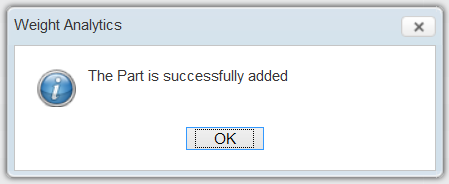
 icon is enabled.
 .
A dialog titled Replace Part is displayed.
.
A dialog titled Replace Part is displayed.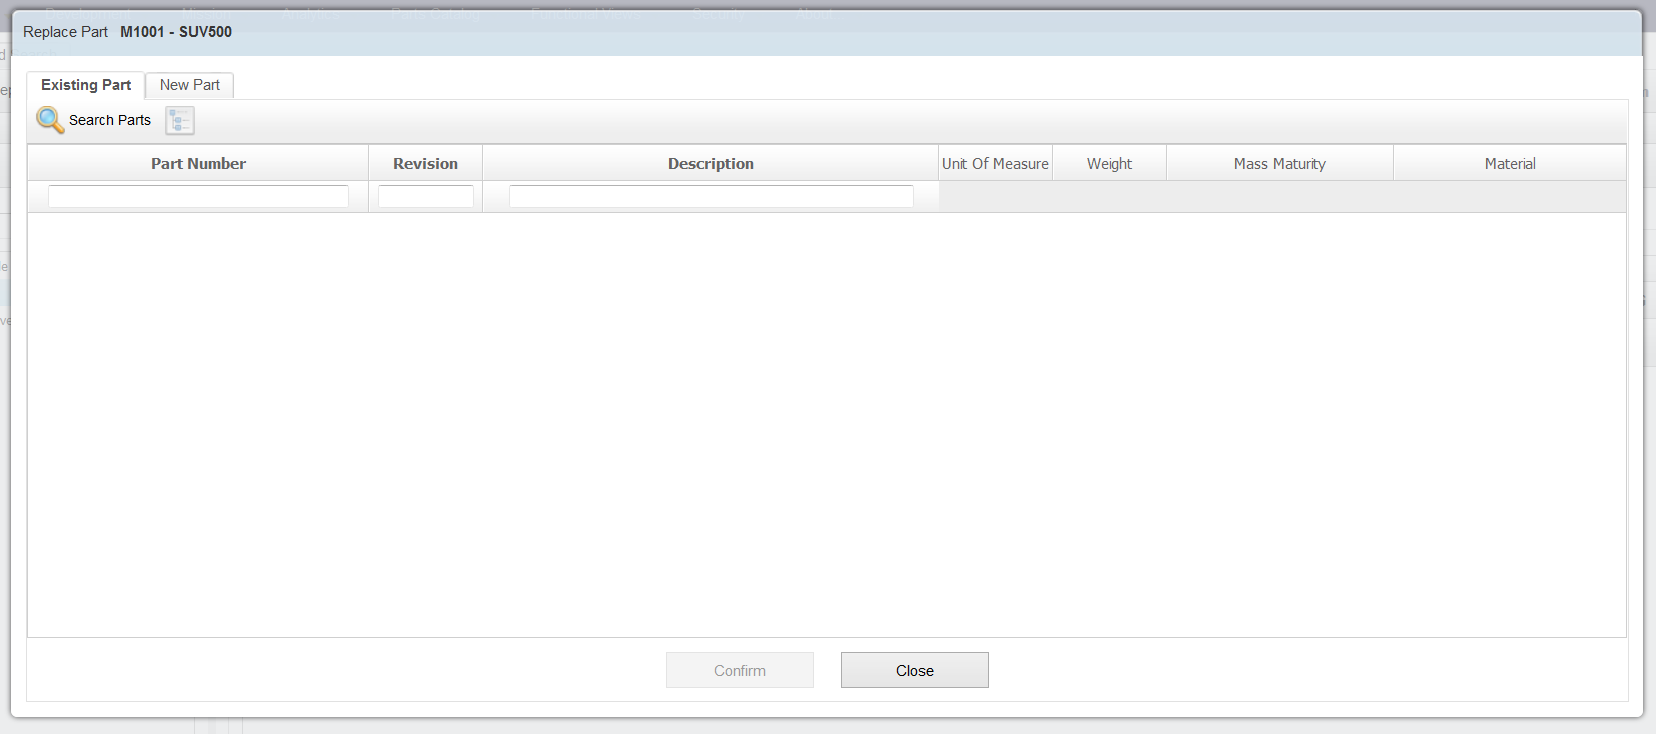
 icon.
The attributes of the part become editable.
icon.
The attributes of the part become editable.
 icon after the modifications are done.
The part is updated with the new data.
icon after the modifications are done.
The part is updated with the new data.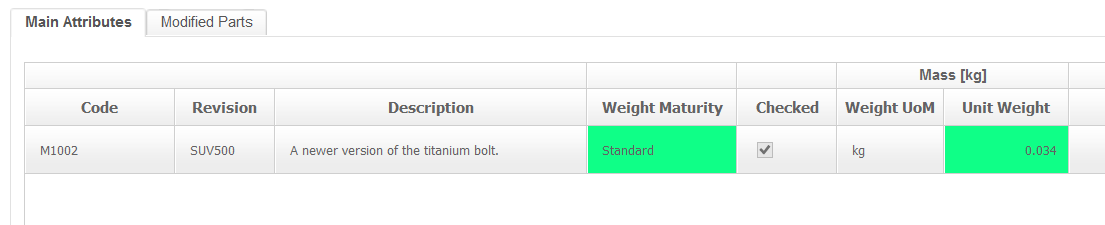
 icon.
icon.
 Each row in the part list displays check boxes that enable your selection.
 icon is enabled.

 button in the From field.
A date selection widget appears.
button in the From field.
A date selection widget appears. Note: In case if user does not see any modified parts when you expect to see them, make sure that a product and a snapshot is selected using product selection options located near the top of the tab.
 icon.
The Part Structure dialog box is displayed.
icon.
The Part Structure dialog box is displayed.
 icon to select the required date from the
Reference Date text field.
icon to select the required date from the
Reference Date text field.
 The Part Structure dialog box displays the displays the structure of the selected node, and the position, quantity, weight maturity, cost maturity, validity, and so on for each child node.
 icon. This feature is available in the following
areas of the software.
icon. This feature is available in the following
areas of the software.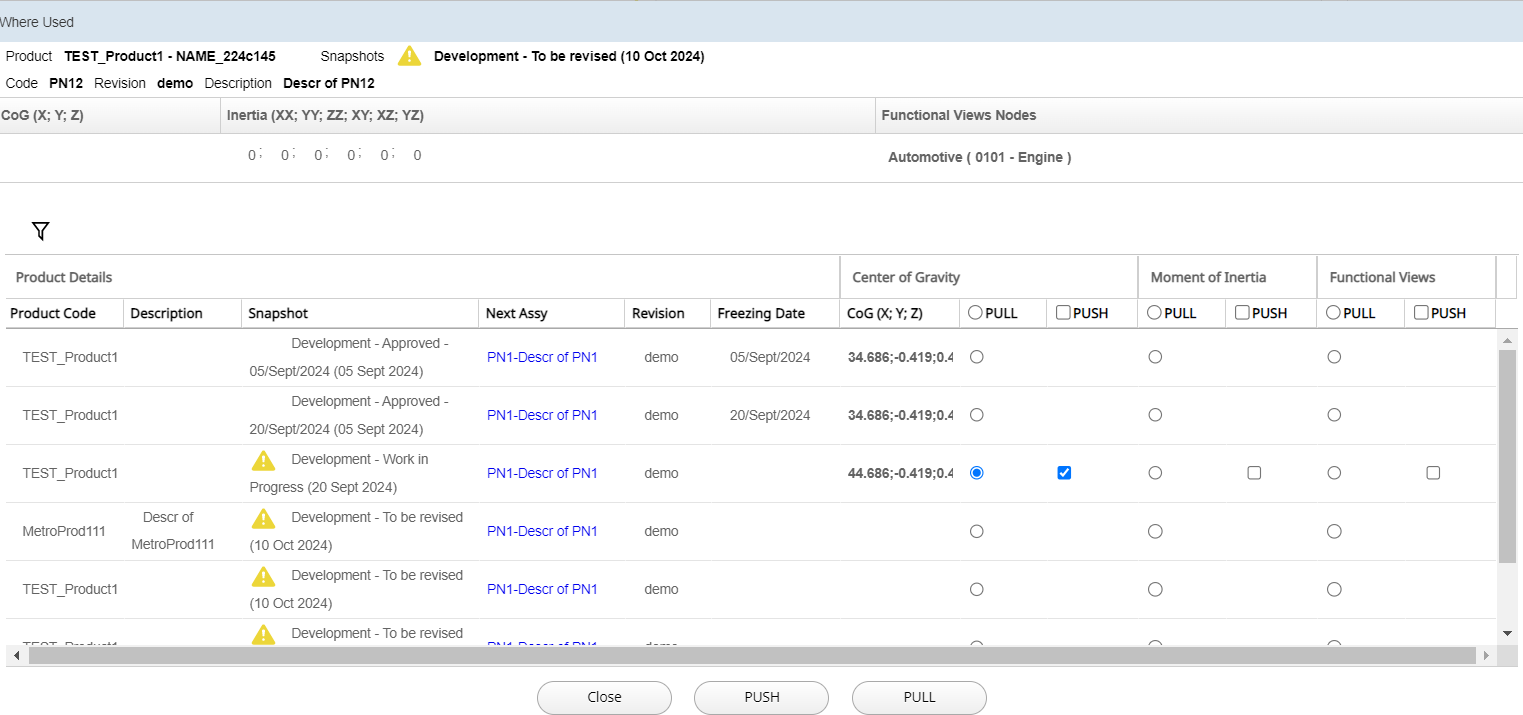
 icon to customize the columns view.
 .
While WA compiles the report a status message indicating the process is shown on the screen.
.
While WA compiles the report a status message indicating the process is shown on the screen.
 button.
A context menu showing additional options pops up.
button.
A context menu showing additional options pops up.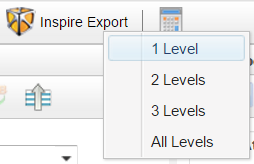


 icon.
Note: If you enter a cost value in a row, you must indicate both Maturity and Currency in the same row.
icon.
Note: If you enter a cost value in a row, you must indicate both Maturity and Currency in the same row. icon to save the changes made to the attributes.
WA automatically calculates the Horizontal roll-up while saving changes and populates (when possible and compliant with Maturity rules) the Total Cost value in each modified row.Note: A triangular warning icon appears next to the Snapshot name.
icon to save the changes made to the attributes.
WA automatically calculates the Horizontal roll-up while saving changes and populates (when possible and compliant with Maturity rules) the Total Cost value in each modified row.Note: A triangular warning icon appears next to the Snapshot name. icon
indicates both weight and cost roll-up operations.
icon
indicates both weight and cost roll-up operations. icon
indicates weight roll-up operations only.
icon
indicates weight roll-up operations only. icon indicates
cost roll-up operations only.
icon indicates
cost roll-up operations only. icon to
recalculate the cost roll-up.
icon to
recalculate the cost roll-up.
 icon allows
you to switch between the weight and cost in the Functional View (switching to
cost indicates cost impacting parts or assemblies shown in the tree).
icon allows
you to switch between the weight and cost in the Functional View (switching to
cost indicates cost impacting parts or assemblies shown in the tree).
 icon to initiate a conversation with the users who
have been granted access to the selected part or assembly.
icon to initiate a conversation with the users who
have been granted access to the selected part or assembly.
 Important:
 icon to recalculate the
weight roll-up.
icon to recalculate the
weight roll-up. icon
and Finalize is disabled. A finalized conversation cannot
store new message anymore. Optionally, you can:
icon
and Finalize is disabled. A finalized conversation cannot
store new message anymore. Optionally, you can: icon to filter the conversations
based on specific criteria.
icon to filter the conversations
based on specific criteria. icon.
icon. that is not displayed once the message
is read.
that is not displayed once the message
is read.