
Tutorial: Sketching, Surfacing, Modify
Tutorial Level: Intermediate Create base sketches, from which you will create surfaces using the Extrude, Edge Extract, and Trim tools. You will then modify the surfaces further by adding sketch curves and using the Trim and Round tools.
In this lesson, you will learn how to:
- Create base sketches
- Then create surfaces using the Extrude, Edge Extract, and Trim tools
- Modify the surfaces further by adding sketch curves and using the Trim and Round tools
Create the Base Sketches
-
Start Inspire Studio. Or if it is already open, click the
New model tool on the File
icon.

- On the ribbon, click the Sketching tab.
-
In the Circles tool group, click the
Circle icon.

-
Click the Front sketch plane.
The view automatically aligns orthographically.

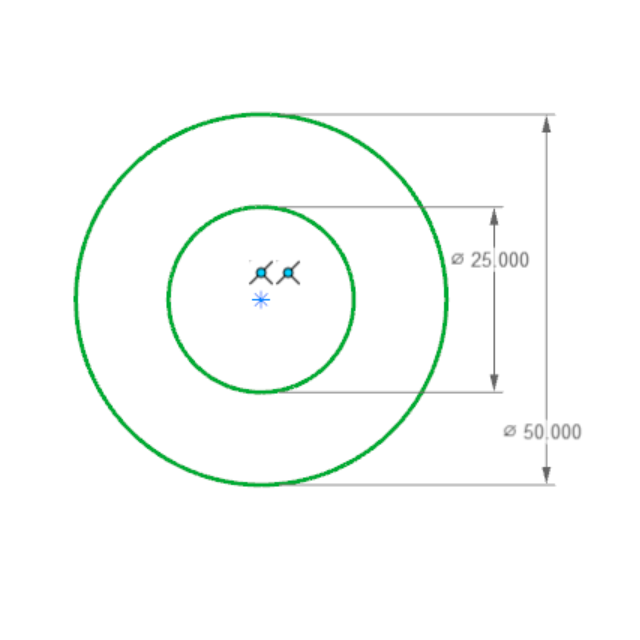
-
Draw two concentric circles, snapping the center to the global origin.
Dimension the circles 25 mm and 50
mm.
- Exit the sketch.
-
On the Sketching tab, select the
Line tool.
- Click the Front sketch plane.
-
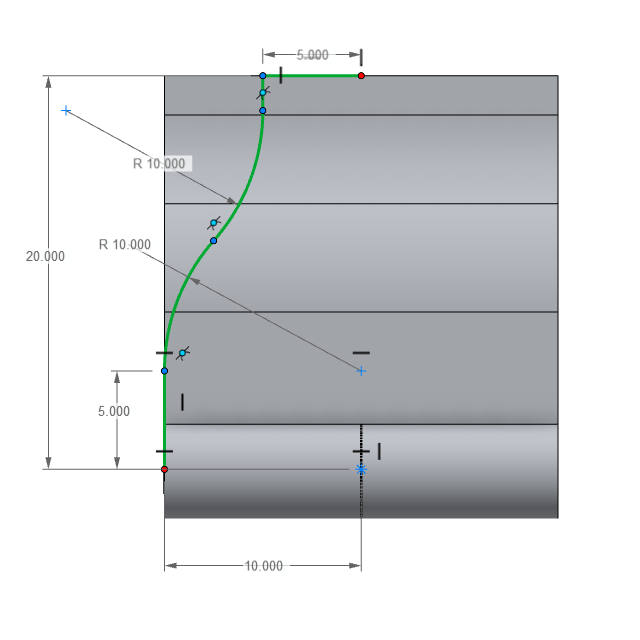
Create a sketch as shown:
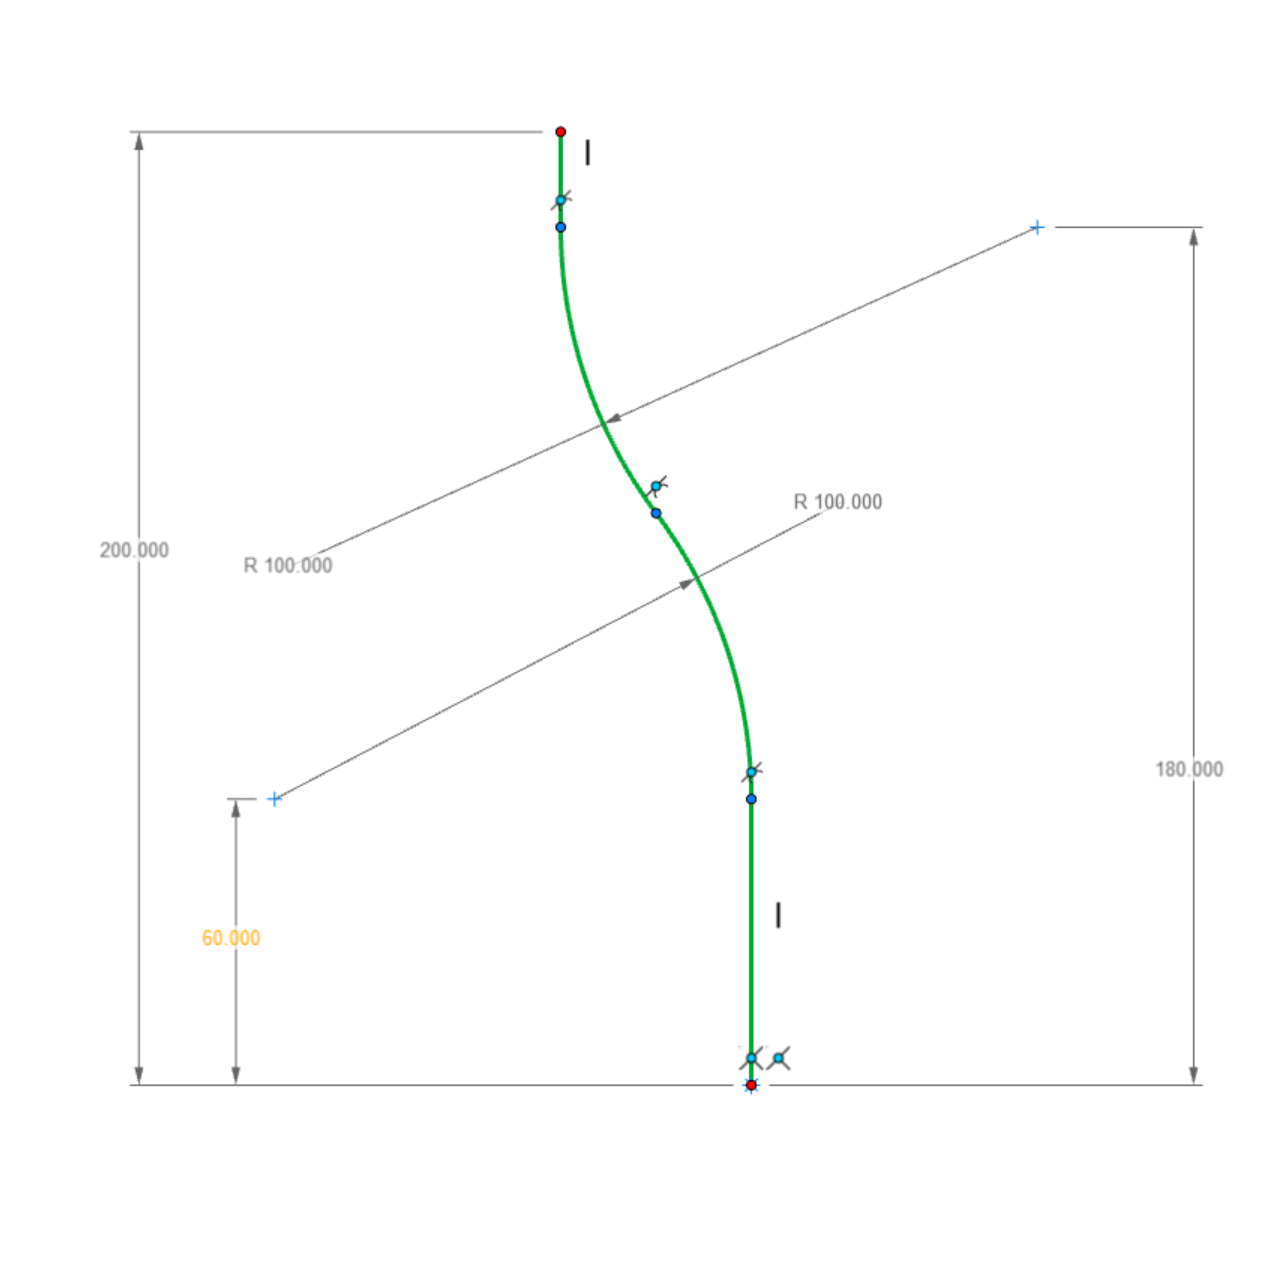
Tip: Apply dimensions from bottom to top. Make sure to add missing tangent constraints for the line-arcs. - If you sketch on the wrong plane, you can easily switch it to a new plane as shown.
- Save the model.
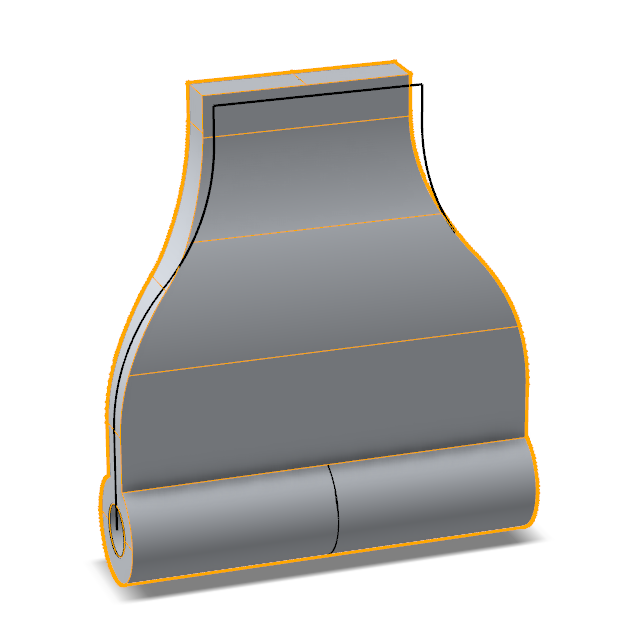
Extrude, Edge Extract, and Trim
-
Open the Extrude tool:
- On the Surfaces tab, click the Extrude icon.
- While holding down Alt, right-click to open the tool belt, and then click the Extrude icon.

- In the modeling window, select Sketch #1.
- A default smart extrusion is applied based on the sketch dimension. Change the extrusion value to 100, turn on Symmetry Distance, and add Caps.
-
Extrude Sketch #2 with the same value of
100 but without caps.
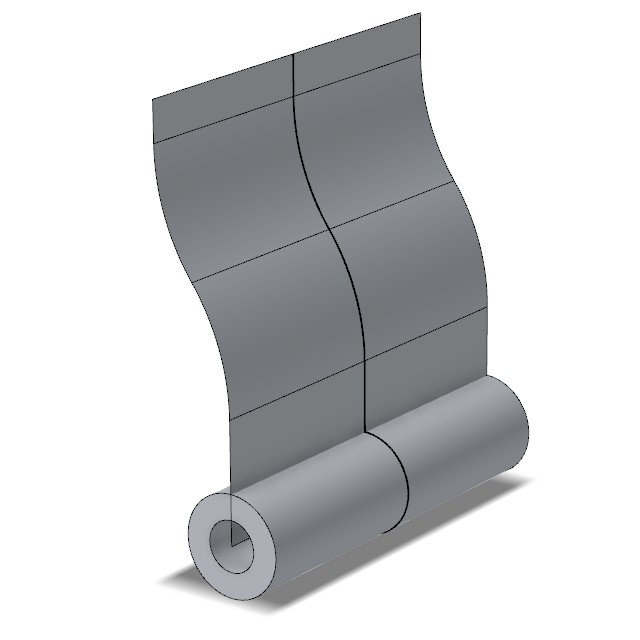
. -
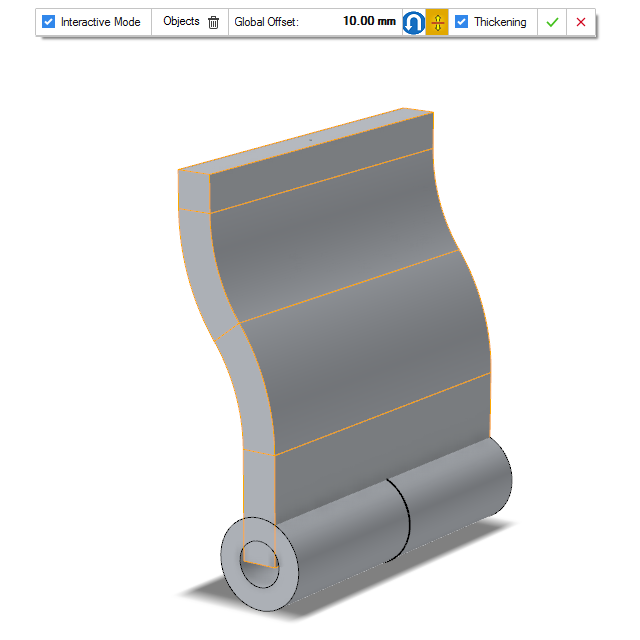
Offset Extrude #2 with a distance of 10
mm, Symmetric Distance, and
Thickening.
-
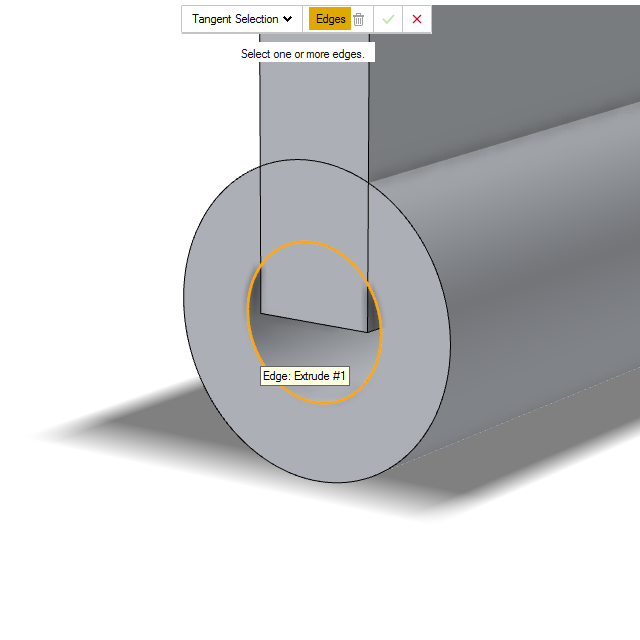
On the Curves tab, click the Edge
Extract icon, and then extract the inner edge of
Extrude #1.
-
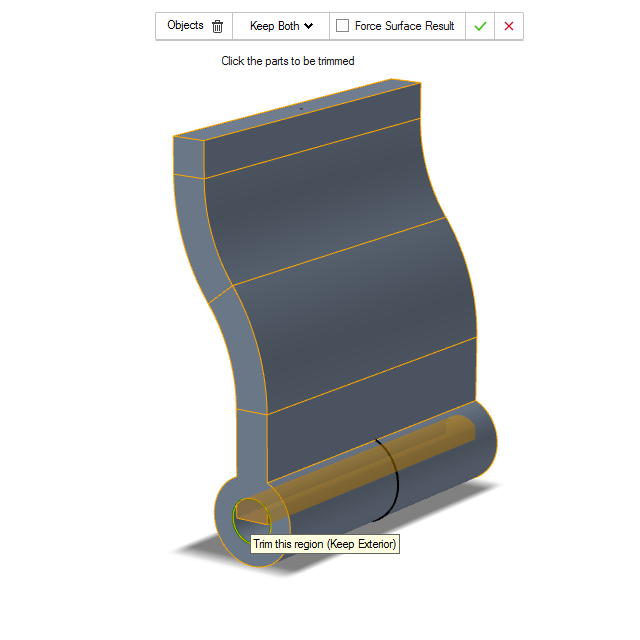
On the Modify tab, click the Trim
icon. Select Extrude #1, Surface Offset
#1 and Edge Extract #1 as inputs. Remove
the region as shown.
- Save the model.
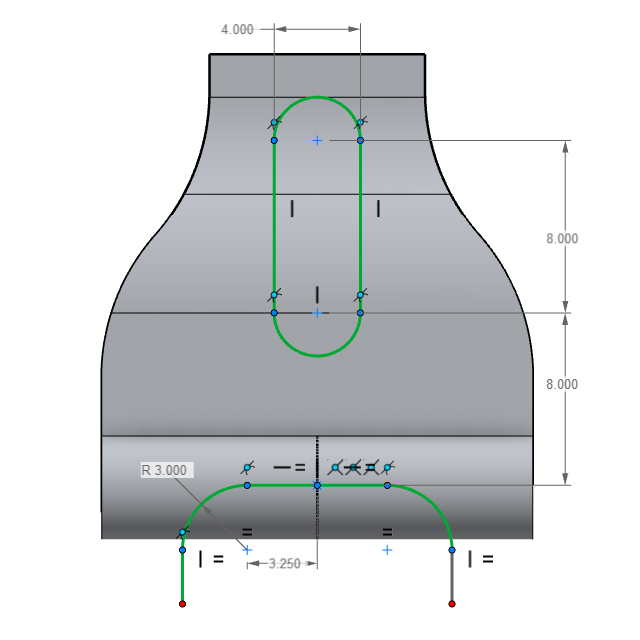
Sketch, Trim, and Round
-
Create a new Sketch #3 in the
Right view as shown.
- Exit the sketch.
- Add a Symmetry to the sketch using the Planar Symmetry tool.
-
Trim the surface with the Symmetry object.
-
Create the final Sketch #4 as shown.
-
Trim the surface with the sketch and remove the interior region.
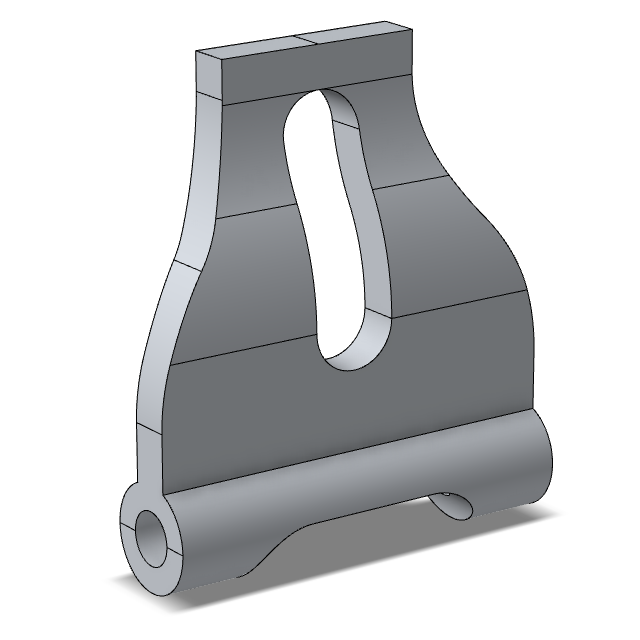
-
Add a Round with a radius of 30
mm.
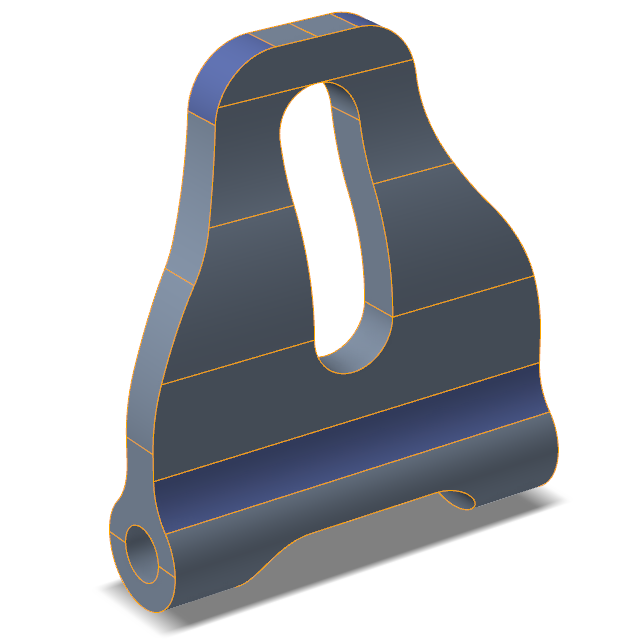
-
Add a second Round with radius of 5
mm, and box select the entire model.
